Popular wisdom says that if something needs to be done well, then you have to do it yourself. Many people do not like the work of some famous pop singers, rock singers, etc.
But instead of criticizing their wheezing, squeals and wild dancing on stage, for example, F. Kirkorov or V. Serduchka, and also not bothering your ears with the cacophonous voice of professionals, it is better to sing into the microphone yourself and at the same time enjoy the charming voice from the speakers of a smart TV or home theater speakers connected to it.
To implement the idea, you only need to correctly connect the microphone. This will be discussed in the material below.
How to realize your plans?
To make this happen, very few steps are required:
- Install a karaoke application on Smart TV;
- Connect a microphone;
- In the installed application, launch your favorite song;
- To please loved ones, friends and most importantly yourself with the vocal abilities that Mother Nature has endowed the singer with.
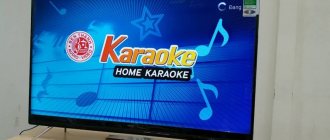
Installing the application
Smart TV software stores have a large selection of karaoke utilities. A well-known and well-proven program is “Karaoke Master”.
Also, a significant selection of songs is stored on the karaoke.ru resource.
Usually, there are no problems at this stage of executing the plan, since the choice of applications for a smart TV is extensive, each user can easily choose the appropriate option.
Difficulties appear during the second step, i.e. when connecting a microphone. Therefore, close attention is paid to this problem below.
Connecting a microphone
An important link in the “singer-TV” chain is the microphone, so the choice should be taken with care. The performance of the entire system depends on this.
To make a successful connection, you must consider the following:
- Be sure to purchase a suitable microphone model for the TV you have at home. If a person decides to ignore this point, then with a high probability the equipment will not work the way the user wants it. Before purchasing, you must provide the seller with accurate information about the brand, model and series number of the TV to which you plan to connect the microphone;
- If you choose the right microphone model, it will not be difficult to connect it to the TV and, after testing its performance, make sure that the task was completed successfully. In Smart TV, after connecting the microphone, the device is automatically recognized and correct functioning is configured;
- Once connected, the correctly selected microphone will immediately function normally and no special configuration of the equipment will be required. All you have to do is open the karaoke application on Smart TV and delight others with your divine-sounding voice.
Third Party Applications
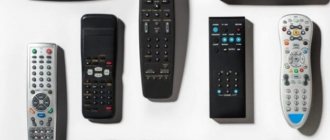
Your devices don't have a microphone jack? Then use the diagram for connecting a laptop with an HDMI cable. If you have a certain type of microphone, you will have to download additional utilities from the World Wide Web. The main difference is the installation.
- To the device if the microphone is directly connected;
- To the TV, if the model supports the option.
How to update the flash player on an LG Smart TV - instructions
Download using one of the following methods. The first one with home Internet. Second, when using a flash drive or a separate memory card. If you download a file from an unverified source, check it for viruses. Such widgets are harmful and lead to breakdowns. Install reliable versions that have been used by someone else.
Connection methods
There are two ways to connect wirelessly, using a cable connection to the TV and a microphone.
Both methods are reliable, but have serious disadvantages and some advantages. For example, in the first case, users are often scared off by the price, and in the second, the cord is constantly dragging behind the performer, who, instead of delighting loved ones with his vocals, constantly trips over the cable.
Wired connection via USB
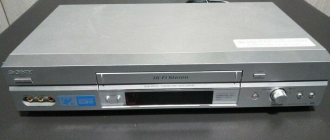
Refers to the simplest method of connecting a microphone to a TV. Most often, this method is preferred by owners of Samsung TVs that have USB ports installed on the rear panel.
Immediately after installing the USB plug into the appropriate port, the smart TV, having detected the device, displays a message on the screen indicating a successful connection, and the microphone immediately functions fully.
For the connection method in question, special adapters are sometimes used.
If the microphone is equipped with a different type of plug, you can connect the USB port of the TV using an adapter.
Wired connection via 3.5 and 6.3 mm connectors
Some TVs are equipped with standard Audio IN jacks.
After connecting the microphone plug to the socket, sometimes you need to press a specially provided key or the toggle switch to turn on the device.
In order to obtain high-quality sound, it is recommended to connect a microphone using an amplifier. Such equipment is equipped with a 3.5 jack or USB connector.
This option with a receiver is often used by LG TV owners, since a microphone cannot be connected directly to them via Mini Jack 3.5.
Of course, not every person has the free funds to purchase additional equipment in the form of an amplifier, however, you can assemble its circuit yourself. It will take a little time and effort with a soldering iron to assemble several of the elements shown in the figure below.
There are many similar circuits for amplifying the sound signal of a microphone on the World Wide Web, so a person with skillful hands can save considerable money in the family budget by assembling the amplifier with his own hands.
Wired connection with Tulip plugs
Until now, popular brands of TVs are equipped with sockets for connecting with a tulip.
If such connectors are not provided on the back panel of the TV, then special adapters “Tulips - Scart” are produced.
After connecting the microphone through the adapter, you should set the toggle switch on the adapter body to the desired operating mode.
Wireless connection
Nobody likes wires getting tangled under their feet, and there are a wide variety of wireless microphones on the market today. You just need to purchase a device that matches the technical characteristics of a specific TV model.
After prolonged use, all wired microphones experience loosening of contacts at the connection points, which leads to unexpected disconnections at the most inopportune moments. Wireless devices are completely free of this problem. Among their disadvantages, only high cost can be noted.
It is not recommended to purchase cheap fakes, since such a wireless device will not last long and will constantly fray the vocalist’s nerves with malfunctions.
The manufacturer of modern smart TVs provides for working with wireless microphones without the use of additional equipment. Therefore, when connecting them, there are almost never problems, which cannot be said about microphones connected via a cable connection.
How to connect a microphone to a Samsung Smart TV for karaoke
Don't know how to connect a karaoke microphone to a Samsung smart TV? This question comes up frequently on various user forms and chats. Every second user encounters similar problems and is looking for advice. The most common situation is that the equipment does not have an input for the wire. Equipment owners shrug their shoulders and don’t know what to do. The instructions below contain several methods to solve the problem.
How to remove ads on Samsung, LG, Sony, Philips and IPTV TVs
Method 1
We take a microphone with a special plug. We increase the sound on it to the desired level. Next, we connect the equipment to the socket on the equipment. We use the DVI AUDIO IN input, which is located on the back of the panel. With the right connection, you can enjoy your favorite hobby.
Method 2
The next method is to look for a connector called “SCART” on the back of the TV. We take the “Tulip” adapter and connect the contacts to each other. Next we will use the control panel. Find the "Search" section and identify the device. We turn on the track and test the system.
If you have any questions or complaints, please let us know
Ask a Question
Method 3
Modern TVs have options for connecting to a DVD receiver. Another option is to activate the device through the player, then directly to the TV.
Method 4
An easy method that almost everyone uses. The user will need equipment with a USB plug. Find the input on the back of the equipment and connect it.
Main connection difficulties and recommendations for eliminating them
Often, independent attempts by a user to connect his existing microphone to a TV can hardly be called successful, but when the device is selected correctly for the TV and all technical characteristics of the equipment fully comply, it is possible to quickly eliminate problems that have arisen.
Problems:
- After connection, the sound is not transmitted to the TV;
- The device refuses to be recognized on TV.
Recommendations:
- Update the karaoke application (in most cases, this simple step can eliminate the difficulties that have arisen);
- Connect via amplifier;
- Connect the cable from the microphone to the DVD player, which is connected to the TV (considering the fact that many users have a DVD player, this method is the most convenient for quickly solving connection problems);
- Check the position of the switches on the microphone body and, if necessary, set to the active position;
- Check the charge level of the wireless device batteries and, if necessary, replace them with new ones;
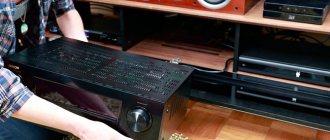
- In the case where there is a home theater at home, using the latter is most advisable. Most of these systems support working with microphones and the user will simply need to connect the plug from the microphone to the corresponding connectors of the receiver;
- A temporary solution to the problem is to use a laptop or desktop PC as an intermediate link, and an HDMI cable can be used to connect the equipment.