4.8 / 5 ( 44 voices)
If you have problems or doubts about the correct operation of the microphone on your headphones, then this article is especially for you. In this material we will look in detail at how to check your headphone microphone:
- on PC with Windows 7, 8 and 10;
- on phones with Android and iOS;
- through special applications;
- using online services.
Let's also consider why the sound is not recorded and what to do about it?
Checking on computers, laptops with Windows 7, 8, 10
There are several ways to test a headset on Windows. The simplest life hack on how to check the microphone on headphones:
- Connect your device to your computer.
- Take a look at the system tray - at the bottom right of the display you will notice a speaker icon.
- Right-click on the icon and select the connected headset from the drop-down list.
- The working microphone from the headphones is marked as the default device, as indicated by a daw in a light green circle.
- On the right side of the name you will see a sensitivity scale.
- How to check the microphone on Windows headphones? Put on your headphones and say a couple of phrases into the microphone.
- If the scale bars begin to vibrate and fill with green, it means the microphone is working.
- You can further adjust the quality and volume of the recorded audio by going to the Properties submenu, going down to Levels, and adjusting the sliders.
How to check the microphone on headphones
Headphones with a microphone are one of the essential accessories for a desktop computer or laptop. They allow you to play online games, chat online, record your voice and much more.
But after purchasing this accessory, users often wonder how to check whether the microphone on the headphones works or not. If you are also interested in this issue, we suggest that you read our article.
The most accessible way to check the microphone on headphones is to check through the microphone settings in the Windows operating system. To do this, right-click on the speaker icon on the taskbar and in the menu that opens, go to the “Recording devices” section. The screenshot below shows how this is done in Windows 10.
After going to “Recording Devices”, the “Sound” window will appear in front of you, open on the “Recording” tab. This window will display all recording devices. In particular, the microphone from the headphones should be displayed here if it is connected to the computer. If there is no microphone, then most likely it is not connected, or the drivers for the sound card are not installed. If the microphone is present in the Sound window, then you can check its operation. To do this, just say something into the microphone and watch the bar on the right side of the window. This bar should start blinking green, indicating the current signal level from the microphone.
If the signal does not appear or it is very weak, then you can try to strengthen it. To do this, select the microphone with the mouse and go to “Properties”.
Here, on the “Levels” tab, you need to increase the microphone volume and its gain. After this, you need to save the settings and check the signal level again.
In addition, you can check the microphone on your headphones using any audio recording program. If you use Windows 7, then you can use the standard Sound Recorder program for this. To launch it, open the “Start” menu and go to “All Programs – Accessories – Sound Recorder”. After the program starts, click on the “Start Recording” button and say something into the microphone. After that, stop the recording, save the recording and listen to it.
If you use Windows 10, you can check the microphone on your headphones using the Voice Recorder program. To launch this program, open the Start menu, search for “Voice Recording” and open the found program. If you don’t find anything, try searching for “Voice record”. After launching the program, click on the record button and say something into the microphone of your headphones. After that, stop the recording and listen to it.
If you have checked the microphone and determined that it is not working, then you can try to solve the problem. Below we will look at the main reasons why a microphone may not work.
- Sound card drivers are not installed.
- The microphone is turned off or plugged into the wrong jack.
- The microphone is disabled in Windows settings.
- The microphone is too quiet.
- The front panel of the system unit is not configured correctly.
You can read more about these problems and ways to solve them in a separate article.
how to turn on the microphone on headphones
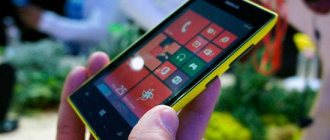
Checking the headphone microphone on smartphones
If you don’t have a computer or beech computer at hand, you can check the headphone microphone using a tablet or phone. The main thing is that the audio ports and audio plugs are compatible.
Let's now consider how to check the headphone microphone on your phone. The procedure here is the simplest, the same for iPhones and Android devices:
- Through the built-in voice recorder . Plug in your headset, go to the app, start recording and speak a few phrases. Save the file, listen, evaluate the quality.
- Via online service . Many people are interested in how to test a headphone microphone online. Refer to the built-in or installed browser (the application must be granted access to the headset used), find the webcammictest service. Click on "Test Microphone".
- Through special programs . If your phone doesn't have a built-in voice recorder or you can't find one, look for audio recording apps in the App Store or Google Play. Microphone speaker is suitable for iPhones, and Mic Test is suitable for Androids. By the way, “Mic Test” is a very advanced software that will allow you to test both built-in and plug-in microphones on both wired and wireless headsets.
Testing audio devices in Windows
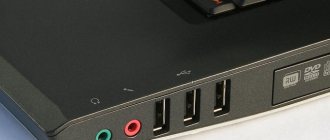
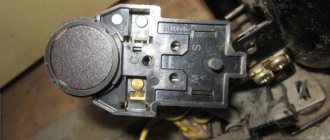
- Connect the devices to the appropriate sockets on your computer. They are usually indicated by corresponding icons. On your laptop or speaker set, the headphone jack will be marked with an icon. Some jacks are color coded: green is usually for the headphone and line-out jacks, and pink is for the microphone.
- Launch your media player. You can select it from the list of programs in the Start menu. Select the audio file you want to play from the media player library. You can also double-click the audio file in Windows Explorer to launch the default media player and automatically play the track. You should hear a sound.
- If the microphone has a power button, turn it on. Open the Start menu and then go to Control Panel | Hardware and Sound | Sound". Select the Recording tab, select your microphone from the list of devices, and click Properties.
- Go to the “Listen” tab and check the “Listen from this device” checkbox. Click "OK" and then position your microphone so that you can speak comfortably. Try talking. You should hear your own voice coming through the headphones. Open the Listen menu again, uncheck Listen to this device, and click OK.
Checking the headphone microphone using special programs
The easiest way to test the functionality of your headset is to use the free Audacity program, a powerful audio editor that will be useful for other purposes. This application is similar to the built-in voice recorder, but in a more advanced version. How to check if the microphone on headphones works using it? Record a short audio file by speaking a few phrases into the headset, and then listen to it to check the sound recording.
The second free and useful program that can also be used for testing is the Skype IP telephony application. You can check the microphone in your headphones online using the following instructions:
- Install Skype on your computer or laptop.
- Refer to "Sound Settings".
- In the Microphone section, select the required device.
- Decide on a comfortable volume.
- ABOUT
- Make a follow-up call to a friend or acquaintance.
- If this is not possible, you can test using the Echo/Sound Test Service, which you will find in the main menu. The service will allow you to make a test call - follow the operator’s commands, and then listen to the recorded file to evaluate the sound.
How to check the microphone on headphones online
In the absence of any specialized software for working with music, you can use special diagnostic services for the recording device online, via the Internet. This can be done using special sites that work with such devices.
To carry out diagnostics of this kind, you must have a good Internet connection. This will allow you to perform this action with minimal loss of time and comfort.
The most popular website for diagnostics is https://ru.webcammictest.com/check-microphone.html. You can access it through any browser. The user will see a large green button on the page.
You need to do the following:
- click on “check online”;
- check the box next to “allow”;
- make sure there are fluctuations in the presented graph.
The presence of jumps in the diagram indicates that the equipment is working properly.
Checking the microphone on headphones using online services
How can I check headphones with a microphone on a computer differently? Another high-quality and free testing is done through numerous online services:
- mictest.ru;
- itguides.ru;
- it-doc.info;
- mictests.com and others.
Right in the browser you can record a file and listen to it. Some services allow you to analyze the sound and display its brief characteristics, monitor the recording volume level and the sensitivity of the headset. But for this to be possible, do not forget to give the browser you are using access to use the microphone.
How to check using Skype?
The Skype program allows you to diagnose and configure the microphone on your headphones. To do this, you need to take the following steps sequentially:
- Launch Skype;
- Enter the “Settings” of the application;
- Find the “Sound Settings” item and click on it;
- remove the checkmarks from the following lines: “Allow automatic microphone setup” and “Automatic speaker setup”;
- Perform the adjustment manually.
During setup, it is necessary to maintain contact and talk with a friend, so the user can adjust the sound to the ideal state.