Today, televisions not only allow you to watch TV channels, but also provide access to other entertainment. For example, now users have access to the Internet, online movie services or even karaoke. In the article we will look at one of the interesting functions - karaoke on Samsung Smart TV.
Some may assume that for such entertainment you will have to buy the appropriate equipment. No, the only exception will be the microphone. There are different methods, some involve connecting hardware, while others involve installing special applications.
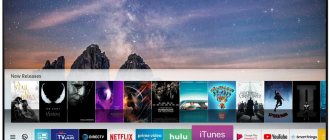
You can use karaoke by installing applications through the standard Smart App store. The program displays the text on the screen, you only need to sing. Also, many utilities include many options in their functionality, for example, the ability to record a song, enable color highlighting of words, or activate sing-along.
Built-in karaoke programs
The category includes:
- DVD player connected to the TV.
- A music center that also connects to the TV, like a DVD.
- The Samsung TV model 6 series is equipped with its own music player.
The main difference between the systems considered is the high-quality combination of the user's voice and music in the same range. The connected equipment does not require the installation of third-party software. You just need to connect the equipment.
First home karaoke
At one time, DVD players with karaoke functions were popular. They were equipped with a microphone, sometimes even two, which made it possible to sing a duet, and played special karaoke discs. But later they were replaced by modern televisions, which made it possible to fully combine all karaoke functions on one device.
The first models of TVs with karaoke were those with a built-in DVD player, equipped with microphones. This karaoke system differed only slightly from the operating principle of DVD players. Instead of two devices, one, more compact one appeared - essentially, a TV with a built-in DVD player. But the sound was immediately reproduced by the TV itself, which became very convenient.
Third Party Applications
If the required microphone jack is missing, then do not rush to get upset. Use your computer by connecting it via an HDMI cable. The second step is to install the application if you do not have the appropriate hardware. At this stage we determine where to install the program. There are two options:
- To a computer or laptop when connecting a microphone.
- To TV with support function.
Error code 2200 on Sony Bravia TV: reasons, how to fix?
There are two options to download and install the software on your TV:
- The first involves using the Internet.
- The second is using a flash drive.
If you downloaded the program via the Internet, then before installing it on your TV, be sure to make sure there is no virus software. Otherwise, the device's firmware may crash or serious errors will occur, which will require reinstalling the software.
If you have any questions or complaints, please let us know
Ask a Question
Connecting a microphone to your TV
Portal about home equipment Which router can you insert a modem into? How to connect a USB modem to the Internet via WiFi
All that is required to organize singing at home is a special program for a specific type of TV or satellite TV, a microphone and a list of favorite tracks. Often, you can also connect acoustic equipment, namely speakers, to the system of Smart TV devices to ensure high-quality sound. Naturally, it is impossible to check the sound quality without a microphone. There are many useful applications on the Internet that allow you to quickly connect a microphone to your TV and set up high-quality vocal playback without the help of specialists. All applications with codecs and drivers are available, but paid. The fact is that such programs have a limited validity, and after that you will have to pay a subscription. Therefore, it is better to use the instructions or our tips for connecting a microphone.
You can connect a microphone to the screen of your TV device using:
- DVD player;
- HDMI cable.
In the latter case, you will need to purchase a microphone that supports this function and see if the equipment will support it.
To make a successful connection, you need to consider the following points:
- Buy a microphone that matches your TV brand. If this is not done, then more than 80% of the equipment will work poorly. Therefore, before purchasing it, you need to provide information to the seller about the TV to which you will need to connect it, indicating the brand number, model and series.
- If you select the right microphone, you can quickly connect it to the TV system. In Smart TV, after a successful connection, the device is automatically recognized and configured for its correct operation.
- Once the correctly selected microphone has been inserted into the TV, it will no longer need to be configured. Therefore, the user can immediately press the launch karaoke application on their screen and sing.
Is it possible without programs?
Karaoke on a Samsung Smart TV does not always require installing programs. If you cannot download the application for some reason, then use another method. Let’s say, use the browser on your TV and search for online karaoke on the Internet. This way you can find any music for a song, because sometimes installed programs do not include all the desired content.
The disadvantage of this option is that the user will have to click on the selected song using the cursor. But doing this on TV is inconvenient.
Connection, practice
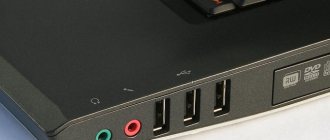
Physically, the connection is quite simple: just insert the microphone plug directly or using an adapter into the corresponding preamplifier connector, and connect the cord from the device to the microphone input on the PC sound card. In most cases, it is pink or blue (if pink is not available) in color. If all the inputs and outputs on your motherboard are the same (this happens), then read the instructions for it.
The assembled structure can also be connected to the front panel, that is, to the input with a microphone icon.
Conclusion
Proper use of a karaoke microphone in a home studio will allow you to achieve good sound quality, since it is designed specifically for voice recording. As is clear from the above, this requires only a simple additional device and, perhaps, care when choosing an adapter.
Nowadays, for karaoke, one laptop with the necessary programs is enough. I don’t connect a microphone in small rooms, since everything can be heard anyway, and I try not to connect it when there is no good stereo system, since the not very good sound of music is also added to the bad distorted sound of the voice from the microphone, to which we can add that some people don't know how to hold a microphone correctly. Windows Media Player is suitable for launching a Karaoke DVD, but I prefer PowerDVD 13 www.cyberlink.com. On the Internet you can find and download images of karaoke DVDs for free. Most often, disk images are found with the extension .iso, less often .nrg; programs are usually used to launch disk images: UltraISO www.ezbsystems.com or Nero ImageDrive www.nero.com. On the website www.musicsystem.ru you can download KarPlayer or Karaoke Player for free, as well as a huge number of karaoke songs for KarPlayer with the .kar extension. Here are the direct links:
KarPlayer program
https://www.musicsystem.ru/music/karaoke/KarPlayer.rar The Readme file describes in detail how to register and obtain a license for free.
Russian compositions by more than 470 performers https://www.musicsystem.ru/music/karaoke/Rus.zip.
Foreign compositions by more than 70 performers https://www.musicsystem.ru/music/karaoke/english.zip.
In these archives you can find the following tracks: White Eagle - How Intoxicating Evenings Are in Russia, Igor Talkov - Summer Rain, Valery Leontiev - Hang Gliding, Inveterate Fraudsters - Love Me, Love, Hands Up - Only Dreaming of You, Elton John - Can You Feel The Love Tonight, Metallica - The Unforgiven, Sting - Fealds Of Gold, Whitney Houston - I Will Always Love You and so on. On the Internet you can find instrumental phonograms of popular songs in MP3 format with a .cdg file. The cdg file is synchronized with the soundtrack - the downside is that this is the coolest option for karaoke, since you sing live to an original high-quality instrumental recording. To run .mp3 and .cdg synchronously, I use the TriKaraoke MP+G Player Free program, which can be downloaded for free from www.tricerasoft.com. Many hit tracks with cdg files can be found on the website rutracker.org. There are still many minuses, most often the name of the track - minus contains the word Instrumental, all these minuses from vk.com can be downloaded using VKMusic. A good selection of songs in DVD collections from Master Karaoke - Master Karaoke. I liked the collections:
Using YouTube, you can sing karaoke from your tablet or even from your smartphone, which is especially cool during a long car trip! Connecting and setting up a microphone to a computer or laptop is not difficult. If the laptop is not connected to additional speakers or a stereo system, then, given my personal experience, in most cases you should not connect a microphone, as the sound will be bad. At home, when friends come over, I connect my laptop via an HDMI cable to my Smart TV, and the microphone to the Home Cinema, the recreation center is already connected to the Smart TV, and the party begins...
What microphone is needed for karaoke on Samsung Smart TV
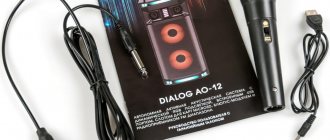
The main component without which karaoke cannot be done is a microphone. The stores have a wide range of different models. How not to make a mistake with your choice? There is the following classification of microphones:
- Wireless device. Features a higher price. The advantage is that it can be used anywhere within the apartment, and the wire will not get tangled underfoot.
- Wired. Refers to budget options. Initially, check the connector on the back of the TV to avoid making a mistake when purchasing. The best option is when purchasing an acoustic device, take a list of the technical characteristics of the TV and show them to the consultant in the store. Based on this information, it will show acceptable models.
How to connect a microphone
Now let's look at how to connect a karaoke microphone to a Samsung Smart TV. There are four ways in which you can make the connection. They are not complicated and do not require much experience. The main thing is to follow the instructions.
How to update software on a Philips Smart TV via USB flash drive, Internet and Wi-Fi
Method 1
The first option involves using a simple microphone connected to a DVD player that has a 3.5 mm Mini Jack plug. The next step is to take care of amplifying the microphone, because the TV does not have a microphone amplifier. To do this you will have to turn to the Internet.
Depending on your microphone model, select an amplification scheme and follow the instructions. When you finish the procedure, connect the micro to the DVI AUDIO IN connector, which is located on the back side. After this, you can launch the program and start singing.
Method 2
It is worth resorting to the second method in a situation where the first did not bring results. There should be a SCART input on the back of the TV. Use an RCA adapter to connect a microphone. Then, using the remote control, go to settings and go to the “Search” section, select the detected device.
Method 3
This method requires additional equipment.
If you have connected a DVD player, connect the speaker device directly to it.
Method 4
A simple solution is to buy a micro with USB and insert it into the corresponding connector on the TV. This input is built into all TVs. There shouldn't be any problems.
Which microphone should you choose?
A microphone is required to use the system. At the moment, there are many interesting devices on the market, with different budgets. Everyone will choose an option based on preferences and price. All microphones are divided into two types: wireless and wired.
The first option is mobile, which allows you to move it around the room wirelessly. Works at different distances within the room. The service life is significantly longer.
The gadget is connected via Bluetooth connection or radio waves. The first option requires maintaining the technology on two devices. Otherwise, you will have to buy a separate receiver and use it using the Audio In input. Next, sync both devices.
The wired model is sold with two cables. They fit a 6.3 or 3.5 mm jack. Most often, a special input called Audio IN is marked on the panel. Drivers for smart devices are installed by default. Therefore, there should be no problems during activation.

