Tools and materials for work
For a comfortable and successful cabinet transformation you will need:
- A small adjustable wrench is used to tighten nuts in hard-to-reach areas.
- Screwdrivers - flat, Phillips.
- Roulette - regular, laser.
- Pliers - useful when working with fasteners and communications.
- Drill - make holes in the back wall for the power cord, intake and drain hoses.
- Screwdriver - tighten and unscrew self-tapping screws while working with the frame, curtain wall (built-in PMM).
- Metallized mesh, special film to protect the pencil case from steam.
Such a set of tools can be found in every home. You may also need special materials and parts:
- To connect to the electrical network: a European socket (preferably moisture-resistant), a socket box, about 2 meters of three-core copper wire, a difavtomat, a stabilizer.
- For water supply: triple wiring for water pipe, insulating winding, set of gaskets.
- For the drainage system: siphon with an additional drain pipe, plastic clamps.
Preparing for embedding
Having chosen the ideal size and location of the box, we will begin preparing the installation.
How to make a niche in a kitchen set
Stages of work:
- Remove the doors by disconnecting the side fasteners.
- Unscrew the fasteners and remove the side walls.
- Remove the base and legs.
- Remove the back wall.
- Take additional measurements of the resulting car niche to make sure that it will fit in height and width.
- Connect the inlet hose to the water supply using a tee.
- Attach a drain hose with an additional siphon outlet under the sink.
- Power up the device to perform a test run.
- After successful startup, adjust the legs so that the tabletop is flush above the surface.
This installation option is suitable for a freestanding model. It does not require securing the side walls.
Partial dismantling of the cabinet
This method is suitable if you want to preserve the appearance of the locker:
- Open the doors wide open.
- Remove all shelves, fasteners and partitions.
- If the dishwasher does not fit in height, disassemble the platform to install the device on the floor. The “traces of a crime” will be perfectly hidden by the front panel (“pseudo-base”) - you can attach it with corners under the door after installation.
- Make holes in the back wall for the fence, drain, and power cord.
- Place the machine in the closet.
- All that remains is to connect the communications and turn on the test cycle.
When installing a built-in model, make sure that the future curtain wall does not interfere with opening or closing the door. Adjust the legs and the height of the base in advance.
How to protect your countertop from steam
The dishwasher operates at high temperatures and steam generation is inevitable. High humidity deforms the material over time. Housewives are interested in what they put between the countertop and the dishwasher. Included with the built-in modifications are special rubberized layers. One is placed between the table and the machine, the second - between the door and the hinged facade. This seal is not only moisture-resistant, but also noise-absorbing. If you purchase a device without additional mats, you can buy a special metallized mesh or film for such purposes. Cover the inside surface of the cabinet with protective material.
Materials and tools
Videos often show the installation process, but they forget to mention the necessary materials and tools.
Some components are already included with the dishwasher.
A mandatory component for installation will be the protection of the countertop from its inside.
When planning to begin installation work, be sure to ensure that you have the following components:
[adv2]
- moisture-resistant euro socket (preferably with a protective cover);
- three-core copper wire;
- difavtomat;
- tee with brass tap;
- fum tape for sealing joints;
- gaskets;
- clamps;
- siphon for 2-3 outputs;
- adjustable wrench;
- pliers;
- screwdrivers of various types;
- level;
- roulette;
- drill;
- drill.
Additional equipment may be needed. Here you need to focus on your specific situation. This is the standard set.
Connecting the PMM to the wiring in the kitchen
When connecting kitchen appliances to the network, remember that it is necessary to provide the room with a grounded socket (Euro plug). The dishwasher will work if plugged into a regular outlet, but will not be covered by the warranty.
Basic electrical connection requirements:
- New socket with grounding.
- Distance from the floor is 25–35 cm. This access point was designed by the developers.
- Automatic (16A).
- Stabilizer - protects household appliances from the effects of voltage surges. Some brands (for example, Bosch), most often models with electronic control, fail due to power surges.
Water connection
To organize the water supply, you will need a tee with a faucet, which should be screwed into the place where the cold water pipe flows to the kitchen faucet, under the sink. Such threesomes are sold in plumbing stores. You can choose the size, material, design you need.
How to secure the water supply hose
Connect the water supply hose together with the Aquastop system (if available) to the tee. If the diameter does not match, use an adapter, which is also easy to find on sale.
Do not connect the device to hot water under any circumstances (unless this is permitted by the manufacturer in the instructions). Unsuitable water temperature can cause damage to the temperature sensor and other components.
Which PMM to choose for the countertop
To make your choice, you need to understand the difference between free-standing models and built-in ones.
Characteristics of solo PMM:
- Harmonious, thoughtful design from all sides.
- Various colors.
- Can be placed in any location suitable in size and distance to access points.
- The control panel is located on the top of the door.
- There is no cooling system or thermal insulation.
Features of built-in modifications:
- The side and top panels are made without decoration.
- The device is intended for installation in a cabinet or kitchen niche; a façade of a harmonious tone is hung on the door.
- The buttons are located on the upper border of the door or at the top of the facade.
- Reliable ventilation system, since the equipment is designed to work in a closed space without natural cooling.
Built-in, solo options can be standard sizes (60 cm width) and narrow (45 cm). There are portable, compact, free-standing machines that are convenient for installation under a sink, sink, or on a table.
In order for the purchase to be successful, you should:
- Compare the dimensions of your future assistant with the installation location.
- Decide on capacity - the number of sets that can be loaded at one time.
- Pay attention to the brand’s reputation and the availability of service centers in your locality.
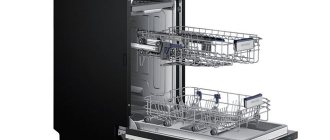
Dimensions
- Built-in.
They are produced in full-size and compact form. The height of the full-size model is 80 cm. Width and depth are 60 cm.
Compact models are produced at the same height (80 cm), with a depth of 60 cm, but with a width of 45 cm. This option is convenient for a small and medium-sized family and a small kitchen. Large selection in the store https://www.premier-techno.ru/
When purchasing such a machine, pay attention to the included instructions. It may indicate important nuances and instructions for installation, including size requirements.
- Regular.
Here you initially need to pay attention to those options that will fit the height of the tabletop from the floor. Usually it is 85 cm (including the thickness of the tabletop itself). The width and depth of floor cabinets can be much narrower than the chosen dishwasher, so you need to go to the store with ready-made measurements of the proposed space for it.
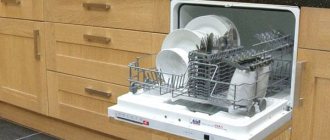
A few photos of what built-in PMMs look like in finished kitchens:
Top 5 best dishwasher manufacturers
The section contains information on which companies you should pay attention to when choosing dishwashing equipment.
Beko
The brand is popular due to its excellent quality, modern innovations, and average price.
Floor-standing full-size Beko DIN 26420:
- Number of programs - 6 pieces.
- Capacity - 14 sets.
- Water consumption - 11 liters.
- Energy consumption - A++.
- Dryer - turbo blower.
The classic design will look stylish both separately and under the countertop. Silent (46 dB), equipped with protection against leaks and children. The height of the internal trays is adjustable - convenient when loading large pots. There is a special compartment for tablets.
Bosch
Famous German brand. It has become synonymous with high quality in the household appliances market. One of the advantages and at the same time disadvantages is the extremely sensitive sensors. They instantly respond to changes in network voltage and water pressure. Therefore, when purchasing equipment of this brand, make sure that there are no periodic power outages or unstable water supply - for the most comfortable operation.
Built-in Bosch SMV44KX00 “Standard” series:
- Modes - 4.
- Capacity - 13 sets.
- Water consumption - 12 l.
- Energy class - A.
- Drying - condensation.
Equipped with functions for loading capsules, tablets, connecting hot and cold water, and a projection beam notifying the end of the cycle. There is also a turbidity sensor and a delay start.
Candy
The Italian brand specializes in high quality new technologies, focusing on simplicity and ease of use.
Narrow, fully built-in Candy CDI 2D10473-07:
- Programs - 7.
- Loading sets - 10.
- Uses water per cycle - 9 liters.
- Energy consumption - A++.
- The dryer is condensing.
Economical model with a cleanliness sensor that determines whether additional rinsing is required. Plus protection against leakage, a sound signal for the end of the cycle, and information output on a digital display.
Electrolux
ESF 2300 DW - this compact partially built-in PMM from the Electrolux brand can also be successfully fitted under a countertop. This model, like other Electrolux options, is characterized by high energy efficiency, stylish design, and pleasant colors.
Other features:
- 6 washing modes + 4 temperature settings.
- Holds 6 sets.
- Uses only 7 liters per cycle. Energy consumption - A.
- Condensation dryer.
- The machine is equipped with detergent indicators, partial leakage protection, and a delayed start of up to 19 hours.
Advantages:
- High-quality washing of the highest class A.
- Durability (there are reviews confirming a 10-year service life).
- Low noise - only 48 dB.
- There is a water purity sensor.
- You can use 3-in-1 products.
Minuses:
- The filtration mesh does not work well, the nozzles become clogged with food debris.
On a note! Experts recommend not loading completely dirty dishes into any dishwasher - it is advisable to clean the plates from food debris with at least napkins or a damp sponge.
- There are leaks (after all, the protection is partial, not complete).
Additional work
If necessary, holes are drilled in the cabinet walls for drain and water supply hoses and a power cord.
Installation of the “facade”
To match the design, interior and color of the kitchen, the front side of the doors of all built-in dishwashers is covered with a pre-ordered panel of the required size. To attach it to the car door, the delivery kit includes special fasteners and a template.
Making a custom front panel is not that difficult, but the interior of the room will look neat
The necessary drawings are drawn on a large sheet of paper and the points for attaching parts to the decorative panel are marked, the sheet is applied to it and, using a sharp awl, the points are transferred to the panel, after which the fasteners and door handle are screwed into the marked places with self-tapping screws. Then the panel is fixed to the car doors and screwed to it with self-tapping screws through the holes around the perimeter of the doors.
Tabletop protection
Before installing a dishwasher under the countertop, you need to pay attention to the following. All dishwashers have a not very good design feature - when the doors are opened, steam and moisture from the machine rise up and fall on the lower surface of the countertop, spoiling it.
Some manufacturers create protection against steam and moisture
If the kit does not provide special protection for the tabletop, you should take care of this yourself. You can use special tape, plastic, metal, etc. for protection.
In Bosch models, a special metal plate is attached under the tabletop before installing the machine; in Electrolux, a film made of a special material is glued.
Adjusting the required height
The final installation consists of adjusting the machine to the tabletop using the front and rear legs and leveling it. Then the necessary gaskets are inserted between the side walls of the cabinet and the machine and the walls are attached to each other. The dismantled lower decorative panel, if necessary, is cut off and put in place.
The rules for installing dishwashers require a gap between the rear wall of the machine and the kitchen wall to be at least 50 mm.
Any owner who wants to save money can install a dishwasher into a finished kitchen; it is not necessary to call highly qualified specialists. You can learn how to carry out the work correctly and avoid annoying mistakes from this article.