A microwave oven, along with a hood and a dishwasher, has long become an indispensable attribute for any kitchen. But what to do when you want to equip the kitchen in accordance with the needs of a modern person, but the area of the room is designed only for the Soviet minimum? Often, users have to choose between a full-fledged work surface and full kitchen technical equipment.
In order not to share the countertop with the microwave, the oven is hung on the wall. How to hang a microwave - we will consider further.
Advantages of placing the stove on the wall
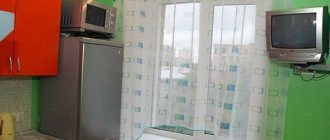
A microwave on the wall is convenient and practical. You place the oven at the optimal height and do not have to lean towards the viewing window during cooking, as is the case when installing it on a worktop.
Other advantages of this microwave oven arrangement:
- Free space on the countertop. This is especially true if you have a small kitchen and every centimeter of work space is precious.
- Safety. As a rule, we hang the microwave at eye level of an adult, which means that you don’t have to worry about leaving your child alone in the kitchen.
- Durability of the oven. A device hung on the wall will last longer, since it will not come into contact with other objects and overheat.
If you install the stove on a shelf suspended from the wall, your storage space will increase.
Choosing a location to install the microwave oven bracket
When using a microwave every day, its location should be as convenient as possible. A few tips to ensure the bracket is installed correctly:
- To avoid injury, installed equipment should not interfere with movement around the kitchen.
- In order not to use additional extension cords, it is necessary to provide an outlet next to the microwave. You should think about this even before finishing the walls. Otherwise, you can lay the wiring in the cable channel.
- The door should not block other objects when opening.
- To avoid excessive contamination, choose a location away from the sink and stove.
- To prevent the microwave from overheating, it is necessary to leave free space at the top - up to 10 cm. This will ensure air access to the heating parts.
- The wall and the fastening itself must be reliable.
- If you want to fill a corner and use the space ergonomically, you can place the microwave in the corner.
- You should not hang the stove too high; the device should be accessible to all adult family members.
Selecting a mounting bracket
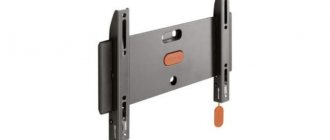
The standard way to mount a microwave on a wall is on metal enameled corners (brackets), where one side serves as a stand for the oven, and on the other there are holes for fasteners (hardware). There are two types of corners - simple and telescopic. The latter moves forward if necessary to increase the area of the stand.
The brackets are:
- white;
- black;
- golden;
- gray.
The microwave brackets are equipped with latches or anti-slip pads to prevent the oven from falling off the shelf.
For your information . Brackets from different manufacturers differ little from each other.
When choosing a bracket, pay attention to the method of fixing the microwave. Of the linings, rubberized material is considered the most reliable. The stove installed on it will stick tightly and will not budge under its own weight, even if it is accidentally touched.
Before you go to the store, measure the depth of your microwave and decide on the mounting hardware.
How to Attach Brackets
The classic bracket looks like the letter “L” and can withstand up to 70 kg of load. Having chosen the appropriate model and durable fasteners, you can get to work.
Installation steps:
- Decide on a location. The MVP should be located away from the gas (electric) stove, refrigerator, sink, TV and closer to a grounded outlet.
- Mark the distance between the fasteners on the wall. Measure slowly, carefully and accurately, with a tape measure and level, so that you don’t have to redo it.
- Drill holes with a drill. This video will help you:
- Special plastic elements are inserted into the holes into which self-tapping screws will fit.
- Now you can attach the L-shaped beams.
- Apply all the bumpers and anti-slip pads.
- Install the oven.
Ready! You installed the microwave yourself. Congratulations on a successful installation!
Related article: Is it necessary to plaster walls before wallpapering?
Necessary tools for installing the microwave on the bracket
To hang this kind of shelf on the wall, you don’t need many special tools. For clay walls, a hammer and a screwdriver are sufficient. Concrete walls require the use of a more powerful tool - an electric drill or a hammer drill.
In the case of frame walls, it all depends on the material from which the supports are installed. You will need a drill and a drill bit for metal or wood.
For marking, you need any writing object; it is most convenient to use a simple pencil - it writes clearly on most surfaces and is easy to wipe off if something happens. A measuring tape and a building level will be useful for correctly marking.
For dowels you will need a hammer.
Operating principle of the bracket
A bracket is a device that holds objects on the wall. It is distinguished from ordinary hinges by its complex, durable design, capable of extension and tilt. True, the simplest brackets can be built without such luxury.
Microwave brackets are often curved angles that are attached to the wall and connected together for added strength. Complex models are panels with fastening strips and other structures.
microwave bracket
The entire structure consists of different types of planks fixed to the wall. The principle of operation is to hold household appliances, in our case a microwave, in a place convenient for the owner.
Selection of materials
Materials used:
- hardware (their choice is determined by the type of walls) - anchor bolts or dowels;
- construction tape for collecting waste;
- corner shelf if you decide to hang the microwave oven in the corner;
- brackets.
The brackets are a structure consisting of two L-shaped holders. On one side of the holder there are holes for attaching to the wall; the other side of some models extends, increasing the usable area for placing the microwave. In some cases, the structure is equipped with additional cross members.
When choosing a bracket, pay attention only to models that are designed specifically for microwave ovens.
Criterias of choice:
- Size. The width of the bottom of the bracket should correspond to the depth of the microwave.
- The maximum weight that the brackets can support. As a rule, this parameter is indicated on the packaging. To correctly calculate the required load, add 5 kg to the weight of the microwave itself (tolerance for dishes and prepared dishes). Choose a bracket with a significant margin of safety.
- Retainers. The brackets must be equipped with rubberized inserts or special clamps so that the large stove does not slip off the holders.
Please note that the color of the bracket matches the microwave and the interior of the kitchen. Standard colors are black, white, gold and metallic.
Advice. If the stove is small, pay attention to telescopic bracket models. Their advantage is that later it will be possible to install a larger microwave. The telescopic stand makes it possible to move the device away from the wall, which is important when cleaning.
Making a microwave stand with your own hands
It’s quite easy to make a microwave stand with your own hands. To do this, you will need a small furniture board and a metal corner 4 cm wide. You should measure the dimensions of the stove: depth, height and length. Next, add 5 cm on each side in length and 10 cm on one side in depth to allow air access to the back wall of the oven.
Then you should cut the corner into two parts, taking into account that the height of the bracket should be slightly less than the height of the microwave. In the middle of each corner you need to cut a 90 degree angle with a grinder. Having bent the profile at an angle of 90 degrees, weld the joints. Next, you need to drill holes in the corners for the stand and for mounting to the wall.
All that remains is to connect the bracket to the stand and then attach it to the wall. Now you can hang up the microwave oven. Anyone can make a bracket with their own hands.
How to mount a microwave on the wall with your own hands
To begin, select a section of the wall to install the microwave oven. The optimal height is at chest level of the shortest person in the household.
Attention! The microwave weighs a lot. To prevent it from falling, make sure the partition is secure.
Make markings on the wall. To do this, measure the width of the microwave, determine the location of the brackets relative to the oven and the distance between them. Select the height at which the stove will be located, attach one of the brackets to the wall at the desired height and put marks for it through the mounting hole. Measure the distance between the brackets, apply a level and mark the attachment points for the second bracket. Place construction tape under the marks to prevent dust from flying around the room.
Further actions:
- Take a drill (or hammer drill) and drill holes according to the marks.
- We drive dowel nails into the holes.
- We attach one of the corners with the fastening holes to the dowels, insert the self-tapping screws and do not tighten them completely or hammer them in (depending on the type of fastener).
- We perform a similar procedure with the second corner.
- We check the horizon, if everything is clear, tighten the fasteners.
- We put plugs on the bolts. To prevent them from falling out from time to time, you can put them on glue.
Before installing the microwave on the bracket, make sure that the unit is disconnected from the power supply.
To install the brackets efficiently, take into account some tips from professionals:
- Before drilling holes, make sure the wall is strong enough.
- Use a building level: it’s better to check once again than to look at the curvature for many years after completing the repair.
- Use a quality tool. A defective level or tape measure with erased divisions will cause you problems.
- Choose durable, certified materials. This applies to the corner itself and the fasteners.
The most important thing is when choosing a place for the stove, do not forget about the safety of your household.
This is interesting:
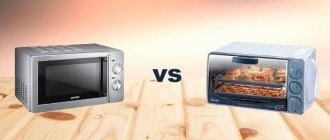
The main differences between an inverter microwave oven and a microwave oven.
Microwave with convection - what is this mode and why is it needed.
Can a microwave oven be placed on a washing machine or dishwasher?
If the wall and drywall
If the partition on which you plan to install the brackets is made of plasterboard, installation is somewhat more complicated, but quite possible.
There are two ways to attach a microwave to a gypsum board wall:
- Installation of microwaves on brackets using extended anchor bolts. The method is relevant if behind the plasterboard sheathing there is a stronger main wall made of concrete or brick.
- Using spacers.
In the first case, thanks to such fasteners, the main load will be borne by the base walls. The diameter of the bolts should not exceed 12 mm, and their length should be 5 cm greater than the distance from the base wall to the gypsum board.
How to hang a microwave:
- We make markings on the wall, noting the places where the brackets are attached.
- According to the marks, we make a through hole in the drywall and deepen the drill into the base wall a few centimeters (the depth of the hole is 5 mm greater than the length of the anchors). For this purpose it is better to use a hammer drill. At this stage, accuracy is important: the hole should not be wide, otherwise the fastener will dangle.
- We clean the hole from plasterboard chips and construction dust.
- We insert the anchors into the holes flush with the plasterboard layer. We clamp it with the key.
- We put a washer, a fastening loop (in our case, a bracket) and another washer onto the bolt thread.
- Tighten the nut.
The good thing about this method is that it ensures that the microwave is firmly attached to the plasterboard wall. In addition, the brackets are easy to dismantle - just unscrew the nut.
The second case (with spacers) is complicated by the fact that even at the stage of assembling the plasterboard wall, it is necessary to provide for hanging heavy objects on it. The supports or cross member of the frame are installed so that the wall has increased strength in the required location. To avoid losing the desired point after finishing, make a mark. This method is applicable if the microwave needs to be hung on a plasterboard partition, behind which there is no base base.
Attention! Do not use regular plastic butterfly anchors to attach microwave brackets to drywall. Their strength is not enough for such a load.
But what to do if in front of you is an interior partition made of plasterboard, fully assembled and decorated, without marks? Finding the frame is easy using a magnet. Consider the thickness of the drywall and finishing layer, choose a more powerful magnet.
How the microwave is attached to the bracket
A few tips to securely attach the microwave to the corners:
- The correct bracket is selected, taking into account the weight and size of the equipment.
- The fastener must correspond to the load, and its type is determined by the material of the surface on which the microwave is hung.
- The bracket is installed strictly according to the building level. If the surface has even the slightest slope, during operation the device will gradually slide off the bracket.
According to reviews, the stove slides off the flat horizontal elements of the bracket. This problem can be solved by securing the microwave to the stand with double-sided tape. You can also purchase a bracket with holes through which you can screw self-tapping screws into the soft rubber feet of the microwave.
The choice of fastenings depending on the wall material
The reliability of fastening depends to some extent on the installation technology. And in this case it is necessary to take into account the material of the load-bearing wall. There is no universal solution, but the question of how to mount a microwave on the wall with your own hands remains. Walls are built from a variety of materials, and there are several microwave mounting options to consider.
Option 1
If attachments are attached to walls made of fragile materials, such as frame partitions, walls made of gypsum plasterboard, or porous material, embedded elements should be provided at the construction stage. Mortgages are gratings or slats made of wooden beams or metal profiles. Self-tapping screws are used as fasteners, and the hinged structure is attached specifically to the mortgages.
When fastening lightweight structures, the brackets are fastened without mortgages using a butterfly dowel, which opens when the hardware is screwed into it.
Option 2
Concrete and brick are very durable materials and can withstand significant weight with conventional fasteners. A problem may arise if the diameter of the drill does not exactly match the diameter of the dowel plug or the diameter of the anchor. The part of the dowel called the plug can be made of nylon or plastic. Nylon ones are more reliable, but their shape also matters. The more prominent they are and the more notches on them, the better. The screw screwed into the dowel must exactly match the diameter and pitch of the thread in the dowel hole.
Option 3
When attaching to a wall consisting of cellular concrete, use dowels designed for working with aerated concrete and foam concrete. They have a more complex shape than brick or concrete. The most popular are spiral dowels. They are screwed into pre-drilled holes. Next, mounting screws are installed into these dowels. Objects that are fixed to the wall must create loads, a force vector that will be strictly perpendicular to the fastener.
Option 4
Hollow ceramic blocks are widely used in construction. In such walls, ordinary fasteners do not hold at all. For such material, a special type of fastener is used - a chemical anchor.
The installation procedure is as follows:
- a hole is drilled in the block;
- a chemical anchor sleeve is installed;
- a dowel is inserted into the sleeve;
- using a gun, glue is injected through the dowel;
- A mounting screw is screwed into the dowel hole.
How to choose a bracket for a microwave oven - mounting options
Despite the variety of mounts for microwave ovens, there is a set of indicators that you need to know when choosing a bracket:
- Load capacity.
- Possibility of adjusting the distance between metal corners.
- Reliability of fastening.
- Company manufacturer.
And the main thing is what dimensions of the microwave oven the bracket is designed for. After all, even if almost all models of microwave ovens have similar dimensions, their depth may well vary. And the length is not so important, since it is easy to adjust, increasing the gap between the corners of the structure. Therefore, adjusting the depth (or width) is quite difficult.
Read about how to install the bracket here: https://remontspravka.com/kak-ustanovit-kronshteyn-dlya-mikrovo/
About the shelf for a microwave oven - in a review article on our website
Read about what needs to be installed on the brackets in the article “Microwave oven with oven”
In addition, you should not forget that for a microwave oven to work well and for a long time, there must be a certain distance between it and the wall. Therefore, before buying a bracket for a microwave oven, add about 15-20 cm to its depth. Detailed information can be found in the passport for the household electrical appliance or simply by measuring the dimensions with a ruler.
Every item has mass, and a microwave oven is no exception. When purchasing a bracket, do not forget about the weight of your microwave. Compare it with the maximum load of the bracket.
Wall brackets
There is a nuance here - the technical specifications from the passport about the weight of the microwave oven do not take into account the food that you will place inside this device. If you are just heating a bowl of soup, then add 1 kg to the weight of the microwave oven. And if you are cooking goose or chicken, the load on the bracket will increase significantly. Therefore, it is better to choose the fastening strength with some margin, since it is not known what you want to cook.
And one last thing. Of course, you can buy a bracket for a microwave oven of an unknown brand, saving money, or give preference to a mount made by hand. Don't take risks!
When a microwave oven falls with a roar from a height of one and a half meters, it can no longer be repaired.