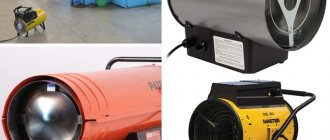
1.Bubble building level
This is the most common type of building levels. It is a very simple but quite functional device .
Design
This is a rectangular frame, most often made of aluminum and hollow inside, with a transparent bulb in the middle. It is the measuring flask , sometimes called the “eye”, that is the most critical part of the level. The flask is filled with liquid, most often industrial alcohol , since it has a lower density compared to water, and the air bubble, due to this, more sensitively to deviations and moves faster inside the flask.
fluorescent are also added to it to make work easier in the dark. Lines are drawn on the flask perpendicular to the body of the level, which serve as permissible limits of deviation. That is, looking at the flask you will see two thin lines, an air bubble and again two thin lines. If the bubble is clearly in the middle between the lines, then the surface is perfectly flat.
An important point is that the larger the bubble itself and the less space left from it to the lines on both sides, the more accurate the device will be and the smaller its error. By the way, there are levels that can be customized. The bulb at these levels is attached with fasteners, which makes it possible to adjust at any time. The most common type of bubble level is a level with two flasks. One serves to control the deviation from the vertical (90 degrees), the other - from the horizontal (180 degrees). They are located perpendicular to each other on different planes. If you see three cones, then the last one serves to measure 45 degrees from the horizontal plane or is rotary, to measure any angle of the surface. There are also levels with a large number of flasks that duplicate horizontal and vertical flasks; such levels are used for very important work, since they have a higher measurement accuracy. Modern levels are additionally equipped with various useful functions :
- Stiffening ribs are a very important element, the presence of which will make the level body more durable and protect against deflections, which is especially important when using long levels.
- The markings made on one of the surfaces of the level can be used as a ruler, which makes it possible to refuse additional tools and free your hands.
- The milled surface, often located on the opposite side of the measuring flask, prevents the level from sliding off the work surface and eases the effort required to hold the level with one hand.
- The impact pad is necessary for adjusting the controlled surface by applying moderate blows with a hammer.
- The pipe groove is a very convenient additional feature when installing sewer pipes, which prevents slipping from radius surfaces.
- Magnetic side - there is a magnet at one end of the level, which allows you to attach it to metal surfaces and carry out installation hands-free.
The length of bubble levels starts from 20 cm and reaches 3-4 m , which makes them universal for any application. For example, for simple repair work with your own hands, a level 30-40 cm long will be enough; for laying tiles, you should choose a slightly longer length - 40 cm-1 m. And if you are planning to make a screed, or do wall finishing, then a level with a length of from 2 meters.
Benefits of the bubble level
- Quite high strength , especially with stiffeners
- Very easy to operate, no special skills required to use it
- Suitable for both home use and more precise work
- Availability of various sizes , which makes it possible to choose the tool that is most convenient for you and most suitable for a specific task
- Affordable price
Flaws
- If you purchase a low-quality level of questionable production, it will go wrong
- Bubble levels are afraid of falls and bumps
- If you choose a bubble level with the ability to adjust, then remember that they get lost more often, and to adjust them you will need a flat surface, which is not always at hand.
Tools
0 votes
+
Vote for!
—
Vote against!
The bubble level is an indispensable tool for performing various types of construction and repair work. This device helps to create straight lines in any plane, check the required slope or angles. The ancestors of building levels are plumb lines and spirit levels, the functions of which they essentially perform. Levels are indispensable when laying pipes and various surfaces that require an angle of inclination. They are used during the installation of equipment that vibrates during operation and is demanding on the evenness of the installation surface. The installation of sewer pipes or steps is also not complete without this tool. Building levels are in the arsenal of any master and are a necessary thing in the household, therefore it is important to know how to choose the right building level.
Table of contents:
- Bubble level design
- What to look for when buying a bubble level
- How to set up a bubble level
- How to use a bubble level
Bubble level design
The building bubble level is a fairly simple but functional design. It is based on a bar made of solid material, into which a certain amount of air ampoules is mounted. Measuring marks are applied to the ampoule, which determine the position of the air inside it. It is this indicator that is the key to the level’s operation. When the bubble is located exactly in the middle, this means that the surface is perfectly flat. To check inclined surfaces, use the air deflection indicator relative to the center of the ampoule.
The main and most important part of the level is an ampoule with liquid in which air floats. If the integrity of this part is compromised, the entire device is considered unusable. The filling of the ampoule is most often industrial alcohol. For ease of use, manufacturers modify the level; some models are equipped with a lens that allows the worker to better see the bubble. To work in the dark, fluorescent additives are added to the liquid, which help to use the device with their glow without additional lighting. In such improved models, the ampoule with all the additives is called an eye.
Shockproof models have become quite popular. While working on a construction site or when transporting the device, unpleasant incidents often occur - falls, shakes, mechanical damage that damage the level. Long modifications are especially prone to breakage, since their size increases the likelihood of falling and makes the impact force greater than that of models with a short frame. At this level, the construction price is slightly higher than for conventional models. However, buying a shockproof device is still more profitable than regularly replacing damaged ones with new ones.
The foundation is no less important in the entire structure. It consists of wooden, plastic or aluminum strips. Wooden planks are made solid, aluminum or plastic are made hollow. The most common levels are those with an aluminum base. When choosing a device, pay attention to its weight, since the heavier the device, the better its readings. Practitioners distinguish among all modifications the cross-shaped design with rubber handles. They call these levels the most convenient and accurate. To work with metal surfaces, it is recommended to use devices equipped with magnets. Another optional but convenient addition is a ruler on the long side of the level. This modification will help out when carrying out measuring work and will eliminate the need to carry a ruler or tape measure.
The simplest and most primitive level model has only one measuring ampoule. But such modifications are quite difficult to find in a modern store. Manufacturers offer a wider range of levels with two or three ampoules. One of the containers is located on the long wide side and is designed to work in a horizontal plane. The second container is located on the narrow short side of the device, perpendicular to the first. It is designed to work in a vertical plane. If there is another container on the bar, then it is also located on the narrow part, but on the reverse side. It is attached at an angle of 45°, and the purpose of this ampoule is to control the operation of the device.
Manufacturers offer bubble levels not only in different modifications, but also in different lengths. The shortest standard model has a long part of 20 cm, the longest – 3-4 m. This indicator determines the functional purpose of the level. To install various household appliances and perform simple repair tasks in a private house or apartment, it is enough to use small levels. When laying tiles or working with various finishing materials of this type, the optimal length is from 40 cm to 1 m. Long construction levels are professional, used when carrying out large construction and repair work. Experts note that the longer the level, the more accurate its readings.
What to look for when buying a bubble level
Building levels are one of the most popular products among manufacturers of cheap and low-quality products. Since this product is used not only by professional builders who know exactly what they need, but also by ordinary people. The manufacturing technology of a building level is not so complicated, but it requires precision and the use of high-quality materials for the device to work properly. Unfortunately, manufacturers of fakes and low-quality goods take advantage of the ignorance of people unqualified in construction matters and offer low-quality products, the readings of which are not accurate. Trademarks that have already proven themselves as responsible manufacturers of building levels:
- Kapro
- Stabila
- Ermak
- Bosch
- Gross Laser
- Shark (Israel)
- Leader
- JYC
But, even focusing on these names, it is not always possible to buy a high-quality and durable building level. You need to know some of the nuances of choosing this device, and also be able to determine the necessary model, so as not to overpay extra money for a professional level if it is only needed for small household work.
- To begin with, determine the required length of the tool. To do this, determine the goals and objectives that are set for him. To carry out finishing work and leveling surfaces, you will need a long device. For small decorative works - installation of hanging furniture, shelves, switches, paintings, a small or medium-sized level will suffice. The most optimal option for use in domestic conditions is a level 50-60 cm long.
- During selection, carefully inspect all glass elements of the device. We are talking about air containers that perform the main function. First of all, they must be intact and have no traces of mechanical impact. Next, the strength of their fastening is checked; these parts are fixed tightly and should not wobble or unscrew. There are models with the ability to adjust the containers; the presence of this function is a very controversial point. On the one hand, the adjustment allows you to adjust the failed level, on the other hand, it makes the device more vulnerable to shocks and mechanical stress. Professional builders recommend purchasing levels with rigid fixation of all containers.
- After inspecting the fixation of the flask, pay attention to the air itself in it and the strips applied to the surface. All these elements should be clearly visible and located close to each other. The best option is to place the control strips inside the vial, and not on its outer surface. Since with active use these marks will quickly be erased.
- The next important factor is the material of the base of the level. Whether it is made of wood, plastic or metal, it should be heavy and durable. Models with stiffening ribs located inside are optimal. In general, the design and external construction of the levels varies from manufacturer to manufacturer, but this aspect does not affect the accuracy of the device itself.
- After an external inspection of the level, it must be checked. Specialized stores should always have a stand for testing the device, which has a perfectly flat surface. But even if there is no such stand, it is not difficult to check the level in any other place. To do this, place it in a horizontal plane and mark the position of the air bubble. Even if it deviates from the center, it’s not scary, since that’s not the point of this test. Then the level is raised, turned 180° and placed exactly in the same place. In this case, the position of the bubble should be at the same mark. If so, then the device is working properly.
- The accuracy of reading a flat plane is impossible without the presence of a verified surface. But in this situation, it is enough to save the receipt for the goods and then check the level readings using other instruments. For example, for this they use a level or a laser level, or a bubble level, which has already proven its performance. These checks must be carried out even with branded and expensive items, since during transportation the technical characteristics and readings of the device are often violated.
How to set up a bubble level
Adjusting the bubble level is only possible if you have a model with unfixed containers. The process of setting the level is quite simple:
- The straightest wall in the room is determined; this section should be at eye level, with the corner located on the left side.
- Stepping back about 4 cm from the corner, drive a nail or tighten a self-tapping screw. Do this not completely, but so that 2-3 cm remains on the surface.
- The device is placed on one side of the nail and leaned against the wall, and then adjusted so that the air in the container shows a flat surface. A line is drawn along the edge of the level on the wall.
- Turn the device over and repeat the procedure.
The correct setting is checked by the drawn lines; if they do not go beyond each other, then the device is functioning properly and its readings are accurate. If the drawn marks diverge, then you must proceed as follows:
- On the right side, where the marks end, mark the central point between them.
- The device is placed again on the nail, and the other end is applied to the marked point.
- For convenience, screw another screw into the mark or simply hold the level with your hand.
- In a fixed position, adjust the container with liquid to the required position.
The container is adjusted in the same way for working in a vertical plane, only the level is pressed against the nail with the long side.
How to use a bubble level
When working with a building level, it is important to remember that this device has a working surface, with which it is applied to the control area. This area features a raw edge or magnetic insert. In some models there is no distinction between the working surface and other edges. If you touch the device with the other side during use, it will not harm it, but the measurement accuracy will decrease. The level is never placed sideways; all measurements made in this way are incorrect, since, in fact, a non-existent surface is being measured.
To work in a horizontal plane, focus on the container on the long side of the level. The device is applied to the surface and a line is marked where the air is exactly in the center of the ampoule. If there is a deviation to the left, then lower the left edge of the frame slightly or raise the right one. The same applies to deviations to the right.
To work in a vertical plane, focus on the container in the narrow edge of the device. For example, if it is necessary to check the quality of the wall finish, then the device is applied to it with the container facing up. If the air is moving away from the wall, there is a convex bump underneath. If the air moves towards the wall, then it is necessary to add a little volume below the level.
2.Pipe level
This type of level has a very narrow scope of application ; it is used for laying gas, water, sewer pipes or round profiles and beams.
Design
A pipe level is a type of bubble level. It is equipped with several flasks with liquid, in each of which an air bubble floats, which also determines the deviation from the required direction. A distinctive feature of the pipe level is the V-shaped shape of the body and the presence of magnets. Also, pipe levels can have a detachable, replaceable clamp to fit the pipe diameter.
Advantages of a pipe level
- Thanks to its special design, it can be easily mounted on a round surface without fear of slipping at the most inopportune moment.
- Thanks to the presence of magnets, the pipe level can be easily installed on a metal pipe or support
- For ease of storage, they can be folded by connecting sections
- Light weight
Flaws
- Small size (up to 40 cm)
- Narrow scope
- Higher price compared to bubble
- Shows the slope of one specific pipe, and is not suitable for assessing the overall slope
Bubble levels 100-120 cm
Levels 100-120 cm long allow you to set vertical and horizontal planes of greater length (support posts, beams, door frames, window frames, heating and sewage pipes). These are already professional models that are used for construction purposes.
| KAPRO OPTI-VISION CONDOR 905-40 120 CM | KAPRO PLUMBSITE GENESIS 100 cm | |||||||
| Length, mm | 1200 | 1000 | ||||||
| Weight, kg | 1,27 | 0,8 | ||||||
| Number of eyes, pcs | 2 | 2 | ||||||
| Number of handles, pcs | 2 | |||||||
| Presence of a magnet | ||||||||
KAPRO OPTI-VISION CONDOR 905-40 120 CM
A level 120 cm long with two eyes and an additional window to see vertical readings looking at the edge of the instrument. Equipped with two handles with rubber inserts, making it easier to hold the tool weighing 1.3 kg.
+ Pros of PLUMBSITE OPTI-VISION CONDOR 120 cm KAPRO
- The red edging around the ampoules provides a clear background and makes the air bubble easily visible.
- You can hold the level with one or two hands - for this purpose, the 120 cm model has two slots with rubber edging.
- The shape of the bulb is specially designed so that the readings can be seen at an angle of 45 degrees.
- Rubberized ends ensure the integrity of the case when dropped and soften vibration from impact for the flasks.
- High accuracy of readings.
- Hanging holes at both ends.
— Cons of PLUMBSITE OPTI-VISION CONDOR 120 cm KAPRO
- Only two eyes for checking vertical and horizontal position.
- It does not have a magnetic stripe to hold it on the metal.
- The soiled white body quickly becomes stained with glue, sealant and mortar.
- The photo in most online stores is not accurate (the photo shows a shorter copy).
Conclusion. This is the best bubble level for a master installing entrance and interior doors or installing windows. High accuracy will ensure smooth installation of the structure. An additional viewing window in the housing will allow you to level the vertical even in an inconvenient location.
KAPRO PLUMBSITE GENESIS 100 cm
The product from an Israeli brand is 100 cm long. It has a magnetic strip and a prism to control the position of the air bubble at the end of the case.
+ Pros of PLUMBSITE GENESIS 100 cm KAPRO 781-40-100РМ
- Resistant to bending and torsion.
- Powerful magnets securely hold the level on the structure - it will not fall off or break.
- The flask with a vertical indicator can be viewed from different parts of the body - for this purpose, an additional window is allocated on the edge.
- The hand hole with a rubberized surface is convenient for working without protective gloves.
- Large rubber rings at the ends are designed to hang the tool for storage and at the same time absorb shock.
- The bubble fits exactly in size between the two marks - the slightest deviation is visible.
— Cons of PLUMBSITE GENESIS 100 cm KAPRO 781-40-100РМ
- Metal shavings constantly stick to the magnets.
- Only two eyes.
- High price.
- There is no scale to measure length.
Conclusion. The model is optimal for installing gates, fences and other metal structures. The level is equipped with a magnetic strip, which ensures fixation on the product and frees the hands of the master. It is easy to attach it to a stand and start concreting it.
3.Hydraulic level
This type of building level is used to apply precise horizontal markings on objects distant from each other. It is advisable to use it when it comes to installing a ceiling, marking the level of the future floor, installing a foundation or any other construction installation in one plane.
Design
The hydraulic level consists of two vessels, with a scale in centimeters printed on them, connected to each other by a transparent, flexible tube. Please note that for ease of use, it is better to choose levels with rectangular so that they fit tightly to the surface. It is better to choose a tube with a larger diameter so that the liquid fills it faster and flows through it faster. The optimal diameter is 6-8 mm .
Before work, the level must be filled with water so that it occupies approximately 2/3 of the volume of the vessels. air bubbles should be avoided . Do not bend the tube - water should flow through it freely. After filling the system with water, align the flasks with each other, the liquid level in them should be the same, this means that the level is ready for use. The length of hydraulic levels can be from 5 to 25 m.
Advantages of the hydraulic level
- Low price
- Does not require special skills to operate
- Covers large areas
- Not afraid of falls and bumps
- No calibration required
Flaws
- Two people are required to use this type of level.
- Not a very convenient method of filling with liquid, in which it is not always possible to avoid the appearance of bubbles, which means that there may be several attempts
- Work only in the horizontal plane
- Possibility of use only at positive temperatures
How to make a choice
Bubble level
The best option is a bubble level. The tool is durable, does not require special care and maintenance, and can work in a variety of conditions.
This universal solution is suitable for both home and novice craftsmen. The device will help you paste wallpaper, level walls and floors, install kitchen units or appliances, lay tiles, and change a sewer pipe with the required slope.
For personal needs, you will need a medium-sized bar of 50-100 centimeters. For regular measurements with fixation of indicators, you can purchase a similar device with an electronic sensor and screen. It is better to check the accuracy of small jobs with pocket levels.
When finishing work and interior design, it is safer to use a hydraulic level. The device helps control the pouring of floors, screeds, ceiling structures, and leveling of plasterboard floors.
The purchase of a laser level is justified in case of a large volume of repair and finishing work. You need to select a tool for specific goals and objectives, do not buy a professional device for housework, and also trust the simplest models of bubble levels.
4.Electronic level
This type of level is considered professional and allows you to perform work with increased precision.
Design
The electronic level looks the same as a regular bubble level and has several eyes for assessing deviations from the vertical or horizontal plane. The difference lies in the presence of a protractor and a digital display , which displays the deviation value. It can be displayed in degrees, percentage or millimeters, your choice. The electronic level has the ability to record measured slopes, and can also signal with sound when reaching 0º or 90º.
Advantages of an electronic level
- High accuracy
- Ease of use
- Possibility of storing measured slopes
- Presence of a sound signal
Flaws
- The need for periodic calibration
- Just like the bubble one, it requires careful treatment
- Higher cost compared to previous types
Laser level (level)
Belongs to the group of professional measuring instruments. The principle of operation is to build horizontal, vertical or inclined planes at a distance of several tens of meters from the location. This is an indispensable device when applying markings, leveling walls or ceilings, installing suspended ceilings or plasterboard ceilings, when constructing walls or interior partitions, or when tiling with ceramic tiles.
There are three main types of laser levels - point, linear, rotary . From the name it is clear that they are used to construct points, lines or planes. Some laser levels have the ability to self-level within 2÷4º.
Design
An LED is installed inside the housing , which produces the luminous flux for the laser. At the linear level, light passes through perpendicular prisms and at the output two mutually perpendicular straight lines are formed. In the rotational level, light is focused to a point at the moment it passes through the lens, and a straight line is formed by rotating the light source around its axis. Self-leveling levels are equipped with a pendulum with a copper tip-weight, which freezes in a magnetic field induced by eddy currents, thereby allowing the level to level. A regular laser level has a small built-in bubble level that must be leveled before use. Everything is quite simple, but the possibilities of using a laser level are really very extensive.
Advantages of a laser level
- Easy to use
- Significant savings in time spent on marking and other preparatory work
- High accuracy
- Easy to store and transport
- Ability to cover large areas
Flaws
- The main disadvantage of laser levels is their cost , but believe me, the costs will be fully justified when you appreciate all the advantages and possibilities of working with this device.
- Laser levels are not always sold complete with a tripod and a storage case, which incurs additional costs for their purchase.
6.Measurement accuracy
The most important thing you need to know when performing any work is the amount of error that building levels can produce.
- The bubble level has a measurement accuracy of 0.5-1 mm/m, the longer the level, the smaller the error
- The error of the pipe level depends on its length; the shorter it is, the greater the deviation
- Hydraulic levels from 5 to 25 meters long have an error of 2-3 mm
- The electrical level has a fairly high accuracy, the error is up to 0.1º
- Laser levels are very accurate, their error is only 0.1-1 mm/m depending on the class of the device
Which manufacturers should you prefer?
You can save on anything, but don't try to save on the cost of a building grade. It doesn’t matter what type of levels you give your preference and for what purposes you will use it - it must provide the declared accuracy . This can be achieved by purchasing products only from trusted manufacturers . According to reviews from experienced users and surveys of people who professionally engage in interior decoration and installation, the following manufacturers can be distinguished:
- Stabila (Germany)
Specializes in the production of laser levels, spirit levels and levels, known all over the world. The products of this brand are supplied to all industrial countries. All measuring instruments of this brand have reliable build quality, high quality materials used and high measurement accuracy. That is why Stabila has high popularity and a high reputation.
- Kapro (Israel)
One of the leading level manufacturers in the world. Kapro levels are valued for their high strength, they are the only levels whose measurement accuracy is confirmed by a certificate from the German VPA laboratory.
- Bosch (Germany)
Specializes mainly in the production of laser levels. The measuring instruments of this manufacturer are distinguished by a high level of accuracy, high-quality assembly and high quality materials.
Which is better
The answers to these questions will help you choose the best type of tool for your current needs.
What basic functions should the level perform?
- The functionality of the bubble level will cover all the problems of household tile laying, but it is impossible for them to correctly measure the level of ceilings in different rooms.
- Laser - will save hours of work on marking walls for frames and wallpaper, but is not suitable for determining the correct level of planes.
- Optical - will support accurate calculations for laying routes and leveling surfaces, but it will not be possible to hang shelves inside a kitchen cabinet.
- Hydro - will help to perform a uniform marking of ceilings, but it is useless for installing wall frames.
Where will it be used? Indoors, outdoors or both?
- Most electronic models are not designed for use outdoors or in aggressive environments (rain, snow).
- Keep in mind that in addition to the laser level, you will need a detector for outdoor use, since the beams will be invisible in daylight.
What is the required measurement accuracy?
Industrial lasers and levels have mechanical or digital counters; there is support for recording the inclination angle in 0.01% increments. For less accurate measurements, basic models of hand tools are selected.
Are additional features needed?
Professional-grade tools and accessories necessary for comfortable work. But the functionality of household and industrial models may not differ significantly.
What to look for when choosing?
Even if you listened to our advice and are not going to save on the cost of a building level, when purchasing you should conduct an external inspection of the device and pay attention to the little things that, in fact, will tell you a lot about the serviceability and accuracy of the level you have chosen.
- When choosing a level with bubble elements, be sure to pay attention to its main element - the flask. Carefully inspect its surface; it should be transparent and free of abrasions or other mechanical damage. Then check the strength of its fastening. It must be motionless and securely fixed in the body of the level, unless, of course, you have chosen a level with the possibility of manual adjustment, in which case the flask will be removable. Experienced users advise giving preference to levels with rigid fixation of the flasks, since in case of falls or other mechanical damage, they are more likely to remain intact and not get knocked down. Pay attention to the stripes that are applied to the flask; they should be even and clear. It is better if they are painted from the inside, so they will not be erased with frequent use. The air bubble should also be clear and not separate at the first shake; do not buy levels with a small bubble - their error will be greater. Another important point is the material of the level. Now almost all building levels are made of aluminum; it is much lighter and more practical than wood or plastic. If you purchase a long level, then it is mandatory to have stiffening ribs, so it will be more durable and will not sag.
- After a visual inspection it is necessary check level by clarity of indications. It's very easy to do. Specialty stores even have special surfaces for testing. If there is none, just use a more or less flat, horizontal surface. Place the selected level on it and mark, for example with a marker, the position of the air bubble, then turn the level 180º and place it in the same place. The bubble should be where your mark is. The bubble doesn't have to be in the center because your surface isn't perfectly flat, it just needs to return to the same position. If, after turning, the bubble is in a completely different place, you should refuse to buy this level.
- When purchasing a hydraulic level, pay attention to the shape of the liquid containers; give preference to rectangular shapes. The material from which the vessels are made must be clearly visible and free from abrasions, scratches, and chips. The scale applied to the vessels must be clear, legible, and most importantly, the same on both containers. Don’t forget to look at the hose - it should be soft, flexible, able to quickly acquire the necessary bends and not break. Do not purchase a level with a hose that is too narrow, otherwise the liquid will take a long time to flow through it.
- When purchasing a laser level , give preference only to well-known manufacturers, do not be tempted by a lower price, otherwise your device may quickly fail, and you will have to pay twice when purchasing another one. If you are going to use it often, or construction and repair are your way of earning money, pay attention to the number of available functions. The most popular are horizontal, vertical straight, plumb and cross. This is the minimum set for a professional level; as a rule, there are much more. It would be good if the level comes with storage case tripod . The case must be durable or shockproof, have a soft protective coating inside and special recesses for storage elements, which must fit tightly into them and not fall out when the case is turned. The telescopic tripod must be rigid, strong and stable. It is better if it has as few plastic elements as possible.
Following these simple rules, the level you choose will serve you for a very long time and will become an indispensable assistant in any of your endeavors. And most importantly, it will be convenient for you.
The article was written for the site.
Tags:Preparing for room renovation
How to check the level for accuracy
The main function of the building level is to reflect accurate readings. When purchasing a tool, you should check its correct operation. It is important to take into account that even a new meter can lie. An expensive device is no exception.
LEVEL ADJUSTMENT THINGS YOU NEED TO KNOW
To check the device for accuracy, it is recommended to use a more or less flat surface without deformation. The plane of the device body must lie completely on it. You can fix the position of the bubble using a pencil.
Next, you need to turn the level over in the same area and note the value of the balloon. Turns are made at least 180 degrees each time. If the readings do not change, you can completely trust the meter.
An alternative testing method involves using matches or a drill. However, the surface does not have to be flat. You can use the counter or any table. A level is placed under it, a drill is placed on it (to the list).
Move the auxiliary object so that the air bubble reaches the control line. Make notes with a pencil. Without changing the position of the drill (match), rotate the level 180 degrees and take readings. If they match the previous ones, the tool is suitable for further use.
If there are discrepancies between the marks, that is, an angle is formed between them, you need to find the bisector and draw it with a pencil. After this, place a level in the resulting line and adjust the position of the flask using the screw. The process ends with a new check, performed in the reverse order: from the bisector to the first mark on the table (observing 180-degree turns).
It is more difficult to adjust the budget version of the bubble level, since this model does not have an adjustment screw. In addition, the capsule with liquid is often glued. For calibration, it is recommended to take a screwdriver and a hammer.
First, determine in which direction the container needs to be moved. Using a screwdriver, carefully drive the protruding edge of the flask down. The bubble should move left or right. Superglue is used to fix the position of the capsule. It is inserted into the holder and waited for 30-60 seconds.