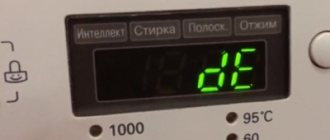
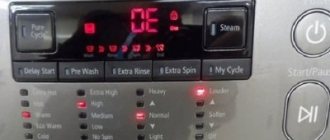
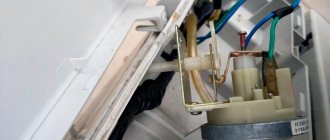
BOSCH washing machines have a wide range of self-diagnosis functionality. Considering that the list of typical breakdowns is limited (the Bosch washing machine does not drain water, does not turn on, does not heat the water and the heating element needs to be replaced), it is often possible to repair the machine yourself. Even if the user does not decide to fix the problem at home, specific knowledge of the problem will be useful. For example, to independently purchase spare parts or to exclude “imposed” work by dishonest workshops.
The article discusses a complete list of errors displayed on the display for various malfunctions of the Bosch washing machine. Instructions for troubleshooting popular problems are also provided.
Diagnostic mode
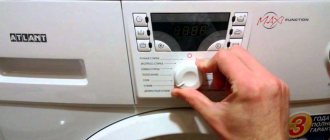
Washing machines do not display all the errors described below to the user on the display or through indicators. To obtain the most complete information, there is a diagnostic mode, which can be entered through a sequence of switching controls. Let's look at the example of the bosch maxx 5 model (similar to the bosch maxx 6 and bosch maxx 7).
- Plug in the machine and close the door.
- Move the program selector to the vertical position.
- Wait 2-3 seconds.
- Move the selector to position 8.
- Wait for the Start/Stop button to flash.
- Press and hold the “Spin speed” button.
- Move the selector 1 position clockwise.
- Release the button.
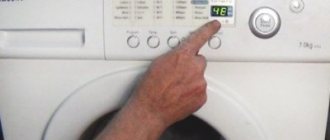
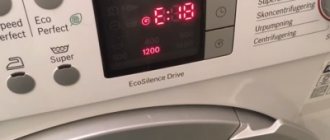
The washing machine display or a combination of indicators will display the latest machine malfunction.
To start a new test, you need to select the analysis program using the selector.
| Position | Test element |
| 1 | — |
| 2 | — |
| 3 | Engine |
| 4 | Drain pump |
| 5 | heating element |
| 6 | Hot water fill valve |
| 7 | Water inlet valve for main and prev. washing |
| 8 | Water inlet valve for main washing |
| 9 | Pre-water fill valve washing |
| 10 | Audio test |
| 11 | Auto test |
| 12 | Auto mechanic test |
| 13 | Autotest not mechanics |
| 14 | Quick auto test |
| 15 | Quick auto test |
Error codes
| Error code | Malfunction | Causes and solutions |
| F01 | The hatch door is not closed | Make sure that the door fits snugly and that there is a characteristic click when closing. The locking device or closing sensor may have failed. The door assembly can be replaced entirely or disassembled and replaced with the necessary parts: hinge, locking tab, etc. |
| F02 | Water does not flow inside | Check: — supply of cold water from the riser; — inlet filter for clogging; — serviceability of the intake valve. |
| F03 | The machine does not drain water | Drain the water manually. Check: — filter, drain hose for blockages; — serviceability of the drain pump. In the worst case, there is a problem with the control board. |
| F04 | Water leak in the system | Check the connections of all hoses and connections inside the machine for leaks. |
| F16 | The hatch door is not closed | Similar to error F01. |
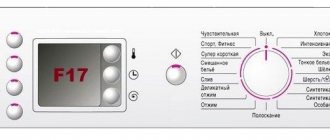
| F17 | Water filling time exceeded | Similar to error F02. |
| F18 | Water drain time exceeded | Similar to error F03. |
| F19 | Water heating time exceeded | Check the integrity of the heating element circuit. Clean the heating element from scale. Make sure that the power of the heating element complies with the technical requirements of the machine, if it has just been installed. |
| F20 | Unexpected heating | The temperature sensor or heating element relay may have failed. A broken element must be replaced. In the worst case, the control board is faulty. |
| F21 | Drive motor does not rotate drum | You should remove the back cover and check the condition of the drive belt, its fit on the drum and generator shafts. Next, you need to repair the motor. If necessary, change it. The machine may also not turn the drum due to a faulty control board. |
| F22 | Temperature sensor error | Broken or short-circuited sensor contacts. You should ring the electrical circuit. |
| F23 | Activating leak protection | Similar to error F04. |
| F25 | Turbidity sensor error | Check: — sensor for the presence of limescale; — exhaust system for blockages; - drain pump. It is also possible that too dirty water comes from the riser. |
| F26 | Pressure sensor error | Possible failure of the sensor, solenoid valve, or depressurization of the system. |
| F27 | Pressure sensor error | Similar to error F26. |
| F28 | Flow sensor error (value out of range) | Check: — water flow into the system and its pressure; — serviceability of the solenoid valve. Perhaps the sensor itself has failed. |
| F29 | Water does not flow through the flow sensor | Check: — correct connection of the machine; — water flow into the system; — serviceability of the solenoid valve; Perhaps the sensor itself has failed. |
| F31 | The water level has exceeded the permissible maximum | Avoid incorrect connection of the machine. The intake valve or drain pump is broken. The pressure sensor is faulty. Check the drain hose for kinks. |
| F34 | The hatch door is not locked | Check: - door fit; — locking mechanism; — electrical circuit of the blocking sensor. |
| F36 | Door lock is faulty | Check the wiring and replace the locking device if necessary. |
| F37 | Temperature sensor faulty | Similar to error F22. |
| F38 | Temperature sensor short circuit | Check the sensor-board electrical circuit. Replace sensor. |
| F40 | Power supply error | The cause can be all sorts of problems in the power supply: low voltage, power surge, etc. You should try connecting to a different power line (for example, through an extension cord). Call an electrician. |
| F42 | Maximum engine speed exceeded | The engine or speed sensor has failed. Problems with mains voltage. Control board failure. |
| F43 | Engine lock | Avoid mechanical blocking of the drum or drive belt by foreign objects. The drum bearing has failed. Excessive tank loading. |
| F44 | No reverse engine | Reverse relay is broken. The drum is overloaded. Control board failure. |
| F59 | Drum position sensor error | Sensor failure. Uneven position of the device on the floor. Drum overload. |
| F60 | Flow sensor error | Similar to errors F28, F29. |
| F61 | Lock sensor error | Same as F36, F01. |
| F63 or | Enabling functional protection | Software error. CPU error. Replacing the control board or reprogramming the software. |
| F67 | Controller error | Replacing or reprogramming the unit. |
| E02 | Engine failure | Complete replacement of the unit. Repair is possible if the cause is wear of the graphite brushes of the motor or the rotor bearing. |
| E67 | Control unit error | Similar to F67. |
Error codes for Indesit washing machines (INDESIT)
The following table shows the main errors and how to eliminate them in INDESIT washing machines:
| Error code | Decryption, solution |
| F01 | Electric motor malfunction. |
| F02 | Incorrect operation of the electric motor (motor). |
| F03 | Temperature sensor malfunction. |
| F04 | Water level sensor malfunction. |
| F05 | Drain pump malfunction. |
| F06 | Button (command) error. |
| F07 | After filling with water, the water level sensor does not work. |
| F08 | Heating element malfunction. |
| F09 | Control module memory error. |
| F10 | Low water flow rate. |
| F11 | Error in the drain pump circuit. |
| F12 | There is no connection between the indication and the module. |
| F13 | Drying temperature sensor malfunction. |
| F14 | Failure of the drying heating element (heater). |
| F15 | Failure of the heating element (heater) drying relay. |
| F16 | The washing machine drum is blocked (top-loading models only). |
| F17 | Malfunction of UBL (Hatch Locking Device). |
| F18 | There is a fault in the control board processor. |
| H20 | Problems with water filling. |
Main machine malfunctions
No water heating
If the machine stops heating the water completely, the automation will report this with a corresponding error. But it is possible that the heating is insufficient or slow. This can be understood by the increased running time of programs (especially if washed at high temperatures). The reasons may be as follows:
- Damage to the temperature sensor (thermostat)
The sensor looks like a silver cylinder. It is inserted from the outside into the hole of the heating element. There is wiring from the sensor to the control board. If the wiring is intact, the sensor cannot be repaired and must be replaced.
- Heating element malfunction
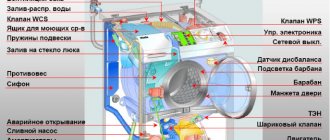
A heating element is a metal coil with an electrical conductor and a fuse inside. It is inserted into the working cavity of the washing machine under the drum, where it heats the water. From the outside, voltage and grounding from the control unit are connected to its terminals.
Failure is associated either with a burnout of the electrical circuit (fuse tripping), or with scale on the coil due to lime deposits. If the circuit of the coil itself is intact, then you can clean the working part of the heater with citric acid or special descaling agents. Otherwise, it is necessary to replace the heating element, which is not very difficult.
- Control module failure
If the “brain” of the washing machine fails, the heating command (voltage) is not sent to the heating element, and the malfunction may manifest itself intermittently and unpredictably. In this case, only flashing or replacing the board can help.
Extraneous noise during washing
First, you should make sure that the extraneous sounds are not coming from metal/plastic parts of the clothes being washed. Run “soft” clothes or a short cycle without clothes at all. If the sounds are not lost, the options are below.
- Foreign object between tank and drum
Having slipped through the holes of the drum, small buttons, bones from women's underwear, etc. hit it when washing. Disassembly required.
- Bearing failure
Bearings and seals on the drum and motor shafts are subject to serious loads, and their natural wear is faster the more intensively the machine is used. If you hear a characteristic metallic grinding noise during the washing and spinning process, this is most likely the problem. Replacing bearings is one of the most difficult repair procedures.
- Shock absorber wear
The machine may creak and hum during spin cycles due to wear and excessive stretching of the shock absorbers - the metal springs on which the drum is suspended. They should be changed in pairs to avoid distortion.
- Free movement of counterweight
A counterweight is a heavy stone (concrete) pad attached to the drum from the front to absorb vibrations during spinning. If the bolts holding it in place are loose, unnecessary vibrations and loud knocking noises may occur.
Engine problems
Motors in Bosch washing machines come with direct drive and commutator drive. The latter are equipped with carbon brushes, which create an electromagnetic field in the motor rotor when friction against its walls. Worn bristles make it impossible to start the engine. They need to be replaced.
Other problems may be related to electrical issues: power surges in the network, interturn short circuits in the motor windings, etc. Such malfunctions are usually fixed at a service center.
The drum does not spin
If the engine is working properly, but there is no rotation, you should go through the options.
- Tank lock
Avoid any mechanical blocking of the tank rotation. A foreign body can be located both inside and outside it.
- Drive belt wear
The rubber belt that transmits rotation from the motor shaft to the drum shaft can shift, break, or stretch. To check it, just remove the back cover. It can be easily changed independently, you just need to purchase a spare part strictly in accordance with the machine article number.
- Control unit malfunction
Failure of the control module is diagnosed by excluding other causes and by starting from an “external” known-good board. As a rule, it can only be repaired in workshops.
Water does not drain
- Mechanical problem
The drain hose may be pinched or kinked. It is also worth unscrewing and checking the filter of the washing machine, located in its base. If it is also clean, you can try disconnecting the drain hose from the point of entry into the sewer and running a program to drain into a bathtub, sink or large container. This will prevent clogging of the siphon (if any) or sewer pipes.
- Broken water level sensor
If the sensor is broken, the control board may stop the drain pump prematurely or not start it at all.
- Pump failure
A pump (or drain pump) is a small motor with a plastic impeller that pumps water into the drain system.
A sure sign of its failure is a quiet low hum of the machine when trying to drain the water and the absence of water gurgling at the same time. The windings of the pump motor hum, but the mechanism itself does not spin. The cause is often lime deposits.
The part needs to be replaced.
Incorrect system operation
Unpredictable, unsystematic behavior of the washing machine usually indicates a breakdown of the control unit. Stops, long pauses in washing cycles, a strong discrepancy between the actual execution time of programs and the stated duration are sure signs of a brain breakdown. Also, the machine may simply not turn on, not spin, or open at the end of the program.
In devices with electronic control, the board must be replaced. The procedure is not complicated, but the cost of the part can reach half the price of a new machine. Electromechanical models with a programmer allow you to “reflash” it
Error codes for Haer washing machines (HAIER)
The following table shows the main errors and how to eliminate them in Haer washing machines:
| Error code | Decryption, solution |
| 1, ERR1, ERROR1 | The washing machine door is not closed. Malfunction: UBL (hatch blocking device); control module, wiring or contacts in the UBL circuit. How to fix it yourself: you need to open and then close the washing machine hatch again; In case of a one-time failure of the control unit, you need to remove the plug from the socket and insert it back after 5 - 10 minutes. |
| 2, ERR2, ERROR2 | Water drain error - the washing machine failed to drain the water within the allotted time. Malfunction: blockage in the drainage path; drain pump; control unit; contacts, wiring in the pump circuit. How to fix it yourself: if the drain filter is clogged, you need to unscrew it and clean it; if the sewerage system (pipe, siphon) is clogged, it needs to be cleaned; if the drain hose is bent or crushed, you need to straighten it; if there is a failure of the control unit, you need to disconnect the machine from the network, and after 10 - 15 minutes turn it on again. |
| 3, ERR3, ERROR3 | Temperature sensor error. Malfunction: temperature sensor; control boards; wiring or contacts in the temperature sensor circuit. How to fix it yourself: if there is a one-time error on the control board, it is recommended to unplug the washing machine from the outlet for 5 - 10 minutes to reboot the electronics, then turn it on again. |
| 4, ERR4, ERROR4 | Heating element (heating element) error - the washing machine did not heat the water within the allotted time. Malfunction: heating element; control module; wiring or contacts in the heating element circuit. How to fix it yourself: if there is a one-time error on the control board, it is recommended to unplug the washing machine from the outlet for 5 - 10 minutes, then turn it on again. |
| 5, ERR5, ERROR5 | Water draw error - the washing machine was unable to draw water within the allotted 8 minutes. Malfunction: water supply valve; level sensor (pressostat); control unit; The wiring in the fill valve circuit is damaged. How to fix it yourself: if there is no water in the water supply or the pressure is too low, you need to contact the management company; if the water supply shut-off valve is closed or not fully open, you need to open it completely; if the inlet hose is twisted or compressed, you need to straighten it; if the drain hose is connected incorrectly, when it is completely located below the level of the tank, the water drains by gravity - you need to connect the drain according to the instructions; if the mesh filter of the water supply valve is clogged, you need to remove it and clean it; In case of a one-time board failure, you need to unplug the washing machine from the outlet for 5 - 10 minutes and turn it on again. |
| 6, ERR6, ERROR6, 7, ERR7, ERROR7 | Control module error. Malfunction: the radio elements on the control board have failed or the tracks have burned out; the board needs to be repaired or replaced. How to fix it yourself: if there is a one-time error on the control board, it is recommended to unplug the washing machine from the outlet for 5 - 10 minutes, then turn it on again. |
| 8, ERR8, ERROR8, 9, ERR9, ERROR9 | Overflow error - the water level in the tank has exceeded the permissible level. Malfunction: water level sensor (pressostat); the fill valve allows water to pass through when closed; control module; wiring, contacts in the level sensor or fill valve circuit. How to fix it yourself: if the control unit fails, you need to restart the washing machine by unplugging it from the network for 10 - 15 minutes. |
| 10, ERR10, ERROR10 | Level sensor (pressostat) error. Malfunction: level sensor (pressure switch); control boards; contacts, wiring in the pressure switch circuit. How to fix it yourself: if the control board fails, you can restart the washing machine by unplugging it for 10 - 15 minutes. |
| 13, ERR13, ERROR13 | Engine error. Malfunction: motor brushes; engine; contacts or wiring in the electric motor circuit. How to fix it yourself: if the control board fails, it is recommended to reboot the electronic controller by disconnecting the washing machine from the network. |
| E1 | Water drain error - the washing machine was unable to drain the water within the allotted time. Malfunction: drain pump; control module; contacts, wiring in the pump circuit; clogged drain pipe, pump or drain hose. How to fix it yourself: if the drain filter is clogged, you need to remove it and clean it; if the sewer pipe or siphon is clogged, you need to clean them; if the drain hose is kinked or crushed, straighten it; If the control unit fails once, you need to unplug the washing machine from the outlet for 10 - 15 minutes. |
| E2 | Door Lock Error - The washing machine is unable to lock the door within 20 seconds. Malfunction: UBL (hatch blocking device); control boards; wiring or contacts in the UBL circuit. How to fix it yourself: you need to open and close the washing machine door again; In case of a one-time failure of the control unit, you need to disconnect the washing machine from the network for 5-10 minutes. |
| E4 | Water supply error - the washing machine was unable to fill the water within the allotted 8 minutes. Malfunction: fill valve; pressure switch; control module; wiring or contacts in the fill valve circuit. How to fix it yourself: if there is no water in the water supply or its pressure is low, you need to contact the management company; if the water supply tap to the washing machine is closed or not fully open, you need to open it; if the inlet hose is kinked or pinched, straighten it; if the water supply valve filter is clogged, you need to remove it and wash it; If there is a possible failure of the control board, you need to disconnect the washing machine from the network for 10 minutes. |
| E8 | Tank overflow error - the water level exceeds the permissible level. Malfunction: pressure switch (water level sensor); the water supply valve allows water to flow in the closed position; control boards; contacts or wiring in the level sensor or fill valve circuit. How to fix it yourself: if the control module fails once, you need to disconnect the washing machine from the network for 10 minutes. |
| F7 | Motor error. Fault: motor brushes; motor; control boards; contacts or wiring in the motor circuit. How to fix it yourself: if the control board fails, you need to reboot the electronic controller by disconnecting the washing machine from the network. |
| F9 (in washing machines and dryers) | Drying temperature sensor error. Malfunction: drying sensor; control boards; contacts or wiring in the drying sensor circuit. How to fix it yourself: if there is a one-time failure of the control module (electronic controller), it is recommended to turn off the washing machine from the network so that the error is reset. |
| F.A. | Error in water level sensor (pressostat). Malfunction: pressure switch; control unit; wiring or contacts in the level sensor circuit. How to fix it yourself: if the control unit fails once, it is recommended to turn off the washing machine from the network for 10 - 15 minutes. |
| Fd (in washer dryers) | Drying heating element error. Malfunction: drying heating element (heater); control boards; dryer heater wiring or contacts. How to fix it yourself: if the control module fails once, it is recommended to turn off the washing machine from the network for 10 - 15 minutes. |
| FE (in washer-dryers) | Drying fan error. Fault: drying fan; control unit; wiring or contacts in the fan circuit. How to fix it yourself: if the control module fails once, it is recommended to turn off the washing machine from the network. |
| EUAR | Control unit (electronic controller) error. How to fix it yourself: it is recommended to turn off the washing machine from the network for 10 - 15 minutes, then turn it on. |
| Unb | Imbalance of laundry in the drum (may be due to overload of the machine). What you need to do: take out some of the things and start the spin cycle again; manually distribute the laundry into the drum and turn on the spin cycle again; spin some items by hand to reduce the total weight of the laundry, then distribute the items evenly in the drum and restart the spin cycle; When washing one large item, you need to put 1 - 2 medium items for balance. |
| NO SAULT | Incorrect chemical composition of the powder or lack of powder in the tank. |
| FC0, FC1, FC2 | Control unit error. If the control unit fails, it is recommended to turn off the washing machine from the network for 10 - 15 minutes, then turn it on. |
DIY washing machine repair tips
General advice
When more or less seriously disassembling a car, you have to unscrew a lot of screws and self-tapping screws. It is better to photograph each fastener element near its regular place or write it down on paper. This will significantly save time during reassembly.
The same applies to all kinds of sensor terminals and cables suitable for the control board (if you have to disconnect them).
Replacing the heating element
The first thing to do is gain access to its terminals. Simply remove the back cover of the machine.
Then you should exclude a possible breakdown to the housing: sequentially make sure that there is no circuit between each of the terminals and the housing.
Next, you need to check the continuity of the circuit between contacts L and N and measure the resistance between them. Depending on the power of the heater, it should be within 24-28 Ohms (R=U2/P). For example, a Bosch maxx 4 has a heating element power of exactly 2 kW and a resistance of 24.2 ohms. If it is very small or very large, replacement is necessary.
When purchasing spare parts, you need to pay attention to the following parameters:
- power (always indicated on the heater itself);
- length (too long may not fit into the tank);
- a hole for a temperature sensor (should be present if there is one in a broken sample);
- curb in a rubber seal (similar).
The last one is very important, because if there is no curb, water will flow directly to the contacts of the heating element when filling the tank. To make it easier for the heating element to fit into the connector, silicone lubricant of the rubber part is useful.

