Automatic washing machines, like other household appliances, have their own service life. Moreover, it depends both on the quality of assembly at the factory and on proper use.
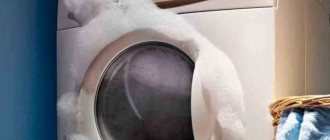
Often a nuisance arises when water starts flowing from below during the washing process. This indicates a malfunction and must be promptly intervened to correct. By the way, breakdowns occur quite often and sometimes you can fix them yourself. But you need to understand the causes.
- What to do if there is a leak?
- Main types of breakdowns
- Is it worth repairing it yourself?
- Conclusion
- Catalog of washing machines with reviews
What to do if there is a leak?
If a puddle has already appeared at the time of washing, you must immediately disconnect the machine from the power supply. It is advisable to do this without entering the room, if possible. It is worth considering that if the machine is running and surrounded by water, this can cause death. Therefore, caution must be exercised.
Washing machine leaks from below during washing
Once the power is turned off, you can move on to the next steps. First you need to turn off the water supply to the device. Next, using the filter, which is located in the lower right corner of the front, you will need to drain the water. All that remains is to open the hatch and remove the laundry, remove the water from the floor and proceed to the inspection.
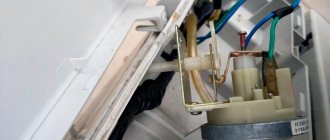
Tank
If water is leaking through the tank, there could be two reasons.
Types of breakdowns and their elimination:
- Crack in the tank. Such parts are very fragile because they are made of plastic. You cannot wash things with small items or sharp objects, because this can lead to such unpleasant consequences as cracks in the tank. Small objects penetrate from the drum into this compartment and damage it. Often these problems go unnoticed until something starts rattling in the machine or a leak appears. It is better to replace the drum. However, this part of the unit is very expensive and not everyone can afford to buy it. There is a solution - seal the crack with sealant, or make a patch-overlay from a sheet of plastic on small screws.
- Drying the gasket between the tank halves. Over time, this gasket needs to be changed; it can leak, but this happens extremely rarely. To do this you will have to disassemble the washing machine almost completely. It's better to call a specialist.
Problems with the tank can be solved, but in most cases they reappear after a while.
If the machine begins to leak due to a breakdown in the tank, replace it immediately. A lot of money will be spent, but in the future you won’t have to deal with it again.
Online diagnostics of a washing machine
If your machine stops washing or rinsing clothes normally, then some kind of malfunction or breakdown has occurred.
You can try to find the problem yourself. Run diagnostics
Select which operation your washing machine does not perform:
1. Doesn’t drain 2. Doesn’t rotate the drum 3. Doesn’t spin clothes 4. Noises, knocks, buzzes when spinning 5. Doesn’t turn on
Checking the operation of the drain pump Is the drain pump of the washing machine working? Yes No I don’t know << Back
Clogged hoses in the washing machine If the sound corresponds to the normal sound that has always been observed when the device is working, the cause is probably a clog.
Was there a blockage in the drain hose? Yes
<< Back
The drain pump does not work! If the sound matches the normal sound of the drain pump, it is recommended that you check the drain filter first.
After cleaning, does the drain pump work and does the washing machine drain water? Not really
<< Back
Operation of the drain pump The sound of the pump is usually immediately audible and noticeable. If there is no sound, the pump is not working. We are looking for how to separately enable the water drainage program. As a rule, this is a separate option. After the program has been turned on, the pump should start working in 1-3 seconds. If everything is done correctly and the pump is operational, a buzzing sound will appear. If you hear no buzzing or other sounds when you turn on the program, the pump is probably faulty.
Is the washing machine drain pump working? Not really
<< Back
Clogged car hoses If you have identified a clog in the hoses, you need to disassemble them, clean them, and then reassemble everything.
Does the washing machine drain well? Not really
<< Back
Hurray, you did a great job, you fixed it.
<< Return to the beginning of diagnostics
The drain pump is faulty, call a professional.
<< Return to the beginning of the diagnosis.
The washing machine does not rotate the drum. During the operation of the washing machine, such a problem may occur. Each model has a different drum operation. It rotates according to a given algorithm, which is set by the program. This principle applies to spinning and washing. If you are not sure whether the drum is not spinning or whether it is working, put the laundry in the washing machine. Start the spin program. If the machine is running, it will first drain the water and then start spinning. In this case, a rotational process will be observed. If rotation is not visible, then check the belt. First, turn off the program, then unplug the wire from the outlet so that power does not flow into the device. Now you need to remove the back cover. You will need to carefully inspect the drum belt. It is quite easy to determine whether it is in the wrong position or damaged.
Is the washing machine belt torn or stretched? Not really
<< Back
Broken drum drive belt If the belt breaks, it will be immediately visible. There are also often cases when the belt simply stretches, which is why the drum, accordingly, does not rotate. Do not allow the machine to operate if the belt breaks. It is important to check whether it has wound around the engine pulley or broken the wiring to the engine. The heating element and temperature sensor may also be damaged if the belt does catch the wires. It is imperative to ensure that the belt model is original. If you choose an unsuitable or low-quality product, this will affect the performance of other devices. How do you know what kind of belt you have? There will be a marking written on the old one, compare it with the one indicated on the belt offered to you. You can also find out belt information by car model.
<< Return to the beginning of the diagnosis.
Washing machine motor malfunction If a malfunction is not found, the block with wires must be disconnected from the electric motor. Carefully remove it. We visually evaluate the engine. It may have melting, cracks, or other effects that clearly indicate damage. We call the windings of the tachogenerator and the engine. It is important to understand that you can fully study how correctly the engine operates and whether there is a malfunction only at the stand. If rotation does not occur, there may be a problem with more than just the motor. Sometimes the cause is a malfunctioning electronic module. If a short circuit occurs in the engine, the module could be damaged, while the engine remains operational. Also, the wires could be damaged.
<< Return to the beginning of the diagnosis.
Repairing a washing machine that does not spin clothes After completing the washing process, the washing machine may not spin properly or may not start spinning. Firstly, look, perhaps another mode is set, which does not involve turning on the spin cycle at all. This happens, for example, with programs related to washing woolen items and delicate fabrics. To check, run the spin cycle separately. If the washing machine does not drain water, we proceed to check the pump.
Does the washing machine now spin clothes? Not really
<< Back
Congratulations, you have solved your problem!
<< Return to the beginning of the diagnosis.
Repair of washing machines, imbalance Modern washing machines place the laundry on the drum before spinning. This is necessary for quality work. Check if this feature works. Sometimes a situation occurs when things get wrapped up in a ball that cannot be unwound automatically within a certain time. At this point the work stops. You need to unwind this laundry yourself, lay it out and continue operating the washing machine. In this case, it is important to turn off the machine, and then, when the laundry is laid out, turn on a separate spin program.
Does the washing machine now spin clothes? Not really
<< Back
Washing machine repair, drum drive repair Now you need to check the drum drive belt. We remove the cover and visually assess the condition of the belt. There should be no damage. If the tension is weak, the spin may not turn on. If you need to replace the belt, you should only replace it with the original one. After replacing, we try the program again.
Fault found, does the washing machine spin? Not really
<< Back
The engine or electronic module is faulty, call a repairman to your home.
<< Return to the beginning of the diagnosis.
The washing machine hums, makes noise during the spin cycle, rumbles, and makes a jet plane noise. If the washing machine makes noise during operation, making unusual sounds, it’s time to pay special attention to it. In this case, a visible breakdown or lack of functionality may not be observed, but the appearance of strange sounds indicates that it is time to look for a malfunction. It is important to understand that a new car that has just been delivered should be inspected for shipping bolts. If you forget to remove them, noise and vibration are inevitable. So, let's begin! We turn the washing machine drum and listen to extraneous sounds.
When rotating, do you hear extraneous noise, hum, balls rolling, does the drum move unevenly with slight jamming? Not really
<< Back
If the drum rotates and uncharacteristic sounds appear, including vibration, it’s time to check the bearings. If they malfunction, they will have to be replaced.
<< Return to the beginning of the diagnosis.
The counterweight of the washing machine has come loose. The fastening of the counterweights must also be of high quality. If they are “loose”, it’s time to eliminate this defect. In some cases, you can notice that the bolts that secure the stones are completely missing. In this case, the connectors for mounting will be visible. The bolts need to be found and put in place - they probably simply came loose. A rumble heard while the washing machine is operating may indicate that the bolts have partially loosened. To check the bolts, you can simply push the drum. If it is secure, the bolts are fine. If it moves, there is a defect.
Do you hear any noise, clanging or rattling noises when moving the washing machine tub? Not really
<< Back
The counterweight has come off
<< Return to the beginning of diagnostics
Checking the shock absorbers of the washing machine Checking the shock absorbers. If you hear vibration or excessive noise during the spin cycle, there may be a problem with the shock absorbers. Sometimes the washer moves. Now let's check the functionality. Remove the top cover. Click on the tank, move it five to seven centimeters down. A normal reaction will be observed if the tank rises sharply, jumping a little and stopping in its normal place. If this does not happen, the shock absorbers need to be replaced.
Are the shock absorbers of the washing machine working? Not really
<< Back
If a visible defect has not been identified, check whether a foreign object may have entered the machine. Replacing shock absorbers. The problem with shock absorbers wearing out occurs quite often over time.
<< Return to the beginning of the diagnosis.
Replacing washing machine shock absorbers. Malfunction and wear of shock absorbers is a fairly common phenomenon.
<< Return to the beginning of the diagnosis.
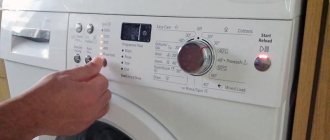
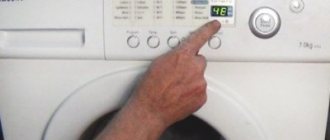
The washing machine does not turn on. It is worth trying to find the cause of the problem yourself and fix it. We start by connecting the device to the network. Next, click on the “network” button. In different car models, different indications are triggered: here either the display will start working, or, on the contrary, some other button.
Does the washing machine have an indicator? Not really
<< Back
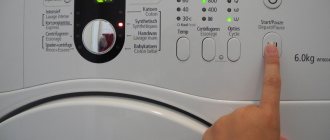
Hatch lock lock (UBL) You can check it by turning on any of the programs. We choose what we will use. Click on the corresponding button. Don't forget to pay attention to the inclusion. As a rule, the process of activating a function is characterized by the presence of a certain sound, for example a click, with which the device makes it clear that pressing again is not necessary and the machine is already working. If there is no sound, the button may be broken. In this case, the main thing that must be done is to block the hatch and start working. If this happens, everything is fine.
The washing machine is blocking the hatch and the UBL is triggered? Not really
<< Back
Water fill valve malfunction
<< Return to the beginning of the diagnosis.
The washing machine hatch does not lock
<< Return to the beginning of the diagnosis.
No indication Checking the electrical circuit. If you notice that the washing machine does not respond to being turned on, it is first recommended to check the power supply. The outlet may be faulty. Try connecting another device. If the outlet works, you need to check whether the circuit that conducts energy through the washing machine from one element to another is intact. To do this, you will need a multimeter, which will help you fully analyze the ability to respond to an electrical signal at several stages of operation. If there is no network connection anywhere, this is probably the problem. We carry out this manipulation until we reach the electronic module. If we are talking about an old washing machine, here it will look like the device’s program. When you turn on the button, there should be no breaks in the circuit. If the circuit works, everything is fine electrically.
Is the washing machine's power supply OK? Not really
<< Back
Repair of electronic module (unit)
<< Return to the beginning of diagnostics
Contact circuit fault
<< Return to the beginning of diagnostics
Dispenser and spigot
Although water collects under the washing machine, the source of the leak may be much higher. Inspect the detergent dispenser. Perhaps the tray is very dirty, and this is what leads to overflow. The water simply gets stuck in the dispenser, as it cannot be directed further, and flows out onto the floor. You should inspect the dispenser inside and out, carefully studying its corners, because most often the leak appears there.
The powder receptacle is easy to “bring to clean water.” You should fill its sections with water, thoroughly wipe the bottom with a rag so that it remains dry, and observe. If the tray is really leaking, you will see water start to flow.
The pipe can fail even on relatively new LG machines after one or two years of operation. This is due to unscrupulous assemblers who are trying to save money on equipment components.
To carry out an accurate diagnosis, you should remove the upper wall of the washing machine body.
It happens that it is the drain pipe directed from the machine tank to the pump that begins to leak. It’s not difficult to check this guess; just tilt the automatic machine and look inside the body from below. Perhaps the reason lies in the filler pipe of the washing equipment. You can inspect it by removing the front panel of the case and examining the connection area.
This part is not the most reliable in a washing machine. Some people are not even aware of its existence and only encounter it when the unit begins to leak from below during washing. Today, the following pipes can be used in a washing machine:
- Jellied;
- Drain;
- Dispenser pipe.
Each of them plays its role and is an integral element of the system. The filler is located between the intake valve and the dispenser. Its function is to combine these elements. Water flows through it quite quickly and enters the powder receiver.
After this, the powder mixture with water enters the dispenser tube, which is necessary to connect the powder receiver and the washing machine tank. Next, the laundry is washed in the selected mode, and when the waste water needs to be drained, the drainage pump starts. It pumps water from the tank to the drain, passing through the drain pipe.
Each of these parts of the washing machine has a certain resource. The walls of the pipe are constantly subject to mechanical stress from water pressure, as well as various mechanical elements and scale. The higher the water hardness and the more mechanical impurities, the higher the likelihood that one of them will break and the machine will begin to leak from below. Of course, an important factor is the quality of the pipes.
Attention! Prolonged downtime of the washing machine also negatively affects the strength and elasticity of these parts of the washing machine. More often they tear under heavy load after a long pause in work. After which the car begins to leak from below.
The dispenser tube is prone to collecting and hardening deposits resulting from the use of low-quality powders. But most often it is the drain pipe of the washing machine that breaks.
The drain pipe takes on a large load from the following items:
- Buttons and cufflinks;
- Pins and hairpins;
- Coins;
- "underwire" bras;
- Toothpicks, etc.
If the washing machine is leaking from below, then most likely the problem is in the water drain pipe.
In order to find this element, you need to remove the top cover of the washing machine. This part connects the soda intake valve and the powder receiver. These elements are located in the left corner. Attached to the receiver and valve with large clamps.
Dismantling is carried out as follows:
- Using pliers, loosen the clamps and move them to the side. You must handle them very carefully so as not to break them.
- Holding the central part of the pipe, carefully remove it from the valve and receiver of the washing machine.
- After the inspection, clear any blockages, if any. You can use a bottle brush.
- If any defects are found, immediately buy a new one.
- Collection is carried out in reverse order.
This part of the washing machine can also fail, but this does not happen so often. Finding and replacing this element will be a little more difficult, but it can be done. First of all, you need to remove the front panel.
In many washing machines this is done as follows:
- The powder dispenser is removed. This procedure is performed differently in different models.
- The fasteners that hold the display panel are unscrewed.
- The bottom panel is removed.
- The rubber seal of the hatch is removed. But to do this you need to remove the wire clamp with a screwdriver. This should be done carefully so as not to damage the rubber.
- The next step is to remove the cuff of the washing machine.
- The fasteners holding the blocker are unscrewed;
- The front panel of the case is detached.
Thus, access to the dispenser is open. First of all, you need to remove the fasteners that hold the pipe. Then you can disconnect the element by pulling the ends. Inspecting the tube will tell you if there is a blockage. If not, the next step is to carefully inspect the item for damage.
Main types of breakdowns
If your washing machine starts to leak, there may be different reasons. Therefore, for each case you should use a certain repair method. Below we will talk about the most common sources of the problem.
Water supply hose
It must be inspected with maximum attention for the presence of a rush. If you can't see if it's leaking, you can disconnect it from the machine, install a plug on the lower end and wrap the entire hose with toilet paper. As soon as water is supplied, the location of the leak will become visible instantly.
If it drips through the connection to the tee in the supply system or near the connection to the machine, you will need to change the gasket. If it leaks through the hose, all you have to do is connect a new one.
Water supply hose with aquastop
Drain filter
Most often, the drain filter becomes the cause of leaks due to loose tightening of its cover during maintenance or cleaning. Therefore, water passes through it and ends up on the floor. The problem is solved by simply clamping the fastening elements.
Broken tray
The dispenser in washing machines is a retractable container into which powder and additives are poured to improve the quality of washing. The following factors influence its performance:
- the grate becomes clogged because the powder is not completely dissolved;
- sediment from poorly filtered water collects;
- There is a lot of pressure in the water supply system.
Consequently, water begins to leak through the edges of the element and a puddle collects at the bottom of the washing machine. However, the problem can be solved by removing the dispenser, washing its grid and the wall of the hopper. Then all that remains is to put the part back and run the water again.
Washing powder tray
As for the strong pressure, it can be reduced by turning up the tap a little to supply water to the machine.
Low quality pipes
A similar problem is common in other household appliances. The device may be highly reliable, but pipe manufacturers often use low-quality material to manufacture their products. Accordingly, you have to deal with leakage through the pipes.
Expert opinion
I work in the household appliance repair industry. Extensive experience in restoring washing machines and dishwashers.
Ask a Question
If, when water is supplied, a leak appears at the bottom and after a while it stops, the problem lies in the pipe that connects the valves and the dispenser, or used to supply water to the main tank.
There is also an additional connection inside the machine from the drain pump to the tank. If it appears to have burst or developed a crack, water will leak out during draining or spinning.
Washing machine connection
Cuff
A special rubber seal is attached to the door. If the door closes, the drum in which the laundry spins will be sealed. If a leak appears directly when taking in water, most likely an invisible crack has formed in the front part of the cuff.
This happens if the door is closed incorrectly and the rubber becomes broken. However, the reason may be that the service life has expired and the cuff has simply worn out. So, if water begins to flow out from under the machine when filling or during washing, this indicates that the inside of the seal has burst.
There is no point in fixing the problem yourself in this situation. You just need to call a technician for a complete replacement of the cuff.
Sealing collar
Pump and tank
There are times when the drain pump, often called a pump, breaks down. In practice, such a malfunction can be solved by a simple replacement, because the design does not allow for repairs.
The tank is a dense structure with high strength. Some users think that it cannot leak, but often water collects under the SMA precisely because of it.
For example, when washing outerwear, there may be sharp things inside the tank. They are the cause of cracks or broken holes in the tank.
Washing machine tank
Other problems
A situation often occurs when the bearing seal is damaged. Water also begins to flow out from below. This ultimately leads to the machine starting to rattle due to the destruction of the bearings.
Another, more rare reason is that the tank is overfilled - excess water begins to flow out. As a rule, this occurs due to a blockage, faulty pressure switch or drain pump.
Very often, regardless of the reliability of the machine model, the cause of the breakdown is incorrect operation or ignorance of simple rules for using the machine.
Filter and drain hose connection
A leak from the bottom of an automatic machine does not always indicate a malfunction of any element of the system. This is often caused by a common user error. If, some time after starting the wash, you find water on the floor, check whether the dust filter lid is tightly screwed on and whether the emergency water drain hose is tucked into place. This advice will be especially relevant if the day before you cleaned the washer’s garbage filter. Perhaps you simply did not secure the element tightly.
If the garbage filter cap is screwed all the way down, you should inspect the connection between the drain pump and the drain hose. To do this you will have to look under the bottom of the machine. The connection of these two elements often leaks due to the loosening of the fixing clamp or the appearance of cracks in the fitting. Sometimes it is enough to treat the cracked area with a waterproof sealant. Although it is much safer to immediately replace the entire cochlea.
If you notice that the washing machine is leaking, you should immediately disconnect it from the power supply. At the same time, you should not step into water that has formed a puddle.
Now you need to proceed with further steps to detect the source of the problem:
- Turn off the water supply to the unit.
- Open the drain filter, which is located in the front, left or lower right corner.
- Drain off any remaining water. There may be a lot of liquid. You should select a container with a low side and place it close to the hole.
- Wipe up the puddle.
- Open the machine door and take out the laundry.
Only after this will it be safe to start looking for the problem yourself or call a specialist.
If the wash cycle ends before a leak is detected, there is no point in draining the remaining water through the filter. This is only relevant if the breakdown occurred during the operation of the unit, interrupting it.
The device weighs a lot. It is better for a man to look for the breakdown, since you will need to move and tilt it.
First of all, you need to check all components that are in the public domain and located close to the suspected location of the leak. It is easy to spot in a puddle.
There is a chance that the problem is not in the washing machine itself, but in the old pipe, and water has simply flowed under the machine. If everything is in order with this, you need to start inspecting the communication system, which is connected directly to the machine. If you do not find the cause of the leak in this area, you will have to look for it in the unit itself.
Drain and inlet hoses for water often leak in areas where they connect to the unit. To get rid of such a breakdown, you need to unscrew the hose for filling or draining water and change the rubber gasket.
But it also happens that the hose has worn out or was accidentally damaged, then to restore its integrity you can use special glue and a rubber patch, although a more reliable option would be to replace it with a new one. But all these recommendations apply to the drain hose. If the inlet hose has been damaged, we do not recommend repairing it with a patch, since the water pressure in it can be very high, and then replacement becomes the best option. You can buy an inlet hose at any plumbing store, and inexpensively.
The cause of dispenser failure may be a malfunction of the hopper (that is, the powder compartment). As a rule, it leaks when it is clogged, either due to excess water pressure, or due to a failure of the inlet valve. What to do in such a situation?
If it's the valve, you'll see leaks in the area underneath it. To eliminate the causes of the leak, you need to remove the dispenser and thoroughly clean it and the hopper. It happens that a foreign object ends up in the bunker drain, preventing it from working normally. If you find such an object, remove it from the powder compartment.
After cleaning, test the operation of the washing machine. In addition, it is worth trying to reduce the water pressure by closing the tap a little. If none of the above helps to cope with the leak from below, it is necessary to replace the inlet valve, since it is its failure that can cause high water pressure during the rinse phase.
- Repair. If the hole is small, you might want to try closing it using moisture-resistant glue and a rubber patch. You can also purchase a special boat patch from a specialty fishing store. After sealing the hole, the hatch cuff should be installed in such a way that a piece of patch rubber is placed on top - this will reduce the pressure on it, and therefore increase its service life. Since the cuff can also be damaged on the inside, we recommend dismantling it to seal the holes.
- Replacement. If the damage caused is too great, you will need to completely replace the cuff of the washing machine hatch, for which you need to do the following: remove the faulty cuff and install a new one in its place.
We invite you to familiarize yourself with the structure of the drum of a Samsung washing machine
It is likely that the reason why water began to flow from the water supply hose is that the connection of the pipe to the machine’s tank has become loose. To find out if this is the case, you need to carefully examine the tank. If you see traces of water leaks, then the problem has been found.
To repair or replace the inlet hose of a washing machine, you need to remove the pipe, then clean all areas of the connections from the remaining glue and dry them. Then you can fix the pipe again, to fix which you will need epoxy resin or high-quality moisture-resistant glue.
If the tank is cracked, it will need to be replaced, and this is a very expensive and complicated process. Of course, you can try to remove the crack yourself using waterproof glue, but this is unlikely to help you for a long time, because the tank will most likely need to be replaced, and this will have to be done with the help of a specialist.
Connections of tank parts. As a rule, the tank of an automatic machine includes 2 elements connected to each other with metal brackets or screws, and in the space between them there is a rubber gasket. Such gaskets dry out over the years and begin to leak. To change the gasket you need to almost completely disassemble the device.
First actions when a leak is detected:
- Unplug the unit from the outlet without stepping into the puddle, and if it is impossible to reach it, turn off the electricity completely at the switchboard.
- Turn off the water supply tap to the machine, and if it is not there, turn off all water supply in the house.
- Drain the remaining liquid in the tank through the drain filter.
- Remove the puddle on the floor and wipe it dry.
- Open the door and take out the laundry.
Be sure to read:
Washing machine “Zanussi”: faults and their elimination, how to repair it yourself
After cleaning is completed, begin searching for the cause of the leak and repairing it if the damage is minor.
Is it worth repairing it yourself?
In almost every case when the equipment stops working, you can use the instructions from the manufacturer. In addition, many ways have already been invented to fix problem areas on your own.
For example, if the cause is a leak in the drain hose and you want to finish the wash, such a breakdown can be easily corrected with simple electrical tape. Since there is little pressure in the drain system, you can even do a couple of washes before buying a new one. You need to purchase another one in order to eliminate 100% of the leakage in this place.
Drain filter
If we talk about water supply hoses or pipes in the internal structure, such a solution will not work - these parts must be replaced. If the pipe for supplying water to the tank is leaking at its connection point, you can safely use glue for rubber products.
In this case, the connection will be restored within 20 minutes after it has completely dried. However, it is necessary to compress the pipe as much as possible in advance.
As for the drain filter, everything is much simpler here:
- First you need to remove it from the neck.
- Inspect the internal threads for any stuck foreign objects.
- Place it back, while tightening the lid so that it fits as tightly as possible.
Do you store laundry in the washing machine?
Oh yes! No.
If the door starts to leak, the problem in any case lies in a burst cuff. In general, at home you can remove and repair the seal yourself. Many masters do this. However, it is better to seek help from a specialist - he will be able to ensure that the cuff will work for a long time. Yes, and the service center provides a guarantee.
A cracked tank should also be left to a professional, as repair work involves sealing the hole. This is a time-consuming task and can be done by those who have undergone preliminary training.
If the tank is badly damaged, you can get information from the specialists about where to actually buy a new one. This element is expensive, so for prevention you need to carefully inspect the clothes before washing, especially if they are children's clothes - in which self-tapping screws or nails can easily be found.
Many people have watched a commercial in which household appliances begin to leak after scale forms on the heater. If this actually happens, the heating element will explode and burn through the tank. Which has happened in practice only a few times.
Video
Emergency procedures
For many years now, automatic washing machines (hereinafter also referred to as SM, SMA) have freed people from the routine work of washing clothes. They themselves heat the water to the required temperature, dose out the washing powder, determine the washing, rinsing and spinning time, and even dry the washed clothes. Leading manufacturers of washing equipment - Bosch, Samsung, Beko, LG, Electrolux and others - equip their washing equipment with a leakage protection system that blocks the flow of water and flooding of premises. But, unfortunately, leaks are still quite common.
If you see a leak on the floor, under no circumstances step into the puddle or try to wipe it away! It is necessary to immediately turn off the power to the unit by unplugging the plug from the socket. If the SM remains energized, it will pose a threat to the lives of others.
The second urgent step is to turn off the water supply to the machine by turning the appropriate tap. After this, you will have to drain all the liquid from the unit using the emergency drain hose. What it is? The emergency pipe is a small hose with a plug, located behind a special door next to the drain filter.
If there is no emergency hose in the SMA, water is drained through the filter hole in the front panel
Next, empty the drum from the laundry . Only after all the above steps can you begin to inspect and find out why the washing machine is leaking.