Assembling the device
Any SLR camera is unassembled in its original packaging. To be precise, the body, lens and battery are located separately. First of all, you should remove the protective cap from the lens and the camera itself. After this, the lens is put on the device. To do this, you need to find a white dot on the lens and align it with the white dot on the body. After this, the lens is rotated clockwise until it clicks.
The second stage is installing the battery. This is also quite easy to do. The battery compartment is located at the bottom of the camera and opens with a special latch. You need to pull it down, and the compartment lid will open. The battery is placed in the camera with the side with the contacts. In general, it is impossible to mix it up here, since it simply won’t fit on the other side.
The memory card slot is most often hidden under the battery compartment cover, but on some models it may be located on the right side. The memory card is inserted with the contacts facing forward.
Most often, the camera in the box will be discharged, or the battery will have a small percentage of charge. Before you start using it, it is best to fully charge it so that it does not run out during the first setup. Charging in most cases is carried out not by connecting the entire device to the network, but using a separate battery charger. The battery should be removed and inserted into the charger. During the process, the red lamp will light up, which will turn green after charging is complete. In rare models, the charging function via a USB cable is available. Modern batteries do not require charging and draining them completely. They do not have a memory effect, as was the case in older types of batteries, so the battery is not afraid of partial charging and discharging.
Advice! To charge your Canon camera, you should use original chargers. This is the only way to extend the life of the battery and not ruin it ahead of time.
First start
Once the battery is charged and the lens is attached, it's time to turn on the camera. Before you start using it, you will need initial setup, during which you set the date, time zone, language and other system parameters. In fact, the initial setup of a Canon camera does not require special knowledge or additional instructions. The device displays information on the display, and the user simply needs to act according to the suggested actions.
After the first turn on is completed, the camera will in most cases ask you to format the memory card. If the card is new, then such a need will definitely appear. You can do this in three ways:
- using a laptop or computer;
- upon direct request for a camera;
- through settings.
There is no point in considering the first option in detail, since it is not the best. The fact is that any technology formats the media for itself, and sometimes it happens that a memory card formatted in a laptop is not readable by the camera. For this reason, it is best to do this using the technique in which the card will be used.
In the case when the card is new and the camera does not understand how to work with it, it will simply write on the display that you need to format the media and offer to do it right now. In this case, the user just needs to agree.
If the card has been used before or just needs to be cleaned, formatting can be done using a special option in the settings. To do this, on the device itself, press the “Menu” button, then select the item with the drawn key. In this menu item, you can change all system settings, for example, reset the date, including formatting the memory card.
Advice! The device will offer two types of formatting: quick and normal. The first option is suitable for new cards, the second for previously used ones or those that produced errors.
Camera modes
Any camera, regardless of class, has different shooting modes. Some of them are automatic, and the second half will require you to configure one or another parameter for specific shooting conditions.
All modes of a Canon camera can be seen on the mode scroll wheel - it is located at the top. The selection of modes is carried out by rotating it. A short white line marks which mode is selected; accordingly, to select another, you need to scroll the wheel to the desired option. The number of modes may vary depending on the model. At the same time, they can decrease or increase only due to automatic shooting programs. Semi-automatic modes are unchanged - there are always four of them.
Automatic modes include macro photography (flower on a wheel), sports mode (running person), portrait mode (person's face), automatic (green empty rectangle) and others. In these modes, the user only needs to point the camera at the subject and, after focusing, which is also done automatically, press the shutter button.
Semi-automatic modes are designated by the letters M, Av, Tv, P. When working with them, the photographer will need some knowledge and understanding of working with aperture and shutter speed. However, the pictures here will turn out to be more interesting.
P mode
P or program mode does not differ globally from automatic mode, but allows the user to adjust the aperture within limited limits. It is also possible to adjust the white balance.
Most experienced photographers find Program mode to be completely useless. The manufacturer notes that it will help novice users switch from automation to manual settings.
Av mode
Av – aperture priority. In this case, the user sets the aperture size himself in order to experiment with the amount of light transmitted and the final image. Based on the aperture size, the camera itself selects the shutter speed and takes the photo. Using this mode you can influence the depth of field.
Advice! When using, it is not recommended to set the maximum and minimum aperture values, as the likelihood of artifacts appearing in the photo increases significantly.
Using this mode, you can adjust the sharpness and blur the background. To make the objects in the photo clearer, you need to set a lower aperture value; if you want to blur the background and focus on the main objects, then select a high value for the shutter speed.
It is worth understanding that the aperture setting depends on the lens that is connected to the camera. That is why, when changing optics, you need to choose not only a lens, but also set new shooting parameters for it. Another nuance - on different cameras the same lens may require new settings.
TV mode
TV – shutter priority. In this mode, the user selects the time for which the aperture will transmit light; accordingly, the aperture size itself is selected automatically. Using this feature is indispensable when shooting sports events or moving objects. Also, different exposure times can give interesting effects, for example, a photo with wiring. The mode will appeal to those who like to photograph any movement, regardless of whether it is a person, an animal or a natural phenomenon.
M mode
M – manual mode. With its help, the user has access to simultaneous adjustment of aperture and shutter speed. Suitable for those who know exactly what they are doing and what they want to achieve. The mode is especially good at night, when the camera, due to the darkness, does not understand what aperture and shutter speed it should set. The user can choose the parameters he needs. This is the mode most often used by professionals. Beginner users simply will not understand how this or that parameter affects the photo.
Creative Camera Settings
1) Program mode (P). In this mode, the camera itself selects the minimum shutter speed and aperture number that is needed for high-quality shooting. At the same time, it is possible to configure a number of parameters separately, for example, sensitivity, white balance, etc. This mode is similar to automatic, that is, the camera itself selects all the parameters, but unlike automatic mode, you can adjust any parameter.
2) Aperture priority (A or Av). In this mode, you set the aperture yourself, and the camera itself selects the desired shutter speed. This mode allows the photographer to influence the depth of field using the aperture. Most commonly used.
3) Shutter priority (S or Tv). Here you set the shutter speed, and the camera sets the aperture necessary for correct exposure. Used when shooting fast-paced scenes, such as sports competitions.
4) Manual (M). You need to set all the parameters yourself. Suitable for experiments or when you have experience and know exactly what to do. Very useful when shooting at night or when you need to take obviously underexposed or overexposed pictures. Often used in studio work.
Rarer modes:
- Sv – sensitivity priority, similar to P mode. The camera sets the shutter speed, aperture and sensitivity, but it is possible to quickly adjust the sensitivity.
- TAv – aperture and shutter priority mode. The camera only adjusts the sensitivity of the matrix, and you – the aperture and shutter speed.
- A-Dep – aperture priority mode with depth of field control. The camera sets the required shutter speed depending on the required depth of field.
System Settings
Canon cameras have a wide range of settings. This may concern the shooting process itself, as well as camera settings, for example, the format in which the picture will be saved, its size, etc. In the system settings, you can set a timer, synchronize the flash, or format the memory card.
Photo quality and size
To set specific photo settings, you need to press the “menu” button and select the item with the camera drawn. This is where all photo-related settings are available.
Depending on the model, the item where you can select the photo quality will be called differently. Most often the name speaks for itself: “quality”. On a Canon camera, the options are labeled L, M, S1, S2, S3, RAW and RAW+L. All letter variants (L, M, S) are saved in JPEG format and among themselves imply a deterioration in quality from L to S3. Not only the quality of the photo changes, but also its size, as well as how much it takes up on the memory card. Obviously, it is best to choose option L in this case.
RAW and RAW+L formats are the maximum photo quality and size. Pictures are saved in RAW and take up a lot of space. Photos in this format resemble an electronic negative, which carries information about the photo, but not the image itself. Pictures in this format require mandatory processing on a PC.
The advantage of the format is that it allows you to get more flexible options for processing the image in a professional editor on your computer. The downside is that they take up a lot of space and cannot be opened without a special program.
Focusing the image
Focusing the image in the camera can be manual or automatic. In the first case, the user does everything himself with the power of the rotary rings on the lens. In the second case, automation works. To switch from one subject to another, press the switch on the AF-MF lens. The AF mode, in turn, is divided into two more options.
- AF-S – focusing by frame. Its meaning is that the camera focuses on the selected subject when you lightly press the shutter button. It is best suited for shooting stationary subjects. To adjust focus to a new subject, you need to release the button and point the camera at the subject again.
- AF-C – continuous focusing. Its meaning is that when you press the button, the camera continues to track the object, even if it moves. Obviously, it is more convenient to use this type of autofocus when shooting sports events.
An important point is the choice of focus point. Modern cameras offer from 9 to 50 points. In this case, there is a main object on which the focus is carried out, the remaining points are focused on other objects. When the photographer looks through the viewfinder, he sees several dots, the active one is highlighted in red. To make the focus point that is aligned with the subject active, you need to use the small wheel on the camera or the navigation buttons. At first glance, it may seem that it is much easier to move the camera and thus combine the points. But there is a nuance: when the camera position changes, the exposure changes, that is, the whole idea can be ruined. Using the navigation keys, the user can take several pictures of the same object, but at the same time focus on a new point each time.
Working with shutter speed
Camera shutter speed is a parameter that is measured in seconds, or rather fractions of a second. The physical meaning of shutter speed is that this is the time during which light passes through the aperture and hits the matrix. Obviously, the more time the light hits the matrix, the brighter the picture will be. This is important when shooting in low light conditions, but there is a downside. A large amount of light can make the photo overexposed and blur the frame. To get the blurring effect, you should set the shutter speed longer; if sharpness is required, then set the time to a minimum . You can adjust the shutter speed in manual or shutter priority mode.
What is white balance
White balance is the correct display of colors in a photo. As you know, the color spectrum can have colder or warmer values.
An example would be a photograph of a person. With normal white balance, facial skin will look natural. If the spectrum slopes towards warmth, then the skin will turn yellow; if towards the cold part, then the entire photo will appear blue.
Obviously, depending on the lighting, the spectrum may change, and the photo will have unnatural colors. Sunlight or an incandescent lamp have warm tones, but a fluorescent lamp makes the image “cool”. And it is precisely in such situations that white light balance adjustment is required.
All Canon cameras have a dedicated WB button that opens the white balance menu. Here you have the option to select preset modes, which are indicated by schematic drawings. For example, the sun means optimal settings for shooting outdoors during the day. Auto settings for other situations are selected in the same way.
However, the camera makes it possible not only to use preset options, but also to make adjustments yourself. This process is similar to using filters and is not suitable for amateurs. To do this, you need to press the “menu” button, select the item with the camera drawn and there find the line “BB Shift”. Next, the correction screen opens on the display, which is divided into four parts by two straight lines. Each of them is indicated by letters:
- A - amber,
- M - purple,
- G - green color.
Shifting the cursor (shown as a black square on the screen) enhances one of these colors or a combination of them.
How to put a date on a photo
Sometimes there are situations when you need the date and time of the photo to be displayed on a photo. Modern SLR cameras no longer have this function, since in general the date spoils the photograph, and if particularly necessary, it can be placed on the photo when printing the pictures. The printing program extracts the date and time from the photo information and places it in the corner. Simpler devices, such as compact cameras, have this function. You can set the date in the photo settings menu. You should find the item “Display date and time on photo”. In this case, the user will first be able to configure the date and time format.
Photo with timer
Taking a selfie with a DSLR camera is quite difficult. It is for this purpose that manufacturers have provided a timer that is set for a few seconds and takes a picture after this time has elapsed. To use the function, you must first securely install the camera, ideally on a tripod, select the exposure, check that everything is in the frame, and then select the timer and response time using a special button on the body. The button is marked with a clock icon. Thanks to the fact that the device beeps after every second, you can know exactly how long it will take for the shutter to fire and have time to take your place.
Camera modes
Digital camera modes allow photographers to control exposure parameters, such as shutter speed, aperture, and ISO. While some modes can completely automate a camera's exposure, there are other modes that allow the photographer to manually control some or all of the exposure parameters.
The faster you begin to understand all the technical concepts, the faster and more interesting the work will be. You need to know the basics. There's no getting around this. Yes, you can click something intuitively and you seem to like it, what you get, but it doesn’t add to your professionalism. This also has its own algorithms and order.
Previously there was only manual mode. It was necessary to select lenses to realize your ideas.
It's certainly easier now. You can have one camera, one lens and enjoy life. Previously, it was necessary to have a whole laboratory for developing photographs, all sorts of chemicals. Nowadays, a fairly good program on a computer like Photoshop and knowledge of how to work there. But let's get back to our shooting modes. We need to fully understand this issue :)
Some photographers use only manual controls, some combine them depending on the situation. A novice photographer does not want to rack his brains over all sorts of settings. It is more convenient for him to use those suggested by the camera manufacturer.
Let's figure out what all these pictures on the wheel at the top mean.
Main modes in the camera:
1.1. Tv or S - when you set the shutter speed yourself (shutter speed in the camera);
1.2. Av or A - aperture control only;
1.3. P - the program completely sets all the settings itself;
1.4. M - fully manual camera control
Shutter priority mode
If you put the wheel on this mode, you will have complete control over the shutter speed. You can read about shutter speed and what it affects in this article.
When you control the shutter speed, the camera automatically sets the aperture based on the amount of light passing through the camera lens. I usually use this mode when I need to “freeze” someone in motion or, on the contrary, blur or show the dynamics of events.
This mode is often used by sports photographers. If you need to “freeze” an athlete in motion, then you need to set the shutter speed faster than 1/125.
If you decide to take your camera for a walk and there is a body of water there, then you can show the water a little in motion. It will look like fresh milk if you set the shutter speed a little longer and put the camera on a tripod.
Aperture priority mode (Av or A)
This mode is used when you want to control the aperture value. For example, if you need to blur the background in a portrait, then you set the aperture to the smallest value. If you're photographing a landscape, you'll set your aperture to the widest possible setting so that the entire picture is in focus without too much blurring of the background details.
I can honestly tell you that this is the best mode in your camera. Try this routine for the next three months and you will be amazed at how much it will enrich your creative life. Most of the time, all photographers shoot in this mode. You set the aperture and ISO values yourself, and the camera sets the shutter speed for you.
Aperture priority mode is powerful because it's surprisingly easy to use. Your photographs will improve significantly when you learn to control your depth of field.
The more you use it, the more professional your work will look.
Auto mode in the camera (P)
The settings in the camera are entirely up to you to choose both shutter speed and aperture depending on the light. If you point the camera at a bright area, the aperture will automatically increase to a larger number while keeping the shutter speed high enough.
Pointing the camera at a darker area will cause the aperture to decrease to a smaller number to keep the shutter speed fast enough. If there is not enough light, the lens aperture will remain at its lowest setting.
I usually don't use this mode. Often it turns out not what I intended.
Manual mode M
Photography is a subjective medium. Your personal tastes should influence your photographs, and there's no better way to achieve this than by taking control of your camera. Learn how to use your camera quickly and efficiently, and explore the world around you with your sensitive photographer's eye. Soon you will be able to walk into a room and say, “If I were photographing here, I would use the settings at 400 ISO, f4, and set the shutter speed to 1/60 of a second.” This is acquired with experience.
I often use this mode indoors. Of course, first you need to take a couple of test shots to see if you like the result. Maybe watch it on the big screen, on the computer.
M mode is extremely useful when working with flash. I do every single shot indoors with flash in this mode. It is very comfortable. At any moment, I can use shutter speed and aperture to “illuminate” the background using flash. In this case, the flash always makes the exposure correct. The ISO, shutter speed and aperture parameters adjust the tone curve of the picture. But be sure to take test shots and see if you like the result.
C1, C2, C3 on my camera are settings that I can make on the camera myself. For example, I know that in a certain studio there is such and such lighting, and in order not to constantly change the shutter speed, aperture and ISO, I can set my values in these C1, C2, C3. Very comfortably. But before you shoot, again, don’t forget to take test shots and see what happens. If you like the picture and are happy with everything, then continue your work.
What other modes might your camera have?
My camera does not have these modes, since it is already considered professional and assumes that the photographer knows how to set the shutter speed or aperture, depending on the situation. But your cameras may have them, so we'll look at those shooting modes as well.
Sport mode
Ideal for action and fast movement. Sports mode will do the opposite of Night mode and shorten the shutter speed to keep the shutter speed fast. This will ensure that any movement is frozen and no motion blur occurs. The camera will increase the aperture if necessary to compensate for the fast shutter.
Portrait mode
One of the most common features on the camera dial is the unmistakable portrait mode. Suitable for people and animals (but subjects in motion may look better if you shoot in sports mode). Only the most important subject that you have chosen in your plot will be in focus. If you don't know how to use aperture priority mode, try this one.
Night mode
Designed for low light shooting. If your camera also has a flash that is set to automatic mode, then most likely it will fire. The camera will automatically fire your flash to help with exposure. So expect some funky bursts of light along with movement in the frame. Turn off auto flash.
Landscape mode
The camera focuses almost the entire shooting area. If you need the entire picture to be sharp and clear, then use this mode.
In some cases, the camera may also use a slower shutter speed to compensate for the small aperture.
It's always worth using a tripod to avoid camera shake.
Until you try it yourself, you will not understand how this or that regime works. After a certain time, you will see that you like some modes more, and you use them more often. By choosing certain modes for yourself, you will be like a fish in water.
Another simple but very important tip is to read the instructions for your camera. There is a lot of useful information that relates specifically to your camera.
Using the Flash
There are two types of camera flashes - built-in and external. The first is built directly into the camera body and opens if necessary. In automatic mode, the process is regulated by the camera itself; in manual mode, you can turn on the flash using a special button (lightning), which is usually located next to the flash itself.
How flash works
The main point you should know about flash operation is its power . Obviously, it cannot shine with one power, since the level of illumination can be different. For this reason, the flash works in three stages:
- determination of lighting level;
- exposure of the frame;
- snapshot.
In other words, the flash fires three times in a row very quickly. In this case, the picture is taken with the third flash, and about 10% of people have high sensitivity to light and notice the first two flashes. Thus, in the photo such people appear with closed or half-closed eyes. The detection and exposure process is called TTL. Professional photographers know that TTL can be turned off, and then the power has to be selected manually. This is quite complicated, but more convenient, and in this case you can choose the optimal flash power.
Features of external flash
An external flash has a number of advantages over the built-in one.
- It is more powerful and can be directed at an angle or from above, which makes lighting and shadows more natural.
- Another advantage is the range. A standard flash can illuminate an object within 4-5 meters in front of you.
- An external flash provides more flexible lighting settings.
Advice! When setting up the flash, you need to set the shutter speed. Considering that at the moment of taking a picture, more light will enter the object, a long shutter speed is not needed, except in cases where this is done to obtain an unusual effect. According to experienced photographers, the optimal shutter speed when shooting with flash is 1/200-1/250.
There are two options for external flash - wireless and wired. The second option connects directly to the camera via a special connection connector. It looks like a metal socket on the top of the camera. Often it is closed with a plastic plug. You can connect the flash using a special cable, which will allow you to move the flash slightly away from the camera. Canon's cable length is 60 cm. The wireless option is the most convenient, since the photographer is not bothered by cords. In this case, a special transmitter is inserted into the flash slot, which sends a signal to the flash that it needs to fire. This transmitter contains all the power control buttons.
What is synchronization
Nowadays, flash synchronization has lost its relevance, since the entire process is automatic. The user's task is simply to make the external flash dependent on the main one. Before connecting an external flash to a Canon camera, the user needs to set its standard flash to “main” in the camera settings. To do this, hold down the “zoom” button for a few seconds, then use the scroll wheel to select “master” and confirm the selection by pressing the center button. On the flash, you need to select “slave” in the same way. Now it obeys the main one and reacts to its impulses.
Automatic shooting modes
Fully automatic mode
Indicated by AUTO or highlighted in green. Its creativity is minimal: you simply select your subject or location, zoom in, and lightly press the shutter button to let the camera select exposure. Your photo is ready. In conditions where the lighting is too low, the camera may turn on the flash to correct it. As you can see, the possibilities are indeed quite modest. But when the shooting conditions are consistent with the capabilities of the automation, you can still get pretty good pictures using it.
Since such shooting is carried out in a very simple way, without the need for a long and scrupulous setup of the camera, it will be very useful to you while traveling, when every second counts, and its most important goal is to capture the moment. The disadvantages are obvious: the camera may not focus the way you wanted it to. For example, if you focus on a person, she may well act in her own way, choosing to focus on an object that is completely secondary in the composition of the frame. Auto mode may also not cope with lighting conditions, significantly increase noise in pictures, fail to turn off the flash when it is not needed, or set the wrong shutter speed, resulting in a blurry shot.
Scene automatic modes
Your first steps towards creative freedom begin with them. They can serve very well for beginning photographers. Professionals do not need them, since they can choose the parameters that will be most suitable for a particular shot. That is why they are not provided in professional cameras at all. The capabilities of professional cameras give users much greater control over the shooting process, which is provided by settings that significantly exceed the creative potential of automatic scene modes.
But their presence in compact cameras greatly facilitates their operation, since it is very tedious to adjust the aperture and shutter speed, but setting the scene mode is extremely simple, since all you need to do is scroll the wheel to the desired pointer. If a photographer is just starting his career, then when choosing a suitable camera, you can pay attention to the number of available scenes. They will help you control the shooting process as much as your current professional knowledge allows. However, we would advise choosing a camera with manual settings. You won't always be a beginner. You'll definitely want more and come back for a camera with manual settings. In addition, if you choose it, you will be able to quickly begin mastering the modes in which real professionals work.
Portrait
When shooting in portrait mode, the camera focuses on the foreground of the frame, while the background remains out of focus. The distance between the main object and the background visually increases. As a result, attention is focused on the main subject of the photo. To achieve this effect, you need to set the maximum aperture to reduce the depth of field of the frame.
Scenery
Landscapes are best photographed with a tripod. It is very important to follow this recommendation in low light conditions. The camera sets a small, closed aperture and a long shutter speed. Thanks to these parameters, there is a large depth of field, which plays a huge role in landscape photography. Focusing is most often set to infinity, and this ensures the necessary clarity of all shots.
Macro mode
Allows you to photograph small objects in detail at close range. High image clarity in this type of shooting is ensured by switching the camera's autofocus to the appropriate focus.
Night portrait
When creating such photographs, the camera carefully studies not only the main subject of the photograph, but also its background. The camera sets a slow shutter speed and turns on the flash, so its position should be well fixed.
These are the main automatic scene modes that you will find in any camera. As a rule, they are enough to create almost any subject photo. Depending on the camera model, there may be other scenes, usually more narrowly focused. For example, beach, text, fireworks. But such regimes, precisely because of their narrow focus, are auxiliary in nature.
What are their advantages? They make it possible to quickly switch to the appropriate mode. When comparing scene mode with full automatic, the advantages of the first will be obvious. You no longer depend on the behavior of the camera, but can independently set the optimal shooting settings depending on its conditions.
What about the cons? Although you control the shooting, this control, alas, is not unlimited, since the modes are still automatic. If you want to take a portrait and set the appropriate mode for this, you can get a decent shot. But this is unlikely to be an example of high photography, since the camera does not understand what aperture and depth of field will provide the best quality image and will offer you a template that is technically suitable for this type of shooting. Only the eye of a true professional can understand what settings need to be made to get the perfect photo. And only manual modes provide opportunities for them. But don't despair! For a beginner, the powers that automatic scene modes provide will be quite enough.
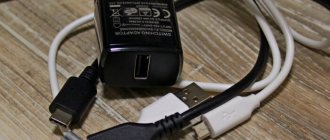
Connecting a microphone
For professional video shooting of a holiday, you will definitely need an external microphone. Most modern SLR cameras have a whole range of necessary connectors. There is an audio-video output, a microphone jack, mini-HDM and others. Accordingly, you can connect a microphone to a Canon camera through the connector labeled “mic”. All settings in the camera come down to choosing whether you want to record sound in mono or stereo. This item is located in the settings menu in the video section.
How to check the mileage of a camera
The mileage of cameras is the number of shutter times, which in turn makes it clear how worn the camera is.
For budget devices, the normal parameter is 15 thousand frames, after which you can expect a breakdown at any time, although this does not mean that it will happen in 100% of cases. For models in the expensive and mid-range segments, this parameter reaches 150 and even 200 thousand.
For a long time, it was possible to find out the mileage of a Canon camera only by disassembling the carcass. Obviously, the method is not the easiest and most dangerous, because it’s easy to disassemble, but not very good to do as it was. Nowadays, there are easier ways to view mileage, namely using computer programs.
Information about the mileage can be seen either embedded in a photograph or directly on the body of the device. It should be noted right away that Canon prefers not to include such information in photographs. There are a limited number of models that embed data into the camera. Thus, only checking the device itself will help. The best options currently are EOSMSG and EOSInfo. The programs are distributed free of charge and to use them you just need to install them on your PC. After this, the Canon camera is connected using a USB cable. In some cases, the laptop may not see the camera, then you will need to install drivers or a special program that, in addition to connecting, provides control of the Canon camera from the computer. After connecting the camera to the PC and launching the program, in the window that opens, you need to find the ShutterCount (ShutCount) item, which shows the number of shutter releases.
Some cameras do not have the ability to test this parameter at home. In this case, the best solution would be to contact a service center so that diagnostics can show the condition of the device. This is worth doing if you plan to purchase a camera secondhand, but there is no information about its previous use. The service center will be able to answer how well the camera is preserved and how long it can last.
Camera shooting mode
A good understanding of your camera's shooting modes is essential to controlling your exposure when shooting. Whether you're a beginner or an advanced hobbyist, you should know what each camera shooting mode does, when it should be used, and under what circumstances.
1) What are digital camera shooting modes?
Digital camera shooting modes allow photographers to control exposure settings, such as shutter speed, aperture, and ISO. While some modes can completely automate a camera's exposure, there are other modes that allow the photographer to manually control some or all of the exposure parameters.
In the old days there were no modes in cameras - everything was manual. Photographers had to manually set the aperture, shutter speed, and select the appropriate type of film for their cameras. To estimate the intensity and amount of light, they used special instruments that measured the light and provided exposure information that they then used in their cameras. In 1938, Kodak introduced a film camera with a built-in light meter, and in 1962, a Japanese company called "Topcon" introduced the first SLR camera, which measures light passing through the lens into the camera. This meant that photographers no longer needed to carry special indicator lights - the camera did it for them. New "auto" modes have begun to appear on cameras that estimate the amount of light passing through the lens and automatically select the correct exposure settings to create a properly displayed image.
Today, most digital cameras have different types of modes that can be used in different situations. While most simple point-and-shoot cameras focus on automatic modes, more professional cameras use modes that allow automatic and manual exposure control.
2) Types of modes
Here are the four main types of camera modes found in most digital cameras today:
- Program (P)
- Shutter priority (Tv) or (S)
- Aperture priority (Av) or (A)
- Manual (M)
3) Program mode
In Program mode, the camera automatically selects the aperture and shutter speed for you based on the amount of light passing through the lens. This mode can be used when you just need to quickly take a photo. The camera will try to balance between aperture and shutter speed, increasing and decreasing them depending on the intensity of the light. If you point the camera at a bright area, the aperture will automatically increase to a larger number and the shutter speed will be quite fast. Pointing the camera at a darker area will reduce the aperture to a lower value to keep the shutter speed fast enough. If there is not enough light, the lens aperture will remain at its lowest (maximum aperture) while the shutter speed continues to decrease until the correct exposure is achieved.
I personally never use this mode because it makes it almost impossible to control exposure.
4) Shutter priority mode
In Shutter Priority mode, you manually set the camera's shutter speed and the camera automatically selects the appropriate aperture for you based on the amount of light passing through the lens. This shooting mode is intended to be used when motion must be frozen or intentionally blurred. If there is too much light, the camera will increase the lens aperture to a larger number, which will reduce the amount of light passing through the lens. If there is not enough light, the camera will reduce the aperture to its lowest number so that more light can pass through the lens. Therefore, in shutter priority mode, the shutter speed remains the same (the one you set), while the aperture automatically increases and decreases depending on the amount of light.
I also try not to use this mode because there is a risk of getting an overexposed or underexposed image. Why? Because if there isn't enough ambient light and I set the shutter speed to a really high number, my exposure will be limited by the aperture/speed of my lens. For example, if my lens's maximum aperture is f/4.0, the camera will not be able to use a lower aperture than f/4.0 and will shoot at the fast shutter speed I manually set. The result will be an underexposed image. At the same time, if I use a very slow shutter speed when there is a lot of light, the image will be overexposed.
5) Aperture priority mode
In Aperture Priority mode, you manually set the lens aperture while the camera automatically selects the shutter speed to properly expose the image. You have complete control and can play with depth of field because you can increase or decrease the lens aperture and let the camera do the math when measuring the correct shutter speed. If there is too much light, the camera will automatically increase the shutter speed, and if you are in low light conditions, the camera will decrease the shutter speed. There's virtually no risk of overexposed or underexposed images as shutter speeds can be as fast as 30 seconds and speeds of 1/4000-1/8000th of a second (depending on the camera), which is more than sufficient for most lighting situations.
This is the mode I use 95% of the time because I have full control over the depth of field and I know the image will be exposed correctly under normal circumstances. The metering systems in most modern cameras work very well, and I let the camera calculate and control the shutter speed for me.
6) Manual mode
As the name suggests, Manual shooting mode means full manual control. In this mode, you can manually set the aperture, shutter speed and ISO to whatever value you want - the camera allows full use of the exposure controls.
This mode is typically used in situations where the camera has difficulty determining the correct exposure in extreme lighting situations. Let's say you're photographing a scene with a very bright area, the camera may get the exposure wrong and either overexpose or underexpose the rest of the image. In this case, you can switch to manual mode, then evaluate the amount of light in the darker and brighter areas and override the exposure using your own settings.
Manual shooting mode is also useful for consistency if you need to ensure that both shutter speed and aperture remain the same across multiple exposures. For example, to properly stitch a panorama, all the images you are trying to assemble must have the same shutter speed and aperture. Otherwise, some images will be darker and others will be lighter. Once you've set your shutter speed and aperture to your preference in Manual mode, your images will have consistent exposures.
7) ISO
Most cameras do not change ISO automatically in the above camera modes, so you must set it manually. If you don't want to set your ISO every time you shoot, turn on the Auto ISO function on your camera.
In practice, there are very few situations where you really need to control the ISO (except for city/landscape night photography).
 other camera modes
Many of the entry-level and semi-professional level cameras have other modes such as Portrait, Landscape, Macro, Sports and Night, depending on the camera (professional cameras do not have these modes). I won't talk about these modes for three reasons:
- They are simply a combination of the four modes above, plus some camera settings
- Different cameras have different user modes, and you don't have to get used to any of them. If you ever switch to another brand of camera or buy a professional camera, you may get lost simply because you relied too much on a certain custom mode.
- All these custom modes are evil