Portable and stationary headphones known to every user, made in the form of “droplets”, “plugs” or “shells” that completely cover the ears, have one significant drawback. They constantly break off in the most inconvenient place, namely in the area of the 3.5 (6.3) millimeter connector. In this case, the only way to correct the situation is to restore the contact or completely replace the plug itself (minijack). This is completely within the capabilities of any user who has held a soldering iron at least once.
But before you solder the plug to the headphones with 3 wires, you will need to familiarize yourself in detail with the internal structure of this transition product.
Device and disassembly
A standard 3.5 mm detachable plug consists of an internal contact part and a plastic protective casing that protects the wires from kinks and damage.
It should be distinguished from a similar device of a larger size (the diameter of the working part is 6.3 mm), called a large jack. The presented design significantly simplifies repair procedures, since soldering the headphone plug in this case comes down to the following simple steps:
- first you need to disassemble the “non-working” plug;
- then remove the damaged conductors and correctly solder new ones;
- Finally, all that remains is to return the plug to its previous form.
The only difficulty that you will have to face when soldering is the need to deal with all the conductors suitable for the contacts (in some cases their number can reach up to 6).
The situation is much more complicated with repairing non-separable plugs, with which you will have to tinker thoroughly. The fact is that in these products the internal contact base is filled with a special plastic compound, which subsequently forms a flexible holder.
In order to solder a mini-jack to a new wiring, you will first need to cut the body of the damaged part and completely remove the mini-jack from the plug itself. Secondly, use some kind of new sheath that reliably protects the plug itself and the wire from breaking.
How to fix headphones at home if the wire comes off the plug
Now I will tell you how to fix vacuum earbud headphones with your own hands if the wire has come off the plug.
I will show the repair process using the example of the Monster Beats by dr Dre headphones, which I received along with the HTC Sensation XE phone. They served faithfully for almost 4 years until the plug finally broke.
The plug in these headphones is a regular mini-jack (3.5 mm) with four contacts - right ear, left ear, microphone and general. By the way, what’s interesting is that this headset has buttons so that you can rewind songs forward and backward, but there are no special contacts on the connector for them. All the buttons somehow miraculously use the same microphone contact.
In short, now I’ll try to repair these headphones at home, and if something goes wrong, screw it! - I'll go buy new ones. Moreover, the choice today is simply huge. And especially since I’m far from an audiophile and any kind will suit me, as long as they’re comfortable.
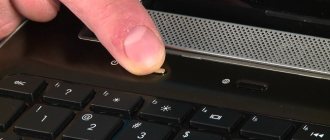
Initially, the headphones looked like this:
Headphones with a microphone and control buttons, so the plug has 4 contacts and 5 wires inside. The headset connector is, of course, non-separable.
As I already said, this repair method is only suitable if the problem is in the connector - one earphone, right or left ear, microphone does not work, the buttons are not pressed, the sound disappears if you move the wire at the plug, etc. and so on.
So, if you are firmly convinced that the headphone plug really needs to be replaced, move on.
Preparation for soldering
Regardless of the design of the damaged and disassembled plug product, its working part requires careful preparation before soldering the conductors.
To do this, you will need to take the plug remaining after disassembly with a number of contacts for connection and wires soldered to the terminals. You need to remember or sketch the order of connecting the conductor according to the color of the insulation (the so-called “pinout”).
Another important point is to check the plug for a break or short circuit in the internal wires going to three contacts (common wire - right channel - left channel). In order to make sure that it is working properly, you will need a multimeter turned on in the “Dial” mode.
When checking, each of the 2 contact pads on the tip of the disassembled plug should be connected to the corresponding connecting tap at the other end (there should be zero resistance between them).
The body part of the element is made as a monolith with a special bracket for fixing the base of the conductor in insulation and a platform for soldering the common wire (braid).
How to test wires with a multimeter
You can ring the contacts both on the plug and directly on the wire itself. For this :
- Set the ringing mode on the multimeter.
- Apply one probe to the contact on the plug responsible for the ground (we looked at the design of different types of plugs in more detail here), and apply the other one to the remaining contacts one by one and monitor the multimeter readings.
- Normally, the resistance on each headphone should be about 30-35 Ohms (depending on the cable). If the multimeter shows 1 on any contact, this means that the resistance is too high, the circuit is broken, in other words, the break point must be found on this wire.
Video:
Stripping and tinning
After disassembling the plug from the contact pads, you should unsolder the old wires (remembering their wiring first by the color of the insulation). Having disconnected unnecessary wiring, the contacts themselves must be carefully processed and excess solder removed from them.
If the old plug turns out to be faulty, it must be replaced with a new one. In this case, the contact pads should first be sanded, and then a little flux should be dropped on them and tinned with a well-heated soldering iron.
How to do without a soldering iron when repairing headphones
It often happens that a person does not have a soldering iron or socket at hand, and the headphone plug does not work. In this case, we can carry out resoldering in several non-standard, but acceptable ways.
The first method is to use it to glue wires to the mini-jack contacts. Everything is done simply and neatly. The reliability of such fastening is of course poor, and the electrical resistance of the glue can be tenths of an ohm. If the headphone impedance is 4 -16 ohms, the glue may affect the sound volume. The good thing is that the drying time for conductive glue is usually 10-15 minutes.
The second method is to heat a nail or piece of copper wire in a candle flame. This is a way for romantics : twilight, plug, headphones and you. In this case, it is better to use scented candles. But seriously, you can solder a plug using a fire and coals. The main thing is to be good and not to forget.
The third way is to make a gas soldering iron from a lighter with your own hands. You need to take a piece of single-core copper wire and attach it to the lighter so that part of the wire is in the flame. Heat is transferred over a certain distance through a copper wire, as can be seen from the photo.
If you use this method, pay special attention to the place where the wire adheres to the lighter body. A hole may form there due to heating. Be careful! For more details on how to make such a mini soldering iron from a lighter, watch the video.
It looks like I have quite thoroughly discussed the topic of how to solder a plug to headphones or a headset. Today we learned how to solder a plug and headphone speakers even without . I look forward to your questions in the comments and on the forum.
Master Pike.
Soldering and assembly
Before soldering and assembling the plug, you should familiarize yourself with the diagram for connecting the wires to the contact pads.
The photo shows the standard headphone wiring, marked by the colors of the lead conductors.
In accordance with it, the red and blue wires are soldered to the right and left capsules of the earphone, and the common braid is soldered to the body with an eyelet.
Before soldering the plug to the speakers or headphones (which is practically the same thing), you must remember to put a protective cover on the supply cable.
After soldering is completed, the casing is moved towards the plug and then screwed onto it. It is recommended to check the serviceability of the repaired unit with the same multimeter, which should be used to ring all the restored contacts (including the ground bus).
The case when the plug, in addition to audio contacts, contains a microphone channel requires special consideration.
Fill the headphone plug with glue
When all the wiring is soldered, all that remains is to fill the connector with polyethylene hot-melt adhesive (1) and, before the glue hardens, insert it into the rubber sheath (2) . It is advisable to fill the entire volume of the headphone jack, so first pour glue into the jack, and then make a drop of liquid on the connector contacts. After inserting the plug into the shell, remove the excess glue that has been squeezed out with your fingers. Now you have another 5-10 seconds to give the connector the desired position (3) . Keep it this way until the glue hardens completely. And then use a sharp knife to cut off the last remnants (4) .
I hope that the article was able to show how to repair headphones yourself. Perhaps you still don’t understand how to solder the plug to the headphones or something is left behind the scenes, feel free to express your indignation or outrage in the comments.
This method has one weak point - the use of hot melt glue . Over time, it may soften, so I recommend looking at the article: Plastic pipe as glue when repairing defective Xiaomi Piston 3
It is known that the breakage of the plug at the end of the wire is the most common malfunction of headphones.
Due to frequent kinks, strong jerks and other mechanical loads, thin wires break or tear. In this case, as a rule, one ear stops working or, as in my case, both at once.
Sometimes the common wire breaks, in which case the sound is distorted beyond recognition: high and mid frequencies almost completely disappear. This happens because the right and left amplifiers of the phone/player are turned on in antiphase and their output signals almost completely cancel each other out.
It also happens that the stereo effect simply disappears.
Often there is no sound in the ears, but the microphone works as if nothing had happened. However, if the microphone wire breaks, the control buttons on the headset cord stop working along with the microphone.
Most often, the cause of any described malfunction is a broken wire in the immediate vicinity of the plug.
Sometimes damage to the wire is visible to the naked eye, but most often it is hidden under the insulation.
Restoring (repairing) a plug with a microphone input
In the modification of headphones with a headset, in addition to audio channels, a separate line is provided for transmitting a speech signal from the built-in microphone.
If a plug with an additional microphone contact needs repair, it will have to restore three signal channels and one common channel (the so-called “ground”).
All preparatory operations and soldering itself in this case are similar to the previously described options. The challenge here is to correctly label the pins and wires to match the audio and microphone lines. You can solder them according to the same rules, but taking into account the wiring diagram of additional circuits.
Particular attention should be paid to separating (shielding) the transmission channels of the audio and microphone signals of the headphones.
Otherwise, when transmitting signals, they will begin to influence each other, causing sound distortion and reduced speech intelligibility. When installing conductors, each of the braids is combined into one common core, and then soldered to the body of the plug.
Disassembling and repairing the plug
A faulty plug is detected by kneading the incoming wire with your fingers. The headphones are connected to a mobile phone or computer, play a music file, and then begin diagnostics.
Typically, copper strands break at the entrance to the rubber or plastic casing of the plug and inside it. If, while kneading the cable, sound appears in the speakers from time to time, it means that the plug needs to be disassembled and repaired.
Recommendations: How to fix headphones yourself if one stops working
, The earphone does not work: fault diagnosis, repair methods
, DIY headphone repair
The plug restoration procedure consists of the following steps:
The plug is cut off with pliers from the headphone cable.
The purpose of the repair is to remove the metal part from the casing. The element is firmly soldered. Trying to save the old casing is unwise. It's easier to cut it lengthwise with a sharp knife.
The metal part of the plug is carefully removed from the casing so that the contacts do not break off. Soldered wires should also be saved. The color of the insulation makes it clearer where to solder the wires of the headphone cable.
In the event of a break in the wires from the contacts on the solder itself, the standard circuit shown in the photo is used for connection. The color of the insulation in the headset cable varies from manufacturer to manufacturer. Most often, the common core is in black or yellow insulation. To be sure, it is better to ring the tester from the speakers to the place where the cable is cut.
The headphones can be equipped with a microphone. In such models, instead of three, four wires are hidden under the cable braid. The connection occurs according to a different scheme, shown in the photo.
The cable cut off from the plug is stripped. First, remove the main braid and free the ends of the cores. The edges of thin wires are cleaned with a sharp knife. It is enough to remove 5 mm of the insulation length so that it is enough to solder the copper core to the plug contact.
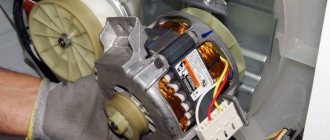
The wires are twisted from thin veins, and they are all coated with a protective varnish. This coating prevents soldering. The varnish is removed by scraping with a knife or burned with fire from a lighter. The ends of pure copper wires must be tinned. The common wire will be connected at one contact, so it is immediately soldered together.
A new housing for the plug is made from the bottom cap of a ballpoint pen. The wire is inserted through the hole for the writing rod. The put on cap is moved along the cable further from the soldering point.
Following the cap, a piece of heat-shrinkable tubing is placed on the wire. The sleeve will protect the wire near the new plug casing from breaking.
The cable cores are soldered to the plug contacts. It is important not to forget about matching the wires to the color of the insulation. Functionality is checked by calling a tester. It’s easier to plug the plug into the connector of your mobile phone or computer.
If both headphones work normally, put heat-shrink tubing on the plug contacts. It is heated with the fire of a lighter. The tube will fit tightly around the plug contacts. To be safe, you can press it with your fingers while the plastic is hot.
Finally, the inside of the cap is lubricated with epoxy resin. A little glue is applied to the heat shrink tube. The cap is moved along the cable until the back of the plug is completely inserted into it up to the limiter. After a day, the resin will harden and the headphones can be used.