Types of humidifiers
At this stage of time, there are a large number of different types of air humidifiers, and here are the main ones:
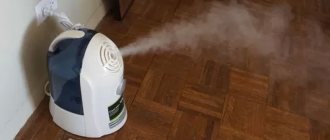
- Regular humidifier. Quite simple to operate and assemble, but at the same time quite practical. It evaporates the water that is poured into the middle and supplies it in the form of steam.
- Cold mist humidifiers. They work using cold steam, spraying the liquid poured inside with a special fan, which is equipped with a finely divided mesh.
- Ultrasonic humidifiers. Using high frequency vibrations, water is transformed into steam.
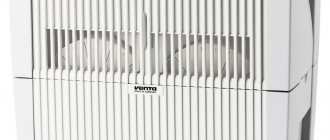
- Humidifiers-purifiers are one of the newest devices for humidifying air masses. Their uniqueness lies in the fact that they not only moisten the air masses, but also eliminate various unpleasant odors from them, in addition, they remove harmful chemical compounds and bacteria from the air masses. With the help of the aromatizers built into the device, the atmosphere becomes more comfortable. But the biggest advantage of such devices is that they humidify fairly large areas, so one humidifier is enough for the entire apartment.
Steam appliances work in the same way as an iron. The element responsible for heating the water is located inside the device. When it is heated, the water also changes its temperature, and then it evaporates and steam penetrates the room.
Using this knowledge, you can easily build an air humidifier with your own hands. At the same time, you will not need to spend your finances, since all the elements for assembly can be found at home, which will allow you to save a lot. In addition, you can create a variety of humidifiers with your own hands.
Options for homemade humidifiers
One of the most affordable ways to make a humidifier from a plastic bottle is as follows:
- Take the number of bottles according to the batteries available in the house; the more such designs there are, the more likely it is that you will be able to cope with the task.
- Afterwards, you need to place the bottle horizontally, visually divide it into two parts and make a cut in the top, with a diameter of about 10 cm. The middle of the container should be cut out.
- After this, you can take an awl or heat a nail over the fire and make several holes across the entire width of the bottle, but only so that the water that will be poured inside cannot flow out through these holes.
- To hang the bottle beautifully from the battery, you can use beautiful ribbons, but before doing this, the structure should be reinforced with tape so that it does not turn in different directions.
- Now pour water into the bottle through the slot, then you need to place one edge of a bandage or elastic bandage tape inside. We fix the second edge on the batteries.
So the design for humidifying the air with your own hands from scrap materials is ready. Now it is important to monitor the water level and add as needed.
As they say, cheap and cheerful. To achieve the desired effect, it is advisable to hang several of these devices in one room; it will be much more aesthetically pleasing than wet sheets hung around the room.
Device role
Before you build a homemade humidifier at home, it is important to know why it is needed.
As a rule, the use of an air mass humidifier is necessary for the following purposes:
- to always maintain normal air humidity in the apartment, especially in winter, since heating greatly dries the air and it is impossible to humidify it in other ways;
- to avoid respiratory diseases, allergies and other consequences of dry air;
- eliminates the influenza virus;
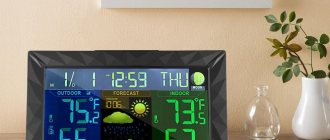
- the device is used to maintain air humidification at a level of 40-70%, which is considered optimal humidification (it is these values of air humidification that have a positive effect on the general condition and performance of a person);
- can serve as a night light if equipped for this purpose;
- serves as protection against bacteria and viruses;
- can be used as a flavoring agent;
- used to release steam safely;
- used to strengthen the body of children;
- serves to improve skin condition;
- gives life and development to indoor plants;
- prevents things made of wood and paper from deteriorating and quickly being destroyed;
- used to purify the air from unpleasant odors.
DIY industrial air humidifier
To independently make a device that is not inferior in performance to industrial humidifiers, you will need to assemble the following parts:
- a plastic container with a lid, with a volume of at least 16 liters;
- corners for ventilation pipes (2 pcs.);
- power supply (AC 220 – DC 45V – 350 W);
- cord and plug for connecting to a 220 V network (2 pcs.);
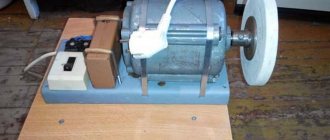
- a fan with a capacity of at least 105 cubic meters per hour;
- plastic tubes with diameter;
- bases for installing pipes (2 pcs.);
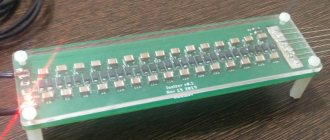
- ultrasonic air humidifier module with a capacity of at least 7 liters per hour;
- float valve.
You can adjust the output voltage using a variable resistor.
The assembly of an industrial humidifier is carried out according to the following scheme:
- In one of the walls of the container, in the middle of its height, make a hole for installing a float valve.
- Drill a hole in the cover and bring out the wire. To improve the quality of operation of the future humidifier, cover the lid with a seal, this will prevent air “leakage”.
- Seal the hole for the wire using a rubber seal.
- Make another hole in the lid through which the pipes will be installed. Use silicone sealant to seal the gap between their bases and the lid.
- Cut the pipe in half so that the length of the parts is at least 30 cm. One of them is intended for installation between the cover and the fan, the other is located at the outlet.
- Install the fan so that the blades are at least 20 cm from the water, otherwise splashes will damage the mechanism.
- Place the module in the container and secure it. Then adjust the float valve so that the liquid level is maintained 10 mm higher than the module shut-off sensor.
- Observing the polarity, connect the device to the power supply, and then connect the 220V cord to the unit connectors.
- Adjust the unit's output voltage to 45 V using a variable resistor. Carry out this manipulation under load.
When assembling the humidifier, remember that the power supply must be placed in a place protected from moisture. If you did everything correctly, the device will cope with its functions perfectly and humidified air will regularly enter the room. If you are not confident in your abilities, use simple options, for example, a wet towel or containers of water placed on the radiator.
Do-it-yourself air humidifier and using improvised means: types
To soften the microclimate of your home and make the air more humid, you should use a humidifier.
This device is very relevant during the heating season, since hot radiators can significantly dry out the air, destroying oxygen.
There are several types of devices: steam, ultrasonic, cold evaporation. Each option has its own design and method of air humidification. Homemade humidifiers can become high-quality analogues to industrial goods.
Among homemade devices, certain types also stand out:
- Devices that are attached to the battery.
- Cold evaporation devices.
- Air washing.
Each design involves the use of water and additional elements that help moisture evaporate.
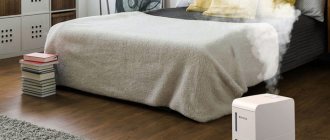
Air humidifier for battery
The principle of “operation” of an air humidifier, which operates thanks to a heating battery, is quite simple. Due to the fact that the temperature of the heating element is very high, moisture evaporates.
There are several options for arranging such a unit. Usually you need a container for water and textiles from which the moisture will evaporate. Other details may be needed.
The simplest DIY battery-powered humidifiers
To make a humidifier attached to a battery, you will need the simplest equipment: fabric, rope, container. Production will take about 5-10 minutes.
What should be done:
- Cut a piece of fabric that will cover 50-70% of the battery surface.
- Cut the rope into 2-3 equal parts.
- Attach the rope to the fabric at the corners.
- Tie the ropes to the top of the battery. The fabric should cover the surface of the heating element and touch the floor.
- Pour water into a container, place batteries at the bottom, and lower the bottom of a piece of fabric into this container.
The water from the container will hydrate the fabric, maintaining the moisture level. The pipe will heat up, evaporating moisture.
Water containers
You can make a completely simple humidifier using any suitable container. The only drawback may be low efficiency. But it's free.
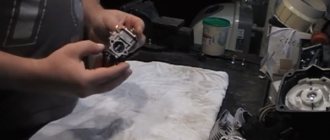
DIY ultrasonic humidifier
You can make your own ultrasonic humidifier using fairly simple parts.
To make an ultrasonic humidifier, you will need a number of special materials. The device consists of:
- containers made of plastic material with a volume of 5 to 10 liters;
- flexible pipe (you can use corrugated pipe);
- ultrasonic transducer;
- stabilizer;
- computer cooler;
- power supply;
- aluminum corner;
- plastic glass;
- ring from a children's pyramid toy.
The option is certainly expensive, but in any case, a homemade humidifier will cost less than a device purchased in a store. Device assembly:
- Use a drill to make holes in the lid of the container. They are needed for the steam generator wire, fan mounting and outlet tube.
- Place a fan on the container and insert the end of the corrugated tube into the other hole.
- Place the steam generator on a floating platform. It can be made from a plastic glass and a “donut” from a children’s pyramid toy. Insert the toy element into the glass, having previously drilled a hole in the bottom, to which then attach a piece of fabric with an elastic band (it will serve as a filter). This structure must be constantly in water for the humidifier to work smoothly.
The device will operate under a voltage of 24 V, and for the fan to function, you need 12 V. Power is provided using a stabilizer chip. It will be better if the circuit and speed control knob are located under the aluminum corner.
A homemade air humidifier does not require constant maintenance, it is easy to operate, the main condition is to use distilled water.