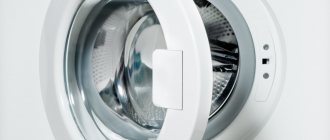
Situations often arise when owners have to urgently do something about the washing machine. For example, you need to find out what is broken, and without disassembling it it is almost impossible to do this. But many people disassemble the car incorrectly, and, consequently, subsequently reassemble it just as incorrectly, which may well cause more serious malfunctions.
Today we will find out how to disassemble washing machines of the German brand Bosch, which are of good quality (like other German equipment), but are very expensive.
Where to begin
Despite the fact that we want to get down to business as soon as possible, we must note that the best place to start is by preparing all those tools that may be required during the disassembly and subsequent assembly process. Their list is quite small.
During the work you may need the following tools:
- wrenches and wrenches of different sizes,
- a hammer or several hammers (small, medium and large, depending on the model of the machine and the nature of the breakdown),
- several screwdrivers with Phillips and straight slots (in the washing machine there may be parts screwed with screws of different threads and diameters),
- pliers
Preparing for disassembly
To properly disassemble a Bosch washing machine, you must first become familiar with its structure. By imagining where this or that element is located, it is easier to carry out dismantling work. Washing machines Bosch Maxx 6 (Bosch Max 6), Bosch Maxx 5 (Bosch Max 5), Bosch Maxx 4 (Bosch Max 4) and many other modifications of this brand are disassembled according to the same scheme.
Before you disassemble your Bosch washing machine, you need to stock up on all the tools that you will need during the process:
- Wrenches - wrenches and adjustable ones. The sizes are different. It is advisable to have a whole set.
- With a hammer, or even better, several hammers of different sizes. Which one to use depends on the type of malfunction and modification of the SM.
- Screwdrivers. Since there are elements in the washing machine that are secured with different screws, you will need two types of screwdrivers - Phillips, hexagonal, and slotted.
- With pliers.
- With a chisel.
The device will have to be pulled out into free space - to disassemble such bulky equipment, you need a lot of space.
We start by removing the top panel
In general, all washing machines are designed approximately the same, so the disassembly sequence we are describing now can be useful for owners of most modern machines. However, the main hero of our material is the Bosch brand, or more precisely, the washing machines it produces.
We recommend starting disassembly by removing the top cover, because, firstly, this is one of the simplest operations, and secondly, the top cover gives access to many important parts of the washing machine hidden inside, for example, the control panel.
So, first the top panel is removed. To do this, simply unscrew a few screws that hold it and slide it, and then completely remove the cover.
Troubleshooting the most common problems
The most common breakdowns that occur with vertical washing machines from Ariston, Zanussi and other brands are all kinds of leaks, as well as bearing deformation.
Repairing leaks
To eliminate most problems that cause leaks in a vertical washing machine, it is not necessary to completely disassemble the body. To find out where the water is leaking from, you need to:
For further work, you will need to remove the side panels of the washing machine to gain access to the internal components.
Replacing bearings
Unlike front-loading washing machines, top-loading equipment does not require removing the tank from the housing to replace bearings. Here you need to do the following:
When installing a new bearing, the seat must be thoroughly lubricated.
We remove what we usually use to manage
Now things are back to normal again. At the third stage, we dismantle the control panel - the part where all the buttons, indicators and display are located. It is important to be careful not to yank the control panel too much from side to side: we don't just want to disassemble the washing machine and forget about it.
Our goal is to return the assistant of German origin to her ability to work. But before removing the control panel, you need to remove the detergent tray - in Bosch washing machines, the screw holding the panel is hidden behind it. Only after all the screws have been removed can you try to lift the control panel with a slight movement.
Again, everything must be done carefully so as not to damage the wires and contacts. If the panel gives in, then it is enough to hang it on a special hook built into the side of the washing machine for such cases and forget about it until assembly.
In general, you can also disconnect the control panel from all communications, but this is usually only required if the fault affects the control panel itself. There are plenty of detailed instructions on how to disable the control panel on the Internet.
Installation
Hammering bearings using a chisel
Clean the bushing that contained the bearings and dry it. After purchasing a new repair kit, we begin installation. We carry out the work in reverse order. First we install the outer one.
At the first stage, you can use the old copy and strike it. Then we use a drift.
Important! Apply only to the outer rim of the bearing!
Move in a circle, striking evenly. You can tell that it is in place by a characteristic metallic sound. It will rest against the bushing.
Lubricant on the oil seal seat
We mount the second one in the same way. The oil seal is the easiest to install. Then generously apply the special lubricant from the repair kit to the inner rim. You also need to lubricate the oil seal seat on the shaft.
Installed oil seal with lubricant applied
After this, we begin assembling the tank, and then the washing machine. We perform all stages sequentially, strictly in reverse order.
Expert opinion
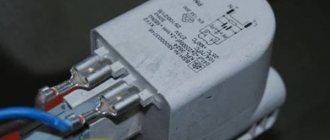
Important point! Be sure to use thread locker when installing the pulley!
Thread locker
As you can see, repairs to replace bearings in a Bosch washing machine are very labor-intensive, but not expensive. In conclusion, we recommend watching the video tutorial.
Finally, we note that Bosch began to produce cars with a non-removable glued tank, in particular the Advantiqx model, which is assembled in Spain. The Turkish assembly is also not subject to disassembly. In such SMAs, the tank assembly is either replaced or sawn.
Removing the front panel
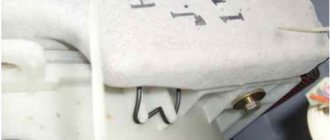
After dismantling the control panel, it is the turn of the front panel to separate from the body in order to allow the owner or technician to repair the breakdown. In order to remove the panel itself, you first need to disconnect the cuff - the gray part directly behind the door, but in front of the tank.
Usually, in order to disconnect it, it is enough to find and loosen the spring holding it. In Bosch washing machines, this small part is most often hidden somewhere near the door lock. When the spring is found, the cuff can be removed and tucked inside the tank - this way it will not get lost in the bustle of work.
After this, you need to unscrew all the screws on the front panel in order to actually remove it. In addition, you also need to remove the door lock. Simply pry it with a screwdriver and pull it out, and then, if possible, disconnect it from the wires. Now the front panel can be safely removed.
Preparing to repair a Bosch car
Before you disassemble your Bosch washing machine, you need to properly prepare for this. You must imagine the CM diagram and the elements that will have to be removed.
The disassembly scheme is identical for different car models: Bosch Maxx 4, Bosch Maxx 5, Bosch Maxx 6.
What stages of disassembly do you have to go through:
- Remove the covers: top, back and front.
- Pull out the detergent tray.
- Remove the control panel.
- Remove the motor, intake valve, pressure sensor.
- Disconnect connectors and wiring.
- Disconnect the pipes and hoses.
- Unscrew the weights and supports.
- Remove the cuff clamp, take out the UBL.
- Remove and disassemble the tank.
What tools will you need:
- Screwdrivers: slotted, Phillips, hex.
- Hammer, chisel.
- Torx keys.
- Wire cutters.
- Pliers.
To disassemble the Bosch washing machine you will need enough space.
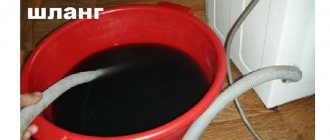
Disconnect the washing machine from the network and turn off the water supply. Then prepare a container, unscrew the inlet hose from the SMA body and drain the remaining water into it. Go around the car, open the hatch on the front panel from the bottom. Unscrew the filter and drain the water from it.
The preparatory stage is over, all that remains is to move the washing machine away so that it is convenient to move around.
Remove the last part of the case that needs to be removed - the back panel
Removing the back panel is just as easy as removing the top and bottom covers - you just need to unscrew a few screws and then actually remove the panel. Too simple compared to what needs to be done. The body of the washing machine has been dismantled, now you can begin the main part of disassembly - removing the insides.
Disassembling a top-loading washing machine
Washing machines with vertical loading of laundry have other types of breakdowns. Most often, diagnostics reveal spontaneous opening of the snare drum. Corrosion of the metal block is often encountered, which also damages household appliances and leads to breakdowns of the moving unit during the washing process and the bearing unit during rotation of the drum.
You should be aware that top-loading units often suffer from loss of elasticity of the upper door sealing rubber. As a result, its deformation is observed, after washing, puddles form on the floor, and rust appears on the body. To fix this problem, you will need to dismantle the control panel and replace the old seal with a new one. Then put the panel in place and check the functionality of the equipment.
Disassembling a top-loading washing machine has its own characteristics. Such equipment can also be repaired at home, subject to certain rules and safety precautions.
During the disassembly process, residual water will leak out, so you should stock up on a rag and a basin.
To independently disassemble the washing machine, home craftsmen need to follow a certain algorithm of actions:
The screws on the side walls of the device are unscrewed. The working unit is carefully moved towards itself, and all the wires are disconnected (after marking the input and output of each wire with a colored marker, and taking a photo of the original network). The control panel is dismantled. The top and side walls are removed. The fastening clamp is detached. Carefully, taking care not to damage it, remove the plastic casing.
During the process, it is very important to remember (photograph) the sequence of work and the place of attachment, the location of all parts, conductors and motor elements. You can begin to repair and replace broken elements
Upon completion of the work, the device is assembled according to the reverse order of dismantling. After assembly, the functionality of the mechanisms is checked
You can begin to repair and replace broken elements. Upon completion of the work, the device is assembled according to the reverse order of dismantling. After assembly, the functionality of the mechanisms is checked.
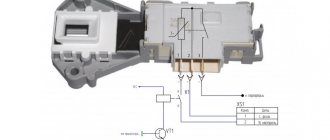
We turn off the thermal electric heater - the most important “organ” of the machine
We gained access to the most important parts of the Bosch washing machine. The first one we turn off is the thermal electric heater (TEH), so as not to damage the wires: replacing the heating element will be very expensive, so nothing can be messed up or broken. To be sure, all the wires can be photographed.
The heater can be found somewhere in the tank area, since it is responsible for the temperature of the water in the washing machine tank. There will be no heating element - the washing machine will either refuse to wash at all, or will only wash with cold water. However, the heating element must be turned off during complete disassembly as we indicated: by sequentially disconnecting the wiring, having previously recorded the order.
DIY repair
So, you have prepared everything you need, get to work.
Remove the top cover of the Bosch washing machine
Take a Phillips or hex screwdriver and remove two screws from the back of the machine. Now slide the cover forward and lift it up. Be careful, the edges of the panel may be sharp. Set it aside.
Disconnect the control panel
Moving to the front, pull out the powder dispenser tray. Press the latch in the center, pull it towards you and remove it from the case.
Remove the bottom cover. It is located at the bottom of the front panel. To do this, simply release the latches. Set it aside.
Remove the front panel of the Bosch machine
First of all, open the hatch door. Before disassembling the Bosch washing machine door, remove it from its hinges by unscrewing the fastening screws. This must be done so as not to damage the sunroof glass.
Bend the hatch cuff and, prying the clamp with a screwdriver, pull it out of place. Place the sealing rubber inside the drum.
Unscrew the bolts securing the door lock. Place your hand behind the body and take out the UBL. Disconnect all wires from it and set the lock aside.
After unscrewing the screws around the perimeter of the front panel, carefully remove it and put it aside.
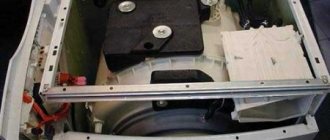
Detach the back panel and deal with the counterweights
Using a screwdriver, unscrew the bolts around the perimeter of the cover and remove it. Behind the panel you will immediately see the internal components of the Bosch washing machine.
Unscrew the screws on the top bar that connects the two parts of the body. Using a 14 mm wrench, unscrew the bolts and remove the upper counterweight. Do the same with the counterweights that are located around the hatch.
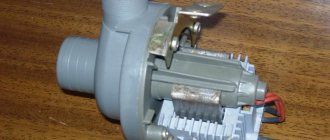
Turn off the engine
After the heating element, you can begin to turn off another, perhaps the most important part of the washing machine - the engine. Without it, any car, including high-quality ones like Bosch, is just a big basin in a metal box.
Turning off the engine is carried out according to the same scheme as turning off the heater, so we will not describe it again - all this is already in the previous paragraph.
More: Ariston washing machine repair
Get out the drum
Left a little. Now we will tell you how to disassemble the drum of a Bosch washing machine with your own hands. Fortunately, the tank in cars of this brand is collapsible.
- Disconnect the pulley. Install a support to block the pulley from rotating. Unscrew the central bolt. If it doesn't work right away, use WD40.
- Remove the bolts around the perimeter of the tank that hold the two parts together.
- Remove the top half.
- Turn the bottom of the tank over.
- Tap the rod with a hammer to remove the drum.
- The bearings are now accessible. If you need to get them out, remove the seal by prying it with a screwdriver.
- Place the chisel on the outer race of the bearing and knock it out with a hammer in a circle.
During the disassembly process, you can carefully inspect all the parts of the washing machine. If they malfunction, they must be replaced.
Often scale forms on the walls of the tank and the heater, which is now clearly visible. Before reinstalling, thoroughly clean all elements, thereby extending the service life of your SMA. Otherwise, you will soon have to start disassembling again to replace the faulty element.
As you can see, you can perform such repairs yourself. Therefore, if you are confident in your abilities, get to work.
https://www.youtube.com/watch?v=ipJpA7qClyM
A visual video on disassembling a Bosch car will help you:
We finish everything by removing the tank
If all the steps described above have been completed, you can complete the work by removing the tank. To do this, just unscrew the shock absorbers and counterweights, and then try to pull the tank out of the body. If it comes out safely, you can congratulate yourself: you have managed to disassemble the Bosch washing machine yourself!
So, we have described the process of disassembling a Bosch washing machine. Of course, it is not advisable to repair high-quality equipment yourself; it is preferable to entrust all the work to a specialist, but it is still worth knowing what to do in a pinch.
Remember that you perform all the actions described here only at your own peril and risk. No one is responsible for possible damage if you deviate from the instructions. We hope that our material was useful to you.
Troubleshooting the most common problems
The most common breakdowns that occur with vertical washing machines from Ariston, Zanussi and other brands are all kinds of leaks, as well as bearing deformation.
Repairing leaks
To eliminate most problems that cause leaks in a vertical washing machine, it is not necessary to completely disassemble the body. To find out where the water is leaking from, you need to:
For further work, you will need to remove the side panels of the washing machine to gain access to the internal components.
Replacing bearings
Unlike front-loading washing machines, top-loading equipment does not require removing the tank from the housing to replace bearings. Here you need to do the following:
When installing a new bearing, the seat must be thoroughly lubricated.
Disconnect the control panel
Moving to the front, pull out the powder dispenser tray. Press the latch in the center, pull it towards you and remove it from the case.
Next, unscrew the bolts located behind the tray, as well as the bolts on the other side of the panel. Carefully release the plastic latches (you can pry them off with a flat screwdriver) and disconnect the panel. To completely remove it, you will need to disconnect the wire connectors - it is better to photograph them in advance. But it’s easier to hang the panel on the side, on the service hook.
READ MORE: Which steam cleaner is better to buy for your home - Rating of the best 2021
Remove the bottom cover. It is located at the bottom of the front panel. To do this, simply release the latches. Set it aside.
Remove the tank
There is little time left before dismantling the tank. Disconnect the wires from the heating element. The heating element in Bosch cars is located in the front part, under the tank.
There is no need to pull out the heating element, otherwise you will tear the sealing rubber, which cannot be repaired.
Sometimes wiring is attached to the walls of the tank, secured with bundles. Cut the harnesses with wire cutters and move the wires to the side. Now you need to remove the shock absorbers.
- Place a socket on the back of the shock absorber rod to press in the latch.
- Pull the rod towards you with pliers and pull it out of the hole.
READ MORE: TOP 14 best robot vacuum cleaners in 2021: rating tips for choosing
Do the same with the second shock absorber. All that remains is to remove the tank from the springs. Lift it up by the edges of the hatch and pull it out through the front compartment.