Required Tools
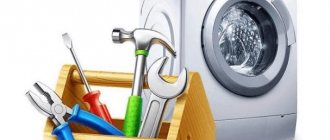
Fast and high-quality repairs depend on having a complete set of necessary tools to restore the optimal operation of the machine:
A set of screwdrivers. Pliers. Set of wrenches. Bearing puller. Inaccurate hand movement can lead to breakage or deformation of surrounding parts, so it is better to use professional tools. Pliers. New spare parts - oil seal and bearing
When purchasing a product, you need to pay attention to the manufacturer. An incorrectly selected design may not fit into the technical structure of the machine.
Replacing Samsung washing machine bearings
To replace bearings on a Samsung washing machine, you will need the following tools:
- Flathead and Phillips screwdrivers. It will be more convenient if these are cordless screwdrivers rather than regular ones
- Pliers
- Hammer
- Key for 10/13
- Hex key 8
Replacement process
Replacing the bearings of a Samsung washing machine is one of the most difficult types of repair of washing machines of this brand. The entire process will take several hours and requires a spacious room. You should not start repairs if you are not confident in your abilities.
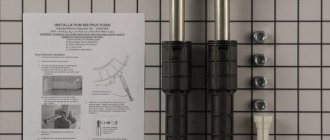
1. Remove the top cover, use a Phillips screwdriver to unscrew the two mounting bolts at the back. Pull out the powder tray by disconnecting the rubber pipes from it.
2. Remove the counterweight (stone) from the washing machine tank. Counterweight bolted to tank
3. The removed counterweight should look something like this.
4. After removing the stone, the drum should look like this. Disconnect the water supply valve
5. Place the machine on its side. At the bottom of the machine you will see a plastic tray that can be torn off and thrown away. There is no need to leave it, it only collects garbage. View of the machine after removing the pan.
6. Disconnect the shock absorbers from the body. They are attached to the bottom of the washing machine with regular bolts that need to be unscrewed.
7. Go around the machine on the other side. Disconnect the springs on which the tank is suspended
8. Remove the front panel. To do this, you need to unscrew two bolts where the powder tray is inserted, three or two bolts where the control panel connects to the top cover, and one bolt (on some models) on the right side of the control panel.
After removing the control panel, remove the O-ring on the hatch cuff with a flat-head screwdriver and unscrew the front wall. Typically there are three bolts on top and four on the bottom.
10. Remove the belt and motor from the drum
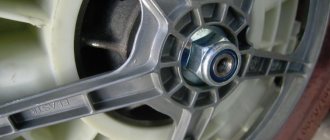
11. Place the tub with the laundry opening facing down. Unscrew and remove the pulley (the gray circle that turns the drum).
12. Disconnect shock absorbers from tank
13. Separate the tank halves. They are connected to each other with special clamps. It is advisable to mark the installation locations of the clamps to make your work easier during assembly.
14. Now you need to pull the drum out of the rear wall of the tank. Sometimes it takes some effort to push the drum out.
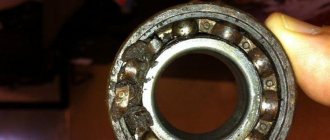
15. Knock out the bearings from the rear wall.
16. We install new bearings in place of the old ones.
The bearing replacement process is complete. Now all that remains is to put everything back in place in reverse order.
Replacing bearings at a service center
As you can see, replacing bearings is one of the most difficult types of repairs, which is best left to professionals. All our technicians have extensive experience; in most cases, we have the ability to replace bearings at the client’s home without taking the washing machine to the workshop.
All work is done in front of you. During our work, we use only Swedish SKF bearings, which will be demonstrated to you before installation. After completing the work, all old spare parts - bearings and oil seal - will remain with you.
We provide a warranty on bearing replacements from 6 months to 1 year. You can order repairs on the website, in the Washing Machine Repair section, or by phone.
Replacing washing machine bearings
Our washing machine began to make noise a long time ago during the spin cycle and we couldn’t get around to replacing the bearings, so the moment came - PIPE :)
Big Wash.
The bearings have been in trouble for a long time, the issue of replacement was postponed until the last minute, don’t do what happened with us.
Let's start disassembling the washing machine, remove the back cover by unscrewing two screws and sliding the cover up:
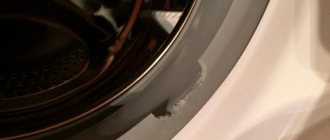
Traces of scattered rust are visible on the inside of the washer; it became clear that the bearings are leaking water from the tank, and this is very bad:
Remove the top cover by unscrewing two screws from the back and sliding it back again:
We remove the powder receiver, take out the box into which the powder is poured, to do this we press on the blue plastic.
We unscrew two screws from the face of the machine and one on the body. We remove the pipes by first releasing the clamps.
It is already clear that the box was leaking somewhere from above and for a long time, because... The body of the machine is corroded:
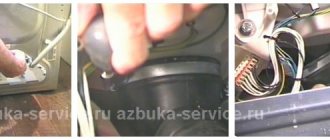
On the drum, turn off the heating element, grounding, motor and valve connector on top:
And again you can see how well it was watered through the bearings.
Next, out of ignorance, I removed everything from the top of the washing machine body to remove the tank through the top, but this is neither correct nor convenient.
The tank must be removed through the front panel; just below there will be information on how to remove the front panel with the lid.
Well, since the extra work has been done, we’ll show you how to remove the control board, valve, powder receiver box and valve, and after the fact you decide what will interfere with dismantling.
We turn off and remove another valve, but this time on the body of the machine:
We disconnect the connectors of the “brains” board, they all came apart quite easily, except for the outermost power connector, I could not disconnect it:
And we remove the front panel, it is held on by plastic clips on the top and sides, and on the bottom by mortgages:
Remove the weight from the tank at the top, unscrew the three screws:
Remove the water supply valve block. I left it on the hose, because... The tap doesn't hold:
At the bottom, the tank is fixed on two shock absorbers, press the plastic cotter pin and remove it:
Disconnect the remaining drain and water supply pipes:
Pinocchio was here:
We dismantle the sealing rubber band of the tank to the front panel, to do this we remove the metal ring and then the rubber band:
We’ll also show you how to remove the front panel of the washing machine.
Previously (above) the plastic with the control board was dismantled, now we unscrew the two screws from the top:
We remove the bottom plastic; by the way, there is also a window for cleaning the pump, this needs to be done occasionally:
Plastic clips and a lot of rust, beauty!
We unscrew the 4 screws of the metal front panel, use a potholder if the screws are rotten:
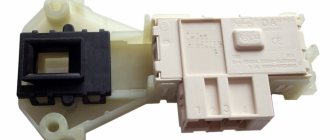
Now we lift the front panel up, it hangs on two bolts and remove it by disconnecting the latch connector:
Ugh, what disgusting corrosion!
To dismantle the tank, it remains to remove the two upper springs on which the tank hangs:
We take out the tank, it’s better to do it together:
When dismantling the tank through the front panel, you need to remove the weight from the muzzle, this will greatly facilitate its removal:
Unscrew the drum pulley with a 17 key:
We unscrew all the screws around the perimeter of the tank and divide it into two halves (this is if the tank is collapsible).
For some reason there is no photo of the two halves, but there is nothing complicated there.
The heating element of the tank can be changed without disassembling the machine, simply through the back wall:
We remove the motor, we should have done this right away, but we also forgot the valve for subsequent washing of the tank:
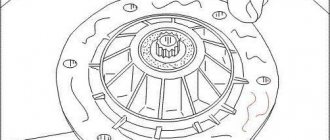
Now you need to remove the drum from the tank; it sits like a cross in the housing sleeve.
If this is a planned replacement of bearings, then you can simply remove the tank, but in our case everything was rusty and had to be knocked out.
We knock on the drum crosspiece through a piece of wood:
The drum cross is in a sad state, but it looks like it can be revived without a turner:
The condition of the tank under the drum, I suspect that there is a whole colony of bacteria here