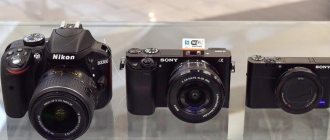
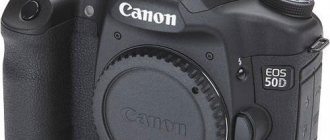
When buying your first DSLR camera, you have a great opportunity, first of all, to take high-quality photos in low light . This could be filming at home, in a cafe at a holiday, at your children's graduation party, or at an event in a large hall.
indoor photos still turn out dull, blurry and not clear. How to avoid this? How to set up your camera to take great photos? This is exactly what we will talk about in this article.
Indoor photography can be divided into two categories : with flash (external) and without flash. Each category has its own advantages and disadvantages . Let's take a closer look:
Photo indoors without flash
This is the first thing an amateur photographer encounters when purchasing a DSLR camera. After all, there is no external flash yet, and the built-in one only spoils the frame, giving it the look “as if from a point-and-shoot camera.”
Therefore, to get great photos you will need to do the following:
— Set the shooting mode to Manual . In this mode, you can adjust the shutter speed and aperture yourself.
— Open the aperture . Those. if you have a Nikon AF-S DX Nikkor 18-105 mm F 3.5-5.6 G ED VR lens, try to always keep the f/ value minimal (f/3.5).
— Go to ISO and set AUTO-ISO: 1600 . This means that the camera itself will set the ISO value (photo sensitivity) in the range from 100 to 1600.
— All that remains is to set the shutter speed correctly. If you photograph sedentary people (who are sitting, standing, posing, etc.), feel free to set the shutter speed to 1/40s - 1/60s . But if your task, for example, is to photograph children in motion, then the shutter speed should be at least 1/125 or shorter.
That's basically all. These are the basic settings you need for low light photography. Remember, if your pictures turn out dark , then you can raise the AUTO-ISO to 2000 or higher, and also set a longer shutter speed, say 1/20s - 1/10s . (but in this case, you need to hold the camera steady so as not to get blurry shots due to hand shake).
The main thing is practice ! Remember, if you are shooting during the day, try to place your subject next to open large windows and sources of natural light. In this case, the results will be much better if the windows are covered with curtains. In the dark, try to turn on all kinds of lamps/chandeliers/lights, etc. to ensure a large amount of light falls on the camera sensor.
How else can you improve the quality of your photos?
You must understand that even if you buy a camera for $1000 , which comes with a standard (kit) lens, you will not always get perfect pictures. The reason for this is the lens , because This is the most important part in the camera. Basically , the quality of your photos depends only on the lens. Therefore, pay attention to high-aperture optics . For beginners, I strongly recommend purchasing a 35mm f/1.8 or 50mm f/1.8 prime lens , because... they have a huge aperture ratio, which will help you when shooting in dimly lit rooms, and their price of $200-300 will be affordable for everyone, and they also have focal lengths acceptable for shooting.
But keep in mind that using a prime lens you will not have the opportunity to “zoom”, i.e. zoom in/out. If for some reason you are not satisfied with such lenses, pay attention to fast zooms . They are much more convenient than fixes, because... They save you from having to walk back and forth to zoom in/out on your subject, but they have two drawbacks:
1. This is the price . Such lenses are much more expensive (at least 5 times) than regular 35/55mm primes.
2. Aperture . All existing zoom lenses currently have an aperture of f/2.8.
Bad weather - learning to take portraits indoors without flash
Knowing how to use flash means being able to control light in any situation. However, sometimes you can find a beautiful light that seems to be waiting for you to use it.
Natural light, unlike pulsed light, allows you to see and adjust the effect of lighting on your subject and the environment in real time. This is a great way to learn about the subtleties of light patterns, and that knowledge and experience will certainly carry over into flash portrait photography. In this article, photographer Ed Verosky helps anyone who wants to improve their skills as a portrait photographer to understand light.
Flash is capable of producing intense light for such a short duration that the photographer can see its effect on the subject in real time.
With constant lighting, you can comfortably move your lights and subject around and instantly know how those changes affect the portrait you're taking. Take a few test shots to check the exposure.
Lighting Settings
Natural light. Window light is perhaps the most beautiful light you can find in the right conditions. It can serve as a huge softbox and be used with any combination of decorations such as blinds and curtains. Simply place your subject near a window and let the light create most of the drama in the portrait.
The window light is narrowed by curtains. ISO 800, 50mm, f/2.8, 1/80 sec
Household lamps. Simple household lamps can also be used perfectly. To start, simply place your main light source in front and to the side of your subject, preferably a few inches above your subject's head. This will give you a classic lighting pattern to work with. The second light source can be located further from the subject and serve as a backlight.
Set of two household lamps without shades. The main lamp is almost directly in front of the model, directly in front of the camera. ISO 800, 50mm, f/2.8, 1/60s
Camera settings
A general tip for any indoor shoot is to think “fast and wide.” Your initial camera settings should be set to the highest possible ISO that will still produce acceptable noise levels; the widest aperture your lens allows; and the shortest working shutter speed.
Of course, each of these controls is interconnected and integral to the overall exposure, so you'll have to make some adjustments and concessions for the environment you're working in and the effect you want.
Luckily, most DSLRs now produce fairly low noise even at high ISO sensitivities, so most indoor lighting and even low natural light won't be a problem for you. Many photographers, by the way, artificially add noise to their images to replicate the look of film or otherwise reduce the ultra-clean, smooth, digital look coming out of the camera.
A simple tip: don't worry about noise as long as it doesn't interfere with the image you're trying to create.
Another thing that will really help in creating beautiful low light portraits is a fast lens. By “fast” we mean a lens with an aperture of at least f/2.8. The wider it opens, the more light the lens transmits in a given unit of time. This will give you more freedom with ISO settings (since they don't have to be as high to compensate for less light passing through the lens), and faster shutter speeds (since they don't have to be as low as to compensate for less light passing through lens).
Shutter speed is an important factor not only because of its effect on overall exposure, but also because of the potential for blur at lower values. However, as with ISO, you need to achieve the effect of a "less than optimal" shutter speed. Sometimes you'll find that a blurry image is a pretty good artistic effect. Every portrait doesn't have to be sharp.
A bare household light bulb was used to the left of the camera to illuminate the model from one side and the background at the same time. The main light comes from the camera on the right. ISO 800, 85 mm, f/1.8, 1/60 sec
So, keeping these factors in mind, you can try the following exposure combination as a starting point and adjust it to suit your needs:
- Camera mode: Aperture priority
- Aperture: f/2.8 (or widest for your lens)
- ISO: 800
- Shutter speed (target): 1/100 sec or faster.
In aperture priority mode, your camera automatically sets the shutter speed for you, and you control everything else. Make sure the shutter speed doesn't go so low that it creates unwanted blur. Again, these are just starting points. With a steady pose and a steady hand, the photographer is able to use shutter speeds as low as 1/15 of a second while holding the camera with his hands.
If your lighting conditions will be fairly static, manual shooting mode is recommended. Plus, you'll likely benefit from shooting in RAW (NEF) format, and important adjustments like white balance, exposure, and contrast can be made easily and with minimal loss of information in post-processing. Additionally, the selected WB setting will tell your processing software what color temperature and tint settings are best to use for each image.
Window light. ISO 800, 50 mm, f/4, 1/200 s
Post-processing
Aside from the creative post-processing possible with your natural light images, there are some things that are best addressed at the outset.
White Balance: Not all light sources have the same color temperature. Despite what they look like to our eyes, the camera will record different types of home lighting (fluorescent, tungsten, daylight balanced) and natural light (sunset, cloudy, shadow), creating different color casts, so if you're shooting a portrait using bright tungsten light as the main source, but you have strong window light coming in in the background, you may end up with an unwanted color mixture. Luckily, it's possible to correct these types of color mismatches in post-processing by making general selections of white balance settings in software and selectively changing the colors in certain parts of the image.
Noise problems
If you've had to use very high ISO settings to get your shots and need to reduce noise, there are a number of good built-in, standalone and additional software options. For example, Ed occasionally uses noise reduction tools in Lightroom or, for example, in the Photoshop Noise Ninja plugin.
Conclusion
Unlike shooting outdoors, working indoors without a flash can present some challenges due to low light conditions. By using some of the tips above, you can overcome the challenges of low-light portrait photography and produce stunning images.
Photo indoors with flash
No matter how much you love shooting without flash , even with professional high-aperture optics, there is not always enough lighting to take a good shot. For example, in this photo, taken indoors , you can’t do without a flash, although it was shot with a professional fast zoom lens Nikkor 24-70 f/2.8 , costing more than $1800:
I would like to immediately note that by flash we mean not a built-in flash, but an external flash . Only with it you can achieve excellent results by evenly illuminating the subject. When shooting with an external flash, you should set the following settings:
— Shooting mode: Aperture priority ( A - in Nikon models, Av - in Canon models on the mode dial). This mode allows us to adjust only the aperture, and the camera sets the shutter speed itself.
— If you are not yet well versed in ISO settings, you should set AUTO-ISO: 800 , or even less, because When shooting with flash, you don't need high ISO values.
— Set the flash pulse power . This is done on the flash itself using the more/less buttons, i.e. If you get dark images, set the pulse power to plus (+); if you get very overexposed images, set them to minus (-).
We've sorted out the settings, now we need to understand the technique of shooting with an external flash . Its main advantage is the rotating head , which allows you to direct the light pulse in different directions.
Always try to point the flash head not directly at the subject, but to the side , so that the light reflects off the nearest wall and falls evenly on the subject. Surely you have noticed that professional photographers always have the flash head turned up/towards the side? This is done in order to reflect light from the ceiling/walls and evenly illuminate the person being photographed.
When you simply have nowhere to reflect the light , i.e. There are no walls next to the subject, and the ceilings are too high, take out the reflector (white paper, found in almost all modern flashes). The light will be reflected from it and also fall evenly on the person.
Pointing the flash head directly “ at the forehead ” is only worthwhile in cases where you are far from the subject being photographed (more than 3-4 meters).
CONCLUSION
Analyzing this article, we can come to the conclusion that the ideal option for indoor photography would be to have both high-aperture optics and a good external flash . After all, high-aperture optics allow you to take excellent shots with complete immersion in the atmosphere of the image, i.e. “as is”, the photographs come out alive and real. And the use of an external flash will always come in handy in those moments when the illumination of the room is extremely low and no optics can cope with its task.
And if you combine these two methods (shooting with high-aperture optics + external flash), you can get such wonderful shots:
Do you have any questions about indoor photography or interior photography? You can ask them in the comments to this article, consultations are free and free of charge for everyone! © Phototricks.ru
How to take photos in the dark
Taking interesting pictures in dark rooms
Have you been invited to photograph a party taking place in an apartment with insufficient lighting? Additionally, don't have anything suitable to use as a background? Do not despair. You can take beautiful pictures even in such difficult conditions. two flashes with color filters and a radio synchronizer on hand . If flashes are not equipped with a radio receiver, then you will also need triggers for synchronization.
Place the first flash on the camera, and place the second behind the person you want to photograph. When you use colored filters, you'll get a multi-colored backlight that will outline the shape of your figure, creating a solid glow behind it. If you have a lot of flashes, you can experiment with color schemes.
Spectacular night shots and videos using a DSLR
When shooting at night, it is very important to have a fast lens . If the optical clarity is mediocre, the camera will be forced to set a longer shutter speed, which can result in blurry pictures. You can purchase an inexpensive Canon EF 50mm lens with a minimum aperture of 1.8. If you don't want to spend money on new optics, take care to get rid of camera shake while shooting. Use a tripod.
But the most important thing when shooting in the evening and at night is lighting. If you're shooting in the city, there shouldn't be any problems finding light sources. However, when shooting in the forest, in the field or in areas where you have no light sources, you must take care of the lighting in advance. Using a flashlight or battery-powered deflector, you can build a small softbox.
Photography in the evening and at night
If it's dark outside, you'll have to open the aperture to maximum . Remember that the depth of field (DOF) will become smaller. However, this is enough for shooting evening portraits. But to capture evening and night landscapes, it is better to increase the shutter speed .
Beginners can select the semi-automatic "P" mode. When using this mode, your photos will not turn out too dark, since in this mode the exposure time is set by the camera. Experienced users are better off using manual settings.
The sensitivity should not be raised above 800 ISO , otherwise the final photos will contain unwanted noise, so for evening shooting, try to choose fast lenses. As for the backlight, it is better to use external light or a flash with ETTL , which can instantly respond to spontaneous changes in ambient light. At the same time, you will be more mobile than with floor light sources.
Photo: Coka, Tomasz Zajda/Fotolia.com


