DEAR BUYER...
Page 2
- Image
- Text
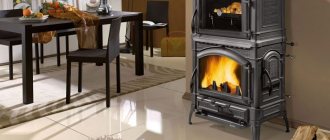
DEAR BUYER!
Thank you for choosing the products of the Darina brand. We are proud of our products and put a piece of our soul into the Darina stoves, creating a reliable and beautiful assistant in your kitchen. They choose us and recommend us to their friends, and today millions of families have already appreciated the high quality of our products, a wide range of models, and an optimal and fair pricing policy. We consider the main focus of our work to be improving the quality of life of customers through the harmonious interaction of technology and people. Comfort and safety are the components of impeccable quality, thanks to which “Darina” will serve you for many years!
Household gas stove type GM meets the requirements of TU4858-007-
53500398-2006, GOST R 50696-2006, GOST R 52161.1-2004, GOST R 52161.2.6-
2006, GOST R 51317.3.3-2008, GOST R 51318.14.1-2006, GOST R 51318.14.2-
2006, GOST R 51317.3.2-2006, “Technical regulations on safety
devices operating on gaseous fuel" and "Unified sanitary
epidemiological and hygienic requirements for goods subject to
sanitary and epidemiological supervision".
GM Owner's Manual...
Page 3
- Image
- Text
Operating manual GM241 00 000 RE
1
CONTENT
Equipment of slab models…………………………………………………………………….on the cover
1.Important recommendations…………………………………………………………………………………………………………2
2.Safety requirements………………………………………………………………………………………..3
3.Installation…………………………………………………………………………………………………………4
4.Connection……………………………………………………………………………………………………………..5
4.1. Connection using a flexible connection hose…………………………..5
4.2. Connecting the power cord………………………………………………………………………………………7
5. Design and principle of operation…………………………………………………………………………………7
6.Style……………………………………………………………………………………………………………..8
7.Completeness…………………………………………………………………………………………………………..8
8.Characteristics…………………………………………………………………………………………………………8
8.1. Technical characteristics………………………………………………………………………………..8
8.2. Operating characteristics……………………………………………………………………………….10
9.Control panel…………………………………………………………………………………………………………..10
10.Table burners………………………………………………………………………………………………………….11
10.1. Ignition of the table burner with the “Gas control” device…………………………………..11
10.2. Ignition of the table burner without the “Gas control” device………………………………….11
10.3. Ignition of the table burner with automatic ignition with the “Gas control” device………11
10.4. Ignition of the table burner with automatic ignition without the “Gas control” device………12
11.Electric ignition………………………………………………………………………………………………………………….12
12.Oven……………………………………………………………………………………………………………………………………12
12.1. Setting the oven temperature………………………………………………………………………………….13
12.2. Lighting the oven burners………………………………………………………………………………………..13
12.2.1. Lighting the main oven burner………………………………………………………..13
12.2.2. Ignition of the main burner of the oven (stove with electric ignition)………………….13
12.2.3. Lighting the grill burner………………………………………………………………………………………..14
12.2.4. Ignition of the grill burner (stove with electric ignition)………………………………………………………14
13.Spit…………………………………………………………………………………………………………………….14
14. Mechanical timer…………………………………………………………………………………………..15
15.Electronic timer………………………………………………………………………………………………………………….15
15.1. Setting the current time…………………………………………………………………………………..15
15.2. Setting the time interval counting mode………………………………………….16
16. Stove cover…………………………………………………………………………………………………………………..16
17.Utility compartment…………………………………………………………………………………………………………16
18.Recommendations…………………………………………………………………………………………..17
18.1. On the use of table burners……………………………………………………………………………….17
18.2. On using oven burners…………………………………………………………………………………17
18.2.1. When preparing pies……………………………………………………………………………………….18
18.2.1.1. General rules……………………………………………………………………………………….18
18.2.2. When cooking meat and fish…………………………………………………………………………………18
18.3. On using the grill burner……………………………………………………………………………….19
18.4. On using a grill burner with a spit……………………………………………………………………..19
19.Cleaning the stove………………………………………………………………………………………………………………….19
20.Replacing the lamp…………………………………………………………………………………………………………………..22
21.If something is wrong……………………………………………………………………………………………..23
22. Recommendations for repair services………………………………………………………………………………….24
22.1. Replacing the nozzle………………………………………………………………………………24
22.2. Replacing the low flame screws……………………………………………………………..25
22.3. Setting up adjustable VMP burners of the table and oven………………………………….25
22.4. Safety device………………………………………………………………………………..25
23.Transportation and storage………………………………………………………………………………26
24.Disposal………………………………………………………………………………………………………….26
25. Factory details……………………………………………………………………………………………………………..2
6
26.List of national standards…………………………………………………………………………………27
Information in Kazakh………………………………………………………………………………….28
Mechanical timer, Electronic timer
Page 17
- Image
- Text
Operating manual GM141 00 000 RE
15
MECHANICAL TIMER. ELECTRONIC TIMER
8.
Turn on the spit drive by pressing the button on the control panel, while the
There is a lighting lamp.
9.
The product attached to the rod must be located exactly under the grill burner.
During cooking, the door must be closed and the handle must be removed.
Attention!
!
Forced manual rotation of an electrically driven spit is prohibited.
Puppy!
14. MECHANICAL TIMER
The timer is used to set the cooking time interval and
sound notification.
■ To set the timer for a specific time, you must turn the knob from
Positions “0” to “60”. Then, turning in the opposite direction, set the handle to the required
a custom time stamp after which the call will ring.
15. ELECTRONIC TIMER
The timer is used to display the current time and to set the time
cooking interval in the oven or on one of the burners (front
right) and sound notification.
■ The stoves are equipped with a three-button timer.
■ After connecting the stove to the mains, the timer indicator starts flashing. He
is in standby mode. When you press the “ ” button you will turn on the timer.
The indicator will stop flashing.
15.1. Setting the current time:
1.
Press the “ ” button - the mode for setting the current time for
three-button timer, for a five-button timer press the buttons simultaneously
" ", " " and hold for 3 to 5 seconds;
2.
By pressing the “+” or “-” buttons, set the current time.
Briefly pressing the buttons changes the indicator readings by 1 minute;
3.
After 10 seconds have passed since the last button press, the transition occurs.
timer into current time counting mode.
15.2. Setting the time interval counting mode (timer mode):
1.
Press the “+” button - the timer mode is activated; at the same time the indicator lights up
zeros;
2. Using the “+” or “-” buttons, without waiting, set the required temporary
interval (up to 10 hours), each time you press the button the interval increases or
decreases by 10 sec. The “ ” icon appears on the indicator;
3. After 10 seconds have passed since the last button press, the mode turns on
time interval after which automatic shutdown occurs
power supply and an audible signal, which is stopped by pressing the “ ” button.
Safety requirements
Page 5
- Image
- Text
Operating manual GM241 00 000 RE
3
SAFETY REQUIREMENTS
Attention!
!
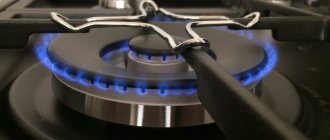
The table burner flame goes out when the air flow speed exceeds 2.4 m/s.
!
All stove models with electrical equipment are made according to class I
protection against electric shock and must be plugged into an electrical outlet
with grounding.
!
Models of stoves with a gas control device ensure safe
difficulty of using the stove in case of sudden extinguishing of the flame on the burner,
in this case, the gas supply to the burner stops.
To avoid fire, it is strictly PROHIBITED
:
► Use a faulty stove.
► Look for gas leaks using matches and other open flames.
► Install the stove in places with an increased risk of fire hazard (close to
suitable for wooden surfaces covered with wallpaper, flammable plastic, etc.).
► Leave the stove unattended while it is running.
► Dry laundry over the stove.
► Use the stove to heat the room.
► Store flammable objects (combustible substances, gas) near the stove
rosesols, paper, rags, etc.).
► Allow children to operate the stove.
2. SAFETY REQUIREMENTS
■ In the event of a fire, turn off the general gas supply valve and the taps on the stove.
those, call the fire department by phone
01
and take measures to extinguish the fire.
■ If there are household electrical appliances connected to the network near the stove
(electric lighters, toasters, coffee grinders, etc.), make sure that their wire does not get into
burner flame zone.
Attention!
!
The most common accidents associated with
stove, are burns.
Typically they occur:
- when touching hot parts of the stove;
— when boiling liquids splash;
- when dishes standing on the front burners tip over.
■ Be careful and watch your kids especially closely, or better yet
Keep them out of the kitchen while the stove is running or cooling down.
■ During operation of the stove, table and oven burners, as well as the door glass and some
parts of the front panel become very hot and retain heat for a considerable time
after switching off. Be careful not to touch them and give special warning
children - possible burns.
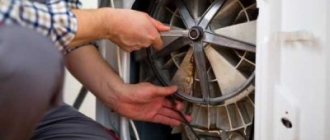
How to disassemble a gas stove?
Repairing Darin’s appliances may require certain knowledge and skills, which is why it is so important to know how to properly disassemble a gas stove with your own hands. The first thing you need to do is unplug the appliance from the outlet and close the gas shut-off valve.
After ensuring your own safety, you can proceed to the next steps, sequentially disassembling each part of the equipment.
Next, we will tell you how to remove the most important elements of the case to provide access to the necessary parts of the device. Since the internal structure of all gas stoves is almost the same, the following steps are suitable for disassembling equipment of any model.
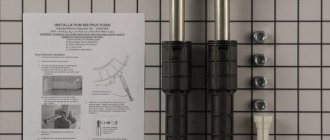
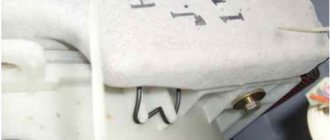
Removing the handles of the gas stove
During operation, the handles located on the control panel gradually become dirty, and grease can get not only on the surface of the switches, but also inside their housing, which is why they can be difficult to turn.
The only sure way out is to remove the handles and clean them of accumulated grease and food debris using soap or ammonia.
The most effective remedy in the fight against fatty stains is ammonia solution, for the preparation of which you will need to mix alcohol and water in a 1:1 ratio.
If the regulators are being removed, it wouldn’t hurt to soak them in the solution for at least 5 minutes, then remove any remaining dirt using the hard side of a sponge or an old toothbrush. In this case, you need to figure out how to properly remove the handles from Darin’s gas stove without damaging the body of the equipment.
The handles on Darin’s gas stove can be removed quite easily, and you don’t have to pry them off with a knife or screwdriver. First of all, turn off the gas supply valve and check that all the knobs are turned all the way. Next, we wrap our fingertips around the ring that covers the holes behind the handle, rest our phalanges of fingers on the surface of the plate, and pull toward ourselves until the handle comes off completely.
If the contamination is so severe that you cannot remove the handles yourself, you can try to carefully pry them off with a chisel or knife. However, be careful not to scratch the body of the cooker. Since the switches are plastic, do not pull them with all your force, otherwise you may simply break them.
For more information on how to remove the handles from a gas stove and what to do if they do not come off, read on.
Removing the oven door
Often the need to remove the oven door arises due to bending of the brackets, which is why it does not close well.
This situation can occur due to the structure being overloaded, for example, if a heavy object is placed on an open door. Thus, the brackets no longer perform their function of pressing the sash, and as a result, a gap appears between the door and the body of the plate.
You should not try to remove the door with a crowbar, because due to the damage left behind, you may need to replace some parts, which will entail large financial costs
Since the principle of fastening the oven door is the same for all stoves, it is worth familiarizing yourself with the uniform instructions for removing the door yourself. First of all, you will need to fully open the oven door and find the door hinge latches that hold it in place.
Next, it is important to follow the instructions presented, maintaining the sequence of actions:
- fold the door hinge latches back and slowly close the door until they rest against the slots on the door;
- pull the half-closed door towards you, while the distance between the inner wall of the door and the oven should be equal to 10-15 cm, and slowly lift it;
- We remove the hinges from their sockets on the body and remove the door without much effort.
In this case, it is important to take into account the heaviness of the door, so as not to accidentally drop it after removal.
If the door has been successfully removed, then the first thing you will need to do is assess the extent of damage to the brackets and, if necessary, purchase new parts.