How to repair a juicer yourself
The presence of a juicer on the farm will sooner or later confront the owner with the need for repairs. The relatively simple design does not always require the intervention of a specialist and allows you to repair the juicer yourself. The main thing is to have an understanding of the structure of such devices and have some experience working with electrical appliances.
Design
The nuances of the device depend on the operating principle of household spinning appliances. Most of them relate to:
- centrifugal,
- screw,
- intended for processing citrus fruits.
Centrifugal models are driven by an electric motor. Their screw analogues and options for citrus fruits can be made with manual or electric drive. Manual mechanisms are much easier to repair; electrical appliances cause more difficulties, especially when there are engine problems.
Possible faults
The most reliable branded juicers can suffer and stop functioning properly due to:
- neglect of operating rules;
- mechanical damage;
- wear of structural elements;
- voltage drops in the network.
Among the operating rules that are most often violated by users, the following prevail:
- an attempt to process products that do not meet their intended purpose;
- exceeding the loading volume for one processing;
- excessive load on the working mechanism;
- improper care after use.
All malfunctions can be divided into breakdowns that can be eliminated by simple repairs yourself and malfunctions that require the involvement of a specialist to eliminate. The first includes breakdowns as a result of mechanical damage and wear, which can be eliminated by simply replacing parts. The latter are associated with engine damage.
Trouble-shooting
If the device fails during operation, before eliminating the failure, you must disconnect it from the network and wait until it stops completely. Common malfunctions include:
- lack of response to connecting to the network;
- hum in the engine compartment and lack of shaft rotation;
- extraneous vibrations.
The device does not turn on. Check the switch, power cord, motor windings.
| Engine noises and lack of rotation | Loosen the stator fastening and check its condition |
| vibration | Check the fastening of structural elements (filter, bowl, other removable elements) |
Frequent and intense dynamic loads can accelerate the wear of structural parts and cause mechanical damage. In this case, after disassembling the structure, it is necessary to install the failed part and replace it.
Usually this:
- oil seals,
- gears,
- bearings,
- nozzles,
- net.
Drive repair
Replacing such parts is relatively easy. More serious problems include drive failure. To fix it you will need:
- remove the engine from the housing;
- conduct an external inspection;
- ring the windings.
If external parts fail, they are replaced. Most of them can be selected and reinstalled yourself. Problems with the winding will require it to be updated.
If operating rules are followed, engine failure is a relatively rare occurrence. Their occurrence may require serious intervention, which is not always justified from an economic point of view. In such cases, the best way out of the situation is to take your device to a service center and/or consult with specialists.
But in any case, to find out the causes of the malfunction and perform repairs yourself, you will need to dismantle the structure.
Disassembly
This procedure should be performed regularly after each use to remove residual cake and pulp and rinse the device. Regardless of the design features, dismantling for maintenance is usually straightforward and relatively quick. To disassemble the rotor apparatus you must:
- remove the pusher from the loading hole;
- unlock the mount;
- remove the chopper cover;
- remove the basket with the grater from the pulley and remove it from the housing;
- remove the spin tank.
A vertical squeezer with an auger is disassembled in a similar way. To dismantle its horizontal analogue, you will need to disconnect the assembly with the spin mechanism from the housing with the motor, then remove:
- feed tray;
- juice and pulp dispenser;
- auger or augers.
After dismantling, you can proceed to servicing or repairing the device by replacing the corresponding elements.
Engine dismantling
Removing it from the case is a more complicated procedure. It is performed less frequently and is associated with the need for complex repairs. Typically the drive bay is accessed from below. To extract it you need:
- remove the cover by first unscrewing the screws;
- if there is a protective casing, unlock the fastening and remove it from the housing;
- remove the engine itself.
The design diversity of models from different manufacturers does not allow us to formulate a universal disassembly/assembly scheme for the device. The best way to avoid errors and damage to the device is to follow the instructions.
Manual
The manual is a required part of the kit. In most cases, such documents are translated into the language of the consumer's country. The instructions should include sections:
- a general description of the device and its detailed diagram;
- operating rules and list of safety measures;
- preparation for use;
- disassembling and assembling the device.
If your own experience and the contents of the instructions were not enough to understand the design in detail and troubleshooting is an impossible task, it is better to contact a specialist.
Source: https://TehnoPomosh.com/dlya-kuhni/sokovyzhimalki/remont-svoimi-rukam.html
Troubleshooting algorithm and troubleshooting
If the electric juicer shows no signs of life, makes a lot of noise or vibrates, you should not immediately start disassembling it. Often the reason is very banal. The main thing is to carry out a thorough external inspection.
- It is necessary to check the presence of power in the network, the reliability of the connection of the plug to the socket and the integrity of the power cord. The latter quite often fails due to kinks or exposure to sharp objects. If damage is found on the cord, it must be replaced. In extreme cases, repair by splicing is possible. In this case, special attention should be paid to wire insulation.
- Noise and vibration of the juicer are the result of improper assembly of the device or foreign objects entering the drum.
- The hum of the motor when the drum is standing indicates the tightening of the adapter coupling fastening. As a rule, the problem is resolved by loosening this part.
Other malfunctions will most likely require disassembling the device.
How to repair a juicer with your own hands
A healthy lifestyle is not a luxury these days, which is why many people decide to purchase a juicer. Household appliances can break down, often at the most inopportune moment.
Today there are four types of juicers on the market - auger, centrifugal, combined, as well as units designed to process exclusively citrus fruits. They can effectively extract fresh juice from fruits and vegetables, and each of them has specific uses. But they can all break.
The basis of any juicer is the engine. Today, asynchronous and commutator electric motors are used. Repair of these devices is often associated with a failed engine.
If such a problem occurs, then do not panic; you can entrust the device to experienced service center technicians or try to repair it yourself. Let's look at the main types of faults.
The main components of units for extracting juice from fruits and vegetables include:
- bowl lid;
- retainer;
- grater;
- basket.
The main malfunctions of these household appliances are related to voltage surges. Since the power range at which the juicer operates is small, this reason will be a consequence of equipment failure. It will not be possible to fix the breakdown on your own; only a specialist can replace faulty components.
With frequent use of the device, wear of its components, assemblies and mechanisms occurs. In this case, they will need to be completely replaced.
Repair of the main components of the SCARLETT juicer
Repairs by type are divided into simple and complex. A simple repair consists of a number of simple and inexpensive works with the replacement of nozzles, nets, cords, lubrication and cleaning of the internal parts of the juicer. These actions will not take much effort or time.
Complex repairs consist of the following work: replacement of housing elements or couplings, repair of the engine, control board.
Structural repair at home
In this video, they will show you how juicers work. Enjoy watching!
At the heart of any model of this device is a built-in motor, which is responsible for the operation of the entire device. Today, juicers use commutator or asynchronous motors. Repair of units of this type is often necessary due to a broken motor.
Changing the mechanical part of the device is almost impossible. Let's take a closer look at the typical malfunctions of juice making devices. The advantages of an asynchronous juicer motor are that they have a very simple design, high efficiency and easy maintenance.
These motors are not as noisy during operation as brushed motors. But, unfortunately, the frequency of 50 Hz does not allow you to get more than 3000 revolutions per minute. This is a very significant limitation for juicers.
The commutator type of engine has no such restrictions. They are also smaller in size than asynchronous ones.
Their disadvantages include:
- increased noise level during operation;
- short service life.
The shaft of any type of engine contains impellers necessary to blow air over the stator coil. This is necessary so that the windings do not overheat during operation of the device. If you disassemble the device and find that such parts are missing, you can select them yourself. This way you can improve the functioning of the electric motor.
Typically, a juicer has several speeds. In induction motors this is done using a section of stator coils. Not all coils may be activated at the same time, resulting in switching the speed of the device.
Oil heater with fan. Features, cost and principle of operation can be found on our website.
Features of built-in electric cookers can be read in this article. We recommend you take a look!
Here you can find out the cost of a Roventa hair dryer with a rotating brush.
This circuit is used quite often in juicers; the efficiency depends on the correct installation of the electrical circuits.
Juicers generally do not use a starting winding, but instead use a coil-dividing circuit. In order for the motor protection to operate, it must be in full compliance with the installed relay.
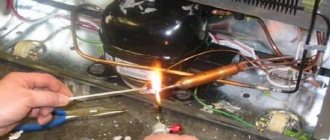
So, it is quite clear that most serious breakdowns of units concern their engines. In order to find out the cause of the malfunction and then eliminate it, it is necessary to disconnect the device from the network. Next you will need to ring the windings.
Then you need to wind the coil around the stator again. It is worth noting that the rotor does not burn out, since the current passing through it is very small. The mechanism of the juicer is so simple that only gears, seals or bearings can be damaged.
If you have not yet managed to purchase such a device, you still need to select the required configuration; we recommend paying attention to the type of engine and parts installed in it.
We also recommend watching
Source: https://tehnosektor.ru/kuhnya/remont-sokovuzhimalki-svoimi-rykami.html
How does an auger juicer work?
Inside the auger juicer there is a spiral-shaped auger. It looks like a large screw. By scrolling vegetables and fruits, the auger turns them into pulp and, using pressure, squeezes the juice through a sieve. In this case, large particles are retained on the filter. Some part of the cake still passes through it, so the result is fresh juice with pulp. The products are fed through a special window in the bowl, in which the squeezing process takes place. It contains a cone-shaped glass in which the auger is located. The walls of the glass are made in the form of a sieve, through which the juice is squeezed out. Next, the juice enters the container through a juice outlet, and the pulp is picked up by special blades and removed from under the auger.
How to disassemble a juicer with your own hands
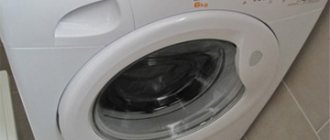
In the household appliances market, as elsewhere, there are favorites and outsiders. The Bosch company and its series of juicers called Bosch MES have been deservedly popular for several years. Feature: long service life without breakdowns and excellent price-quality ratio.
But, unfortunately, when malfunctions occur, many buyers become interested in how to disassemble this juicer. After all, it is clear that by carrying out repairs yourself, you will save money. Moreover, difficulties can arise only during the first disassembly, and then, usually, everything turns out easily and quickly.
And the breakdown is not always serious enough to call in specialists. Often this is some kind of “trifle” that any man can easily cope with. And even more so if the household appliance simply needs to be disassembled after its intended use.
General rules for disassembling juicers
Remember that before disassembling an electrical appliance, you should not only move the switch (lever) on the case to the Off position, but also completely disconnect the power cord from the power outlet. Wait until the hum of the engine subsides and only then proceed with disassembly.
You need to start by removing the pusher from the hole for loading products. Now remove the container intended for accumulating the wrung out products from under the lid.
It is very easy to disassemble the juicer
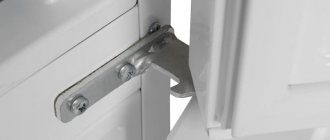
To allow the juice remaining in the juicer to flow out, tilt the body forward slightly and then disconnect the jug. As a rule, the cover is attached to the body of the household appliance with plastic or metal clips. Find out in what position they turn off and remove the cover.
Next you will have access to a container for collecting the finished juice and a filter. Remove them one by one, being careful not to break anything. And be especially careful when disassembling the filter - it is very sharp and will easily cut your fingers if you are too hasty or careless.
Components of the Bosch MES series juicer
Fortunately for owners of this type of device from this well-known manufacturer, it will be necessary to disassemble the electrical device for repair in very rare cases. Another thing is the everyday disassembly after squeezing the juice, which any housewife or owner should learn to do quickly and even automatically.
By the way, this will be the case with models of the Bosch MES series: the first time you may need to look through the instructions to do everything correctly. But then cleaning and washing the juicer will take place quickly and almost “on autopilot”.
Before starting work, carefully inspect the device. It roughly consists of the following parts:
- switch with three positions: open - intended to unlock the lid; off — off state; on or 1—on state;
- the electric motor block, which provides a compartment for the cord from the power supply - depending on the model, it is made of plastic (most often) or stainless steel;
- container where product waste (cake) is collected - made mainly of plastic of various shades;
- a strainer made of stainless steel, less often - made of plastic;
- insert for a plastic strainer to match the color of the body;
- cover with a shade of the main color of the model;
- loading insert made of transparent polymer;
- transparent plastic pusher;
- container for storing finished juice, equal to one liter, with a special compartment for foam, made of transparent plastic to match the color of the body;
- legs made of food-safe rubber.
The main parts of the juicer look like this
Features of disassembling Bosch MES juicers
Please note that in the case - where the engine block is located - there is a special compartment for storing the power cord. This is quite convenient when disassembling and operating, as you save a lot of free working space.
Although, in order to take advantage of the hidden "pocket", the electrical cable will have to be inserted and pulled out manually. There is no “auto-finishing” mechanism, as, for example, in vacuum cleaners. The engine block itself can be easily removed without any problems.
The shutdown button (lever) has three positions: On, Off and unlocking the lid. But the main thing is that it helps to unfasten the lid when it’s time for washing or routine cleaning.
The functionality of this approach is excellent, but the main thing is that this lever serves you for a long time. You will use it very often, which leads to accelerated wear of the part.
Also note that when you move the power lever to the position that opens the lid, it does not swing upward all the way. It’s just that a gap appears between it and the body, allowing you to open it completely with your own hands. If necessary, remove the cover very carefully so as not to damage the internal fasteners.
The container for collecting cake is quite large in size and can be easily removed from the housing. These features allow you to use the juicer to prepare drinks for a family of several people. By the way, washing the pulp container is convenient thanks to its well-designed shape.
The plastic insert for attaching the strainer can also be removed quickly and conveniently. You need to pull the edge on the side of the container for collecting pulp with one hand, and with the other hand, gently push the tap designed to drain the juice into the container.
The strainer is most often made of high-quality stainless steel and there are no problems with removing it from the body. If in your model it turns out to be plastic, it doesn’t matter, the characteristics will remain virtually unchanged.
The lid design includes a loading barrel, which does not in any way affect the disassembly speed of Bosch juicers. In addition, washing and cleaning it is very simple and quite easy, especially if you have a dishwasher.
Removing the loading insert will not be difficult the first time, even for those users who are disassembling such household electrical appliances for the first time. The main purpose of this part is to fit onto the loading barrel and prevent serious contamination of the working surfaces. In a word, it works like a tray in which the squeezed juice accumulates.
The pusher is the easiest to remove because it is in plain sight. Its shape is convenient for cleaning and washing; there are no problems with it.
The juice container is easy to remove; no special effort is required.
Some Bosch juicers have their own design features, so be prepared for this. In any case, if something is not clear, take a look at the user manual. There you will probably find answers to most of the questions of the owner of this type of household appliance.
- Angelina
Source: https://tehznatok.com/kak-polzovatsya/kak-razborat-sokovyizhimalku.html
How to make a juice press with your own hands
As mentioned above, the simplest in design and, accordingly, the easiest to manufacture are mechanical presses for squeezing juice. To make your own apples, on which you can process other fruit and berry raw materials, you will need the following consumables and tools:
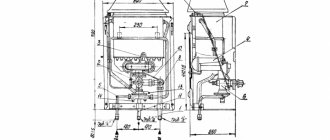
Before you start making a homemade apple juicer, it is advisable to find drawings or drawings of such a device on the Internet or draw them yourself. It would also be useful to watch a video on making a juicer, which shows this process in all its details.
In the upper part of the resulting press frame, it is necessary to drill a hole into which a nut for the screw mechanism of the device is welded. Depending on whether you need a large or small juice press, select the dimensions of the perforated basket and frame, which serves as the supporting element of the entire juicer.
A wood board can be used as a piston through which the screw mechanism will exert pressure on the raw materials loaded into the basket (a circle of the appropriate diameter is cut out of it).
Wooden piston Stainless steel piston PTFE piston
Autumn is harvest time. Fresh apples in gardens of summer residents are pleasing to the eye. At first it is not clear how to cope with such volumes. Juicers come to the rescue. But, like any equipment, sooner or later they break. To make your life easier, you can repair a broken device. Today there are many types of juicers, such as: Bosch, Moulinex, Scarlet, Philips, SVA, Zhuravinka, Cameron, First Austria. The good news is that on the Internet you can find various videos on the topic of repairing juicers with your own hands.
Each juicer comes with instructions and an assembly diagram. But if you have been using the device for several years, the instructions may have been lost. Even in this case, disassembling the device will not be difficult.
The main thing is not to overdo it with the effort when disassembling. Otherwise, there is a risk of damaging the juicer body.
You can disassemble the juicer in several stages.
To get to the juicer motor, which is located below, you need to:
There is an exception for screw juicers, which are similar in design to a meat grinder.
To disassemble them you need:
Do-it-yourself juicer repair
The basis of the juicer is the engine. Today, asynchronous, commutator electric motors are used. Nothing surprising - the technology doesn’t know any others. Actually, repairing juicers with your own hands is faced with the situation of a failed engine.
It is almost impossible to replace the mechanical part; devices that operate on the basis of meat grinders break couplings and plastic bushings if they get into a bone; hydraulic presses have a lot of fuss with the oil system.
Let's look at the issues, don't expect a detailed guide, but we'll cover the main types of faults in sufficient detail.
Juicer device
We hope that reading the review will help readers repair their chosen type of juicer themselves. Nothing complicated inside. Don't let the upcoming repair of the Scarlet juicer scare you.
Types of Electric Juicer Motors
Repair of the Rossoshanka, Santos juice extractor - the difference in the price of the product is 30 times - there is a motor inside. Rossoshanka's doesn't work long, it's noisy, the essence is the same. The properties of the juicer are determined by the design of the mechanical part.
The advantages of asynchronous motors are considered to be simplicity of design, maintenance, and high efficiency.
Less noisy than collector ones, however, when powered with a voltage of 50 Hz, it is difficult to obtain speeds above 3000 per minute.
Juicers consider this a serious limitation; Santos has a fairly large centrifuge diameter. We will similarly describe Rossoshanka, Neptune, and other domestic juicers with high productivity.
Collector ones have no restrictions and are smaller in size. They lose out in other important ways for professional juicers:
- Noise level.
- Short period of continuous operation.
On the shaft of electric motors we see impellers that blow air over the stator coils. This is done to cool the windings during operation.
If, when disassembling the juicer, it turns out that there are no elements inside, it is possible to supplement the design by wisely choosing the shape of the blades. Will soften the thermal operating conditions of the electric motor.
From the above it follows: asynchronous motors are preferable for the manufacture of high-quality juicers; the problem of speed remains to be solved.
In the case of centrifuge models, the issue is mitigated by an increase in the diameter of the working chamber. As a result, with increasing distance from the axis, the centrifugal force increases. It is permissible to reduce the speed of the juicer engine without losing quality.
Each device is equipped with a set of speeds. In asynchronous motors, this is achieved by properly separating the stator coils. Not everyone works at the same time; there is a variation in speed. The scheme is often implemented and consists of correct switching of the electrical circuit with buttons.
The technical solution is highly reliable, durable, and fault-tolerant. On a positive note. As for the speed, you can increase it by using an inverter in the circuit. It is clear that this will lead to a significant increase in the price of the device. Smooth speed control can be achieved.
As for asynchronous motors, it will be easy to do. Amenable to adjustment, avoiding complex circuits. Losses are reduced if the windings are powered with direct current. Inductive reactances have little effect. The downside is small: you will need a complex power supply, which reduces the efficiency of the juicer.
The listed key points must be clearly understood if there is a desire to replace the engine. Readers can insure themselves against winding burnout by taking the trouble to include a 135 degree Celsius thermal fuse in the circuit. The element must fit tightly to the winding.
Ideally, the thermal fuse is recessed between the turns of wire. Provides heat exchange.
Forced cooling wouldn't hurt. How to do it in the case of juicers, any devices, has already been described. You can borrow the starting protection relay of the asynchronous motor from the refrigerator, along with the motor. There are two subtleties here:
- In juicers, a starting winding is rarely used; a circuit with dividing stator coils is used.
- The motor type must match the relay; overheating protection will not work.
Issues regarding the use of engines in juicers
There is a weak point of cheap juicer models: they are not protected against engine burnout. Why not install a relay similar to that accompanying refrigerators?
This is a difficult question, we leave it to the readers to decide for themselves. The cost of other freezers is an order of magnitude (!) lower than top-end juicers.
The refrigerator runs day and night, avoiding begging for the required break, and does not turn off in the summer. The power of the device is considerable.
For our reasons, reliable technology is closer to nature, figuratively speaking. This is directly confirmed by the design of the Norwalk juicer. So in a refrigerator, often all the sensors have nothing to do with electricity, much less electronics.
We need more bimetallic plates, thermocouples and other reliable and simple equipment. By the way, geysers do this, even ignition using a piezoelectric element. In this case, the equipment works for a long time, is reliable and productive. Overheating of the windings can be easily assessed by the temperature of the magnetic core.
Why isn't this done in juicers? Unable to answer this question.
What about Norwalk? Do-it-yourself repair of juicers in this case is closely related to hydraulics, as was already mentioned at the beginning. Design:
- There is a high-speed engine inside.
- An auger is attached to the shaft according to the principle of operation of a meat grinder.
- The ground cake is placed in a bag and placed on the table of a hydraulic press.
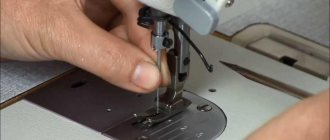
- The oil cylinder is driven through a belt drive, as in washing machines.
Thanks to a well-thought-out solution, the compressor is free of electrical parts. Steel block equipped with gaskets. The motor, on the contrary, is made in the best traditions of the machine. One glance is enough to understand: after 5 minutes he will not ask for rest, imitating Zelmer.
In light of the above, we believe that it is enough to find a Norwalk auger juicer attachment instead of a meat grinder, and you will get an excellent device for long-term operation.
According to domestic GOST, this means that the equipment can withstand merciless use during a work shift (8 hours).
The hydraulic unit will need to be refilled with new oil periodically. First, the old one merges. Having removed the cylinder cover, it is necessary to remove the internal mechanism with the return spring and scoop out the oil. Maintaining the position, the compressor drive starts. Gradually the oil will end up in the cylinder.
The new one is poured three-quarters of an inch below the cap. Will the air gap interfere with the work? The masters say: it is powerless to damage. You will need to monitor leaks in fittings, compressor, and cylinder.
Let us add that the table is returned to its original position by a spring after pressing the release valve handle.
Questions about repairing juicers with the “Not working” fault
Our technicians answer a large number of questions about repairing juicers every day. Check out the questions that concern you below, or ask your own question, which we will be happy to answer!
Was the article useful to you?
Leave your questions and feedback on juicer repair.
We are happy to answer all your questions and will definitely take your feedback into account in the future work of the Umedia Service. Leave your first question or review about Jumedia for juicer repair!
Have you already repaired your device with us? Leave your rating!
Your rating: Current rating: 4.86 (Votes: 18)