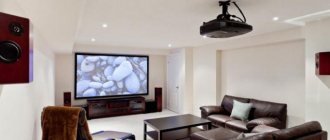
A projector is a device that connects to a video camera, laptop, PC, or tablet in order to display the image on a large screen. The remote control is used to control the operating device. The design of a video projector is quite complex, and may differ depending on the technology used to compose the image. Exactly how the projector will work depends on the technology used. Today on the market you can find LCD, DLP, LCoS models. Let's take a closer look at these and other, less popular technologies.
LCD projectors
Today LCD models are the most common due to their affordable cost. However, apart from the low price, they are unlikely to stand out with other advantages. Of course, you can watch videos at home on such projectors, but you need to do it from afar. Up close, only multi-colored dots will be visible. In addition, the contrast also leaves much to be desired. We should not forget that these models are initially positioned as budget ones, so the lamp installed in the projector is the cheapest, and the matrix resolution does not reach HD. You can only enjoy viewing on this projector in completely darkened rooms. However, even in such conditions, due to the low quality of the transmitted image, some particularly small details will simply not be visible.
Projectors with three LCD matrices have higher image quality, which does not deteriorate even when viewed closely. The use of improved image transmission technology conveys many more color tones. In 3LCD video projectors, image enhancement is achieved through the use of special technologies. Each color has its own monochrome matrix. First, each light stream passes through its own matrix, and then, using a prism, they are combined into one bright and multi-colored image.
Working principle of a 3LCD projector
Although 3LCD projectors have much better brightness and color reproduction than their budget counterparts, they also have their drawbacks. Compared to DLP projectors, the contrast is not too high. This is due to the characteristics of the LSD matrix. None of them, even the most expensive ones, are capable of providing complete color non-transmission; as a result, it will not be possible to achieve a deep black color.
In addition, all liquid crystal matrices require regular blowing with cold air. This procedure is mandatory in order to reduce the negative impact of high temperatures on them. However, constant airflow causes the formation of a layer of dust on the matrix, which cannot be avoided even by installing filters and regularly cleaning them.
You may be interested in: comparison of DLP and LCD projectors.
Projector resolution
A projector screen image is made up of millions of tiny squares in a grid pattern known as pixels. The actual number of horizontal pixels divided by the number of vertical pixels is called resolution. Thus, if a projector image consists of 1920 pixels horizontally and 1080 pixels vertically, the image resolution is 1920x1080.
Read: Projector or TV: Which is better to choose for your home?
The more pixels on the screen, the sharper it becomes. In an HD (High Definition) image, the resolution is 1920x1080, which adds up to more than 2 million pixels or 2 megapixels. A 4K Ultra HD image has a resolution of 3840x2160 pixels, for a total of over 8 million pixels or 8 megapixels. With 4 times the number of pixels in a 4K image compared to an HD image, the 4K image is much clearer.
DLP technology
The operation of DLP projectors is based on the action of a special DMD chip, which contains many small rotating mirrors. They are responsible for the formation of the matrix.
High-resolution DMD chips contain a huge number of microscopic mirrors. The principle of operation is that light from the lamp passes through a disk with multi-colored sectors, which rotates, and hits the matrix. As a result, when the projector is turned on, the image appears as the light beam passes through the corresponding colored sectors of the disk.
The controls in DMD chips are located differently than in LSD models. They are located behind the mirrors, so DLP projectors have almost no distance between pixels.
The technology used in these models allows you to obtain an image with increased contrast. This can be achieved due to the fact that the mirrors, which are responsible for the black pixels, are located in a certain position. Because of this, it is possible to achieve the appearance of a true black color.
Although DMD chips are much less susceptible to high temperatures, there is a heat sink located on the rear side. At the same time, there is no need to worry about dust - the projector optics are located in a hermetically sealed housing.
Currently, LED-DLP projectors are most widespread. They do not use light passing through a moving wheel. Instead, there are colored LEDs that turn on one by one. Their brightness is too low. However, unlike gas-charging lamps, LED lamps are small in size and weight, and also last much longer.
The main disadvantage of DLP projectors is the appearance of a rainbow effect, which is especially noticeable during dynamic scenes. This is due to the fact that color components are projected one at a time and can be mixed with frequent frame changes. In addition, gray color is very difficult to reproduce on DLP projectors. The mirror must be rotated as accurately as possible so that the eye can catch the sequence of pixels of different colors changing into a gray tint.
KV.by
Additional features of a home PC...
...or what can we do with our own hands?
I think it’s worth introducing some variety into the endless wars of chipsets, processors, hard drives, browsers, operating systems, mobile communication services, “we don’t like Microsoft” campaigns, management seminars, educational programs on the Internet, etc. That is, now let’s try to abstract ourselves a little from all this and take a closer look at what our inexpensive PC can do. For example, many have seen USB connectors on the back wall and even used them to connect some devices. But is it known that with the help of these ports and devices for them, we can now completely control all audio systems in the house and create our own video surveillance system? It's not as expensive as it seems, and in most cases your PC will be enough for this, even if it's not a Pentium II. In fact, there is nothing particularly complicated in the design of an LCD projector, as a whole movement of enthusiasts has been able to prove. You can build your own projector at home. Many have already done this, and some have even commercialized the process - for example, one developer collected all the parts and sells them as a DIY projector kit (home.tampabay.rr.com/wwalls/lcd.htm). The cost of the components of the set rarely exceeds $200-400, due to which the enterprise can be considered profitable.
Projectors have two huge advantages:
- Absolutely harmless to health.
- Changing the diagonal of the visible part of the screen is at your discretion.
Industrial expensive models offer a much wider range of capabilities, including operation of the device in any type of lighting and combination with various video signal standards. In the home “self-assembly” version, some functions are transferred to the PC, for example, you can use a TV tuner.
Figure 1 shows an approximate diagram of one of the simplest solutions to such creations (section in the center).
| Rice. 1 |
I adapted this diagram a little, since on the page www.audiovisualizers.com/madlab/lcd_proj.htm it is generally drawn by hand. At least, even with adaptation, the meaning can be understood. A regular active LCD monitor connected to a computer is used, its image is reflected in the mirror and directed to the lens. The lamp enhances the brightness of the picture. A fairly trivial cooling system is provided.
This scheme can become more complicated and cheaper. For example, through the use of individual LCD panels rather than entire monitors. They are sold and are quite cheap ($60-250 on eBay), although you can find better and more expensive ones, respectively. That is, in this case there are no limits to perfection.
In Fig. Figure 2 shows a solution involving the use of an LCD panel.
| Rice. 2 |
In this case, we are already operating with a slightly more professional solution than in the first example.
There are also more complex circuits for home assembly, for example, shown in Figure 3, which is already close to industrial originals. Moreover, it can be implemented at home.
| Rice. 3 |
As can be seen in Figure (3), the device uses filters, mirrors, three LCD panels for each color, respectively, and a lamp. The white light of the lamp is divided into blue, red and green. Accordingly, each has its own path. The total signal arrives at the lens. This scheme is already closer to professional implementations of projectors, but it is, accordingly, more expensive.
What’s most interesting is that there are many forums on the topic of creating LCD projectors with your own hands; this can even be called a certain movement of enthusiasts. If you decide to create your own projector, you can contact the authors of www.audiovisualizers.com/madlab/lcd_proj.htm - they are ready to help.
Christopher-2002, [email protected]
LCoS (SXRD, R3LCD, D-ILA)
The developers of this technology managed to eliminate all the shortcomings of previous models of video projectors. At the same time, all their most positive qualities were preserved and improved.
Here, the image is formed, as in 3LCD projectors, by passing rays through matrices. However, they do not pass through, but are reflected from a layer of mirrors, as in DLP models. The pixel controls are on this mirror layer behind the pixels, which are placed close together. This eliminates the rainbow effect and improves image quality.
Of course, this technology has disadvantages. The main one is the high price. LCoS projectors are significantly more expensive than similar DLP and 3LCD models, which have the same, and sometimes even higher, characteristics. Therefore, these projectors are currently used only by professionals to create high-quality presentations and installations.
This is interesting: rating of the best projectors for the home in 2021.
How the projector works
The working principle of projectors can be explained as follows. A color projector uses a bright white light source and splits the white light using dichroic mirrors into individual RGB beams - red, green and blue. The image shown here shows the path of light inside the projector and how the 3 dichroic mirrors split the white light into individual components of red, green and blue light rays.
A dichroic mirror is a mirror that reflects light of a certain wavelength and allows others to pass through. A 3LCD projector uses 3 dichroic mirrors, the first of which reflects red light but transmits green and blue light. The second dichroic mirror reflects green but transmits blue light, and the final mirror reflects blue light.
Some high-end projectors use a blue laser beam as a light source to create RGB beams. Some have colored LED lamps to directly generate the RGB beam and some projectors have a combination of LEDs and lasers, called a hybrid projector.
CRT technology
This technology can be considered the oldest, since it is based on a cathode ray tube (CRT). Although CRT technology has been used for several decades, nevertheless, it is still relevant and in terms of image quality characteristics (clarity, resolution, color rendition) it is not inferior to modern and more expensive methods of image formation. Another advantage of CRT is the greater reliability of electrical circuits and the duration of continuous operation of the tube, exceeding the limit of 10,000 hours.
This technology also has a wide dynamic brightness range and black depth that no other technology can provide.
Despite their undoubted advantages, CRT devices are still inferior in some respects to modern devices.
- The units have a large mass (several tens of kilograms). If the manufacturer made them a little lighter, it would be possible to more conveniently transport and install this equipment.
- Brightness levels range from 100 to 300 ANSI lumens, while in modern devices the level can reach 10,000 ANSI lumens or more. For this reason, watching videos is only possible in a well-darkened room.
- To achieve good image quality, a lot of adjustments are required, and sometimes it is difficult to do without the involvement of a specialist.
It is worth noting that today it is almost impossible to find a projector of this type in retail sales. It has been superseded by more modern technologies described above.
Inside the CRT video projector there are 3 CRTs with screens with a diagonal of 7 to 9 inches. Each CRT is designed to output one color (green, red, blue) of the RGB color model.
The principle of operation of the projector can be described as follows: the input signal is divided into components by color, which are involved in the control of modulators. At the same time, the intensity of the beam begins to change. At this moment, the beam, passing through the magnetic field and deflection system, subjects the surface of the phosphor-coated screen to scanning from the inside. After this, a one-color picture is created on the screen. Next, it is projected through the lens onto an external screen.
As a result, 3 images are simultaneously projected on the external screen, and when mixed, a full-color picture is obtained.
Advice from the experts
For people who have sufficient skills, backed by knowledge, and are going to make a projector at home on their own, there are a number of recommendations from craftsmen who have experience in such production.
- In order to increase the size of the projected image and improve its quality when making a simple projector, it is recommended to use a laptop or tablet instead of a smartphone. You can also assemble a projector from an LCD monitor in the same way, which will further improve the output image. But at the same time you will need to increase the size of the box and select the appropriate lens.
- You can increase the clarity of the image on the screen if the inner walls of the box are black.
- For a 3D projector, you can make a holographic pyramid yourself by gluing it together, for example, from separate parts cut from CD cases.
- To avoid overheating of the matrix from the tablet, during the manufacture of such a device it is necessary to install an additional fan. It will provide a constant supply of fresh air under the base of the matrix. Secure the fan with tape or tape.
Numerous Internet community sites display a large number of a wide variety of designs made from scrap materials (which can easily be found in any home) with instructions and reviews from people who have used the advice. Well, everyone determines the feasibility and economic feasibility of such crafts independently, based on their own capabilities and skills.
In conclusion, you should note that a carefully assembled and correctly adjusted projector will allow you to get a fairly high-quality image on a screen located at a distance of 4 meters from the device. In this case, the output frame diagonal will be 100″. This is a completely acceptable solution, if not for watching videos in maximum resolution, then at least for spending time together as a family watching an interesting film.
How to make a projector with your own hands
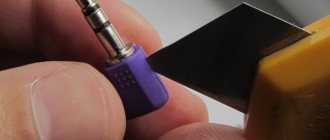
To make your own projector, you need to visit a home improvement store to buy a lens. It is this that creates the necessary magnification of the picture - at least a 10x magnification is needed. Otherwise, for a successful result you need careful work and a source with a whole screen and a good matrix.
Out of the box method based on a mobile device
The easiest way is to make a projector with your own hands at home for your phone - everyone has one. A phone projector does not take up much space, but to make it you will need:
- stationery knife;
- hard cardboard box;
- large paperclip;
- lens;
- electrical tape or glue gun;
- pencil hardness 2m.
The lens flips the image passing through it 180 degrees. You need to install a special application on your Android device to rotate the picture. The operating principle is as follows:
- In a box of a suitable size, cut a hole for the lens on the end side with a knife. Try to do it clearly in the center.
- Install and secure the lens in it in a convenient way, the main thing is reliability.
- Make a stand for your smartphone from paper clips and cardboard scraps - it should have a square shape.
- Set your phone's brightness to maximum and open any image with bright colors.
- Place the phone in the box and empirically find out the good location. The image must fall on the lens.
During the experiment, the room should be darkened, because the projector operates in the dark. To watch movies offline on flash drives, you need to cut a hole in the box to connect the USB cable.
Out of the box method based on a tablet or laptop
Tablets and laptops differ from smartphones in having a larger screen diagonal, which is a plus for a projector. But if these devices have a poor sensor or resolution, the picture quality will suffer. In addition, the diagonal of even a small laptop significantly exceeds the parameters of a tablet or smartphone - the projector will turn out to be too bulky.
You need to choose a box and a lens according to certain rules: the length of the first is at least 50 cm, and a magnification of 3-4 times is suitable for the second. Budget option - glass to enlarge pages when reading.
To make a projector with your own hands from a tablet, you will need the following procedure:
- Cut a hole in the end, slightly smaller than the size of the lens, and secure it with tape or tape.
- Secure the tablet inside the box behind the lens, taking into account the image rotation by 180 degrees. You can make a frame to fix the device.
- Determine the best position for projecting the image.
If using a laptop, holes are cut on both long sides. The device must be secured with the screen down, i.e. the keyboard “looks” at the top of the box. This way the image will be correctly oriented; no additional manipulations from the spreads are required.
Projector-based method for slides without a magnifying glass
It’s possible to make a projector without a magnifying glass, so as not to bother with purchasing it and adjusting its position. You will need a device for demonstrating slides - an overhead projector. The type of device that allows the slides to shine through is best. The advantage of this method is a fairly high-quality image, because the lenses inside the projector are already adjusted. To display video files you need a matrix - it is optimal to use a tablet matrix with a diagonal of 10.1 inches.
Important! If the projector uses reflected light to display the image, the image quality will be much worse.
After placing the matrix on the projector with a gap of approximately 0.5 cm, you can connect the slide projector to the computer. To cool the matrix (overheating can ruin it), a stream of air must enter the gap. A fan is suitable for this purpose - today you can buy miniature models with convenient mounting.
Even budget versions of this method will give a tolerable picture for viewing. For example, you can buy a tablet with broken glass, but a good matrix intact, and install it in a mediocre projector.
3D projector
The dream of movie lovers - watching films in 3D format at home - is quite feasible even within a small budget. The main element of such a projector is a plastic pyramid with the following parameters (figures are given in mm):
- base – 60x60;
- small square – 10x10;
- height – 45.
Using the diagram for a simple projector, assemble a 3D device by analogy: no changes in actions, only a pyramid directly on the smartphone screen. After that, turn on the holographic video tracks and enjoy the image. The effect will only work if the smartphone screen is of good quality and the wall surface is smooth.
How to adjust the image
In order for the picture on the canvas to be of high quality, you will have to tinker with the settings of the projector and its components. Little tricks will help correct blurriness and weak contrast:
- The inside of the box can be painted black - this will increase clarity.
- You can make your own holographic pyramid from CD cases. It is necessary to carefully glue the individual elements.
- The screen settings of your smartphone or tablet should be at maximum: resolution, brightness and contrast.
- The matrix of a tablet or monitor easily overheats; installation of a miniature fan is required.
- The optimal distance from the screen to the viewer is 3-4 m; if you darken the room enough and take care of the quality of the canvas, the picture will be comfortable to view.
An important note for those who have not encountered such tasks before: you need to be careful when removing the matrix from a tablet or monitor; it can easily be damaged. If you don’t have such a skill, it’s better to limit yourself to projectors from a smartphone or call an experienced person.
Watching an evening movie with a projector cannot be compared with the small screen of a tablet or even a laptop. That’s why it’s interesting to try to make a projector with your own hands, spending a minimum of resources and time. By accurately determining your needs as a moviegoer, you will be able to choose the optimal method for making a projector in terms of size and picture quality.