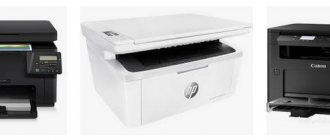
Scanning documents – transferring information from physical media into electronic form (for more details, see the article: what is scanning). You can make a scan with a separate device (scanner) or use an MFP (multifunction device). The latter technology includes several devices and is often called a 3-in-1 printer. It includes a printer, scanner and copier (copier). In both cases, scanning any document is very easy.
It doesn't matter what operating system is installed. The scanning procedure on Windows 10, 7, 8 and even the older version of XP is the same (more details in how to scan in Windows 8-10). The difference can only be in the software of the device itself. The scanning function can be located in different driver menu items. Despite this, finding the function you need is not difficult. Manufacturers produce programs that are intuitive even for those new to PC use.
Below are step-by-step instructions on how to scan documents from your printer to your computer. This article is also relevant for individual scanners. It’s easy to make sure that you can make scanned copies through the printer - look at the documentation for the equipment or lift the top cover of the device. If there is clear glass underneath the latter, then you can both scan and make photocopies of documents. So, you are the owner of all-in-one equipment.
Preparatory stage
Before proceeding directly to the scanning procedure, preparatory measures should be carried out. This approach will prevent further difficulties and technical errors.
- You need to make sure that the device has the appropriate option. The modern office equipment market has a lot of multifunctional devices. However, you can often find models that do not allow you to take a scan. You need to read the instructions for use of the device, which should be present in its passport.
- Next, you should make sure that the device is connected correctly. Modern technology provides users with a lot of possibilities, so by “connecting” with a computer, you can perform any manipulation. Despite this, not all PCs and MFPs are capable of supporting this format. As a rule, when purchasing a scanner or printer, the box already contains a USB cable, which you need to use to activate interaction with a PC.
- After this, you need to make sure that the device is connected correctly by pressing the device button. If the indicators do not manifest themselves in any way, it is worth rechecking the correct functioning of the equipment. Some devices require driver installation, so it is quite possible that you will have to deal with this issue as well.
- From the moment the paper is in the scanner, you need to close the lid tightly and press the button to start the process.
Important! You should pay attention to the individual characteristics of the scanner. There should be a symbol near the glass surface that will indicate how the document is placed.
MFP
How to scan personal documents with a printer
Official documents must be of high quality so that all elements are clearly visible and readable. This applies to important information: birth certificates, passports, IDs and similar documentation. Most often, ABBY FineReader is used for these purposes, but any other software with similar functionality may be suitable. Instructions on how to scan a document to a computer from a printer using a passport as an example:
- Be sure to remove the cover, it will interfere during the procedure.
- In the settings, set the following parameters: “grayscale”, resolution – 300 dpi (or dpi).
- Unfold the passport on the first page and place it facing the glass. It is better to place it closer to the edge, leaving a small gap.
- Close the lid of the device tightly; for more detailed copying, you can press it a little with your hand.
- Click “Preview” and make sure that the color and detail of the letters are correct.
- At the bottom, click “Scan” and wait until the device finishes recognizing the file. After that, check the picture and click “Save”.
- Using a frame, select the area with the image (the passport itself); the empty fields should be outside it.
- To store official data, you should select tif or bmp format.
- Ear fungus in humans
- Basic exercises in the gym
- Ammonia-anise cough drops. Instructions for the use of ammonia-anise drops for adults and children
Windows Standard Tools
This method is the most convenient and proven. Using the capabilities of this system, you can solve the problem, spending a minimum of time on it. The procedure is as follows.
- Visit the Start menu and search for Devices and Printers.
- Search for the name of a specific printer that is currently connected to a computer device.
- Click on the icon and then click on the “Start Scan” button.
- Specifying data such as profile, color format, feed, file type, resolution, contrast and brightness settings.
- Using the Preview option for pre-checking purposes.
- Clicking “Scan”, waiting for the process itself and the subsequent appearance of the window for importing images and videos.
- Importing with preliminary opening of parameters.
- Sending the finished file to the folder in which it will be placed.
Paint program
This program is standard and easy to understand. To use it, you need to follow a number of simple steps:
- launch the application using the special “Start” button;
- click on the “File” tab;
- select the scanning method - in this case - from a camera, but there is also an option - from a scanner;
- wait for the scan preparation process to start;
- select file type;
- adjust the resolution, as well as determine the optimal image brightness setting.
After starting scanning, the user will see the picture he needs or a scan of a document on the screen. All that remains to be done later is to save the document in the required graphic format. The main advantage of this program is that there is no need to download and install additional products. That is, to get started, it will be enough to activate the “native” option and perform the simplest actions.
Scanner
Adviсe
- To scan old photos, it is better to use a flatbed scanner. We do not recommend using a top-loading device for such purposes to avoid damage to the original photographs.
- To obtain images of higher quality display and color reproduction, it is better to use 24-bit color. This will be optimal for matte and glossy photos.
- If after scanning you notice that the image is rotated incorrectly, then you should not adjust its position using software. It is better to scan the photo again in the desired orientation.
- It is better to adjust the saturation options before digitizing rather than after it. It’s worth “playing” with this parameter when the original photos are already of very poor quality (faded or burned out).
- If you need to obtain scans of a large number of photographs at once, you should group them according to common characteristics. Such actions will help save time on making adjustments for each photo.
- Correction, if necessary, is best done in professional programs. Such as Photoshop or Gimp.
- If you still have film with photographs, inquire about the availability of devices in your city that can scan from it. This way you can get higher quality pictures.
ABBYY FineReader
This program is designed to recognize text from scanned PDF images. There are versions in different languages, including Russian, and in just a few clicks you can recognize and compare files. The latest version includes an automation tool called "Hot Folder". With its help, it will not be difficult to assign a folder for document processing.
The ABBY Fine Reader program has many advantages over competing products:
- high degree of recognition accuracy equal to 99%, which is associated with the work of advanced OCR technology;
- decent speed of work – one sheet takes about 15 seconds;
- an impressive number of input file formats and documents for saving;
- simplicity of the Russian-language interface;
- the possibility of machine learning, which leads to improved recognition quality;
- digitization of documentation in just one click;
- ability to process papers according to schedule.
VueScan program
This is a universal software that is compatible with many types of equipment and provides the ability to fine-tune and process images. He also does an excellent job with documents. The application is constantly updated, so it is easy for it to support numerous scanner models. Setting up basic scanning parameters will not take much time.
Thanks to its extensive functionality, this program will provide flexible preparation for all processes and get excellent results. The application is universal and will be an excellent alternative to software. The principle of its operation is quite simple. You just need to download and install the utility, and then start scanning and wait for the result. He will appear in just a few minutes.
Paper for printer
Saving photos
Sometimes the digitized image is automatically saved in the selected folder and the desired format - in some cases, the utility requires you to select these options at the end of the process. It’s worth saving digitized images in a separate folder to make them easier to find, but it’s not necessary to give each one a name—it will take too much time.
The optimal resolutions for photos are JPG and TIFF. The first is chosen if the image will be placed in a digital photo album or in an album on a social network.
The format differs in that the image size is reduced, although the quality also decreases due to lost data. With high magnification, “artifacts” and blurring will be noticeable in a photo with JPG resolution, something like this.
If the image is intended for further processing, you should select TIFF resolution. In this case, the quality does not differ from the original, and with the help of special editors it is easier to restore the image, returning colors, removing scratches and other defects. However, the photo sizes will be large, so if there are a lot of them, you should make sure that there is enough space on your computer.
Scanner Wizard
After the scanning device is connected to the computer, you need to install drivers. To do this, perform the following steps:
- the use of “Plug and Play” technology; if the desired option is present, the monitor will indicate “New equipment found”;
- you need to click on this item and read the information;
- click on the search engine icon “Yes, just now”;
- Click “Next” until the system finds the tool and begins installing it.
Special software
Any printer or MFP comes with a disk on which drivers and software are installed. When using this method, the following actions are performed:
- opening a list of programs;
- application search;
- launch;
- pressing the scan button;
- selection of type, format, brightness and resolution;
- specifying the destination folder storage location;
- correct shortcomings, if any.
Photo printer paper
Possible problems
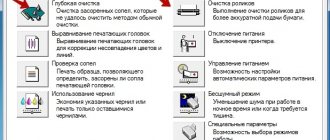
Many problems can arise during the scanning process, their list is as follows:
- all kinds of errors (the reason is the wrong choice of driver);
- the appearance of vertical lines in the image (this occurs due to the accumulation of dust on the surface of the glass slats);
- lack of a finished image (the settings are not suitable, they need to be set again);
- image skew (no corresponding width adjustment);
- slow speed (lack of consistency in resolution);
- the finished image does not feed (the paper is not inserted correctly into the printer);
- poor image quality (there can be many reasons, the most common of which is incorrectly inserted paper, clogged device, lack of correct settings).
Performs a compatibility check
Before scanning, let's find out the compatibility of the scanner with the software. Interestingly, the drivers you downloaded from the scanner creators’ resource may conflict with the printer. For example, Canon Corporation advises using older software. Canon has marked it as recommended. At the same time, scanning in the top ten sometimes does not go very correctly. You must take such points into account.
If your device is an old model, then the drivers may not be suitable for it. In addition, errors may occur during network scanning. The system may simply not see them. From here, you need to connect via a USB cable. But this also does not guarantee the correct functioning of the printer.
Important : if you previously used your MFP as a printer, and now you want to scan with it, then you need to make sure that there is firewood not only for printing, but also for scanning. For some devices these are different driver packages.