When to refuel
- Defects appeared during printing. Sometimes the cause of dark spots on the pages may be clogged nozzles or nozzles in the cartridge. Before charging the cartridge, first perform a program cleaning and then manually wash the print head. If the actions do not produce results, start refueling. If the printer is laser, you can lightly shake the cartridge to evenly distribute the powder (toner) inside.
Software cleaning for Canon printers.
Cleaning via Hewlett-Packard printer software. - The printer does not “see” the cartridge. A problem is indicated by a red or orange flashing light on the front panel of the printer. Additionally, a driver alert may pop up on the computer screen with different error codes or inscriptions.
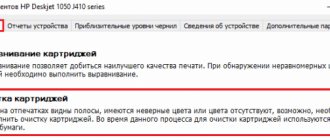
- Insufficient dye level is detected by software. Supported on all models of printing devices. The function can be found in the print settings, go to the “Control Panel”, then the “Devices and Printers” section, find your model and go to properties. The ink level is also determined in the software (drivers) that come with the printer itself and are installed from the disk. For HP inkjet printers, the setup looks like this (see image below).
What consumables are used
- Ink. Liquid dye for inkjet printers. Has a water or pigment base. Pigment ones are of higher quality, resistant to light, do not fade, are not afraid of water, and the image is clearer.
- Toner. Powder material for laser printers. Made from petroleum waste. Less ink is consumed, low cost of printing one page of monochrome (black and white) printing. Thanks to electrostatics and rollers, the toner is transferred to the paper and fixed to it under high temperature. At the factory, the cartridge is refilled with original powder. To save money, the user can use less expensive compatible dyes when refilling.
Helpful advice
Important advice. Print five, or in some cases more, test pages to ensure the toner is properly seated in the reservoir and evenly distributed to the print rollers. Only after this can you begin full-time work.
Summarizing the above, I would like to add that although the price of refilling a laser printer cartridge is not very high, why would anyone pay anything if it can be done independently and, moreover, without much effort.
We also carry out: refilling and repair Epson ink codes
Required tools and materials
- Means of protection. Rubber gloves are worn to protect the skin on your hands. A protective robe or just old clothes are put on over the clothes.
- Old newspapers or paper. They cover the surface on which refueling will be carried out.
- Refill material. To refill laser cartridges, you buy toner, and ink for inkjet cartridges.
- Cleaning products. You can remove ink residues with dry wipes or sponges dipped in washing liquid.
- Syringes. To refill all inkjet printer cartridges, you need one syringe for each color. A minimum of 4 syringes with thin needles with a volume of at least 5 ml is needed. Filling with one syringe is also possible, but after filling each color, you must very carefully rinse the syringe cavity, piston and needle.
- An awl, screwdriver or small-diameter drill. If necessary, use tools to expand the factory holes in the ink tank to fill in the dye.
How to refill an HP laser printer cartridge - start with preparation
In order to refill HP laser cartridges yourself, you need to purchase toner - special ink in powder form. Try to find the one that suits your model, the quality of the print depends on it.
If the issue with the toner is resolved, then you can start working. Find the best working area and cover it with newspaper in case the toner spills. The powder can harm you, so wear rubber gloves and try to avoid getting the substance in your eyes.
How to refill an HP ink cartridge
- Read the printer instructions. A paper version is included. And on the manufacturer’s website you can download an electronic version. Study the installation diagram of the carriage to remove the cartridge before refilling it yourself.
- Remove the cartridge and place it on a lined table.
- First you need to refill the black HP printer cartridge, then move on to the color ones.
- Remove the sticker from the body.
Some models have a round plastic bearing under the sticker; you need to press it with an awl. - If the hole through which the filling is made is too narrow, widen it with a knife, drill or other tool.
- Fill the syringe with paint.
- Insert the needle inward at a 45° angle one-third of the way up the body.
- Gradually squeeze the dye inward at a rate of no more than 1 ml/min.
- If ink starts to bleed through the top, pump it back into the syringe.
- Wipe the body with a sponge.
- Before refilling color cartridges, fill separate syringes with 2-3 ml of ink of all required colors.
- Look for the hole/color pattern on the body of the ink tank so you don't mix up the shade. The location can be found on the Internet by specifying the cartridge model in the search.
Sometimes there are as many as five holes in the cartridge, two each for yellow and blue. Only one of them is refueled . - Refill color cartridges in the same way as monochrome ones.
- In cartridges that have already been refilled, cover the holes with a sticker.
- Place the container in place in the carriage and check the print quality.
If, after gluing the label, ink begins to come out from the bottom, you need to pump out the ink.
Instructions for specific models.
How to refill an HP 122 cartridge
How to refill an HP 123 cartridge
Video
How to refill a laser cartridge?
In fact, there is nothing complicated about refilling laser cartridges. It is enough to understand what needs to be done and in what order. Therefore, we will introduce you to detailed instructions where we will tell you how to properly charge the cartridge:
First you need. It is not difficult. For example, you can use the instructions that came with your device. In addition, many models of printers and multifunction devices have cheat sheet pictures describing how to remove the cartridge. Next, you will need a table on which you will refuel. You need to lay oilcloth or newspapers on it. Also prepare a clean cloth, screwdrivers, tweezers, and pliers. First of all, we disassemble the cartridge. To do this, unscrew the screws holding the side covers. Then, using a flat-head screwdriver, pry up and remove the metal latches (arms) that held the photosensitive drum. By the way, many cartridges have different latches, so remember which side one or the other was installed on. Next, take out the photosensitive drum. Don't touch it with your hands. It is best to use cotton fabric. By the way, then the photodrum must be immediately removed to a dark place. You can't keep it in the light. Be extremely careful - the slightest scratch on the photosensitive drum and the print quality will noticeably deteriorate. Also, when refilling and cleaning many cartridges, you have to remove the charge roller. It is shaped like a photodrum, but its surface is covered with special rubber. Now the “dirtiest” work begins. You need to use tweezers or the same awl to separate the special pins that connect the halves of the cartridge. Sometimes they are difficult to notice right away. Some manufacturers fill the pins with plastic. In this case, it will need to be cut off in order to grasp the pins with small pliers or tweezers. Once you disassemble the cartridge, some toner will spill out of it. You should not use this toner for further refilling, because it contains a lot of debris and small particles of paper. All this can damage the photoconductor. We clean all components of the cartridge from adhering toner. Including a container with waste toner and a dispenser blade. You can use a napkin or a brush. Finally, it’s a good idea to wipe everything down with a lint-free cloth. Some people even remove old toner using a vacuum cleaner. After cleaning the cartridge, we assemble it. Don’t forget to put the photoconductor and charge roller back in place. This completes cleaning the cartridge. Let's move on to refueling. Most laser printer cartridges have a plug on the side. By removing it or unscrewing it, you gain access to the hopper (container) for filling toner. In other models, the dye is poured into a special slot. The main thing is not to overdo it with the amount of toner. There can't be too much of it
The best option is to fill the toner compartment to 80%. When refilling toner, it is important to hold the cartridge correctly. As a rule, you need to hold it vertically and press the magnetic shaft against the body with your fingers
So, the toner will not be able to spill out through the gap that appears. Be sure to shake the cartridge so that the toner is evenly distributed inside it. By the way, it is convenient to add the coloring matter using a funnel made from a regular A4 sheet.
Refilling an HP laser printer
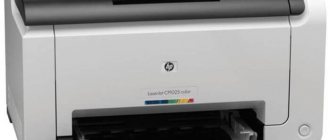
HP printers labeled "laserjet" use laser printing technology. You can charge them at home according to the diagram below.
IMPORTANT! The instructions describe the technology for disassembling and assembling the cartridge, which consists of many structural elements (metal pins, springs, various plastic parts, and others). Perhaps you do not have such a cartridge, then you are in luck, because disassembly and assembly will be even faster and easier.
The filling principle is the same. The only difference is that some steps need to be skipped, which makes the work much easier. In short, you need to separate the part of the cartridge with the hopper from the part with unused toner. Next, remove the rotating elements: green (or blue) photo roller, magnetic drum and charge roller (corotron). Then unscrew the blade and pour out the waste toner. Clean all components with a clean, lint-free cloth. Pour powder paint into the desired compartment and assemble the entire structure in reverse order.
First we will provide a good video, below there is a text algorithm.
- Turn off the power with the button located on the case. Pull the cable out of the socket.
- Open the cover on the front or top of the case (depending on the printer).
- Take the cartridge by the handle and pull it towards you, pull it out.
- Remove the bolts holding the side cover.
- Remove the plastic.
- Remove the photo shaft by holding it by the outer white gears.
- Use a flat screwdriver to move the charge roller away from the wall and remove it.
- Divide the cartridge into two parts: a compartment with waste and fresh powder. To do this, press the metal pin from the inside with a screwdriver, and grab it from the outside with small pliers. The pins must be pulled out from both sides of the cartridge.
- Remove the spring located on the side.
Then, holding the cartridge with both hands, separate the parts from each other. - Empty the used toner from the waste bin and dispose of it. First remove the dosing blade from the container by removing the spring and unscrewing the two bolts.
- Wipe the blade with a clean napkin/rag. Brush use is prohibited.
- Reassemble the hopper by screwing the blade back into place.
- On the part of the cartridge that contains unspent powder, unscrew the plastic part and remove the cap. Shake the jar of powder well before filling. Unscrew the cap of the toner container, screw on the special nozzle (included in the kit or can be purchased separately). Refill with new toner.
- Close the hole tightly with the protective plug.
- Reassemble the cartridge in the reverse order, place it in the printer, turn on the device and try to print a sample.
When you insert the photo roller, carefully check with your hands that it rotates easily. If rotation is difficult, errors were probably made during assembly and something is preventing the drum from spinning normally.
IMPORTANT! If there is no compartment with a plug, then you will have to pour the toner into the slot behind the magnetic roller. To avoid spilling powder in unnecessary places, insert half of an A4 sheet into the slot and sprinkle it on it, having previously positioned the structure at an angle.
See the video for more details.
Refueling process
Refilling a laser printer cartridge yourself is not as easy as it might seem. There are three types of cartridges:
- To refill some, you just need to remove the cap and add toner;
- To refill others, you will need to completely disassemble the entire cartridge;
- To refill chip cartridges you will need the help of professionals.
In the first case, refilling the cartridge with toner will not take even ten minutes. Place a newspaper on the table or floor and remove the cartridge from the printer. Then unscrew a couple of bolts and remove the special plug from it. Then we fill in the toner purchased at the store and insert the plug into place. Shake the cartridge, wipe off any remaining toner with a dry cloth and insert the cartridge into the printer. That's it, the laser printer cartridge is refilled.
In the second case, refilling will take longer, since you will need to completely disassemble the printer cartridge. On the Internet, for each type of cartridge there is a diagram for its complete disassembly. The principle of disassembling the cartridge comes down to the following: remove the cover, move the metal arms apart and pull out the photosensitive drum, which should not be touched with your hands. After refueling, all this is assembled in the reverse order.
Some experienced users prefer to drill a hole in the cartridge and fill it with toner. But to do this you need to know where to drill. Therefore, you should resort to this method in extreme cases.
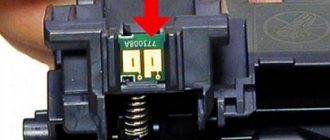
Refilling chipped cartridges at home is impossible, as it requires flashing or replacing the chip. If it turns out that you are unlucky with the cartridge, then contact a specialized company to replace the chip. After which you will be able to refill the cartridge yourself using the above methods.
The main thing is to take care of your health when refilling and avoid getting toner on your hands, face or respiratory tract. A new cartridge can be bought in a store, but health cannot.
About refillable cartridges (RESC)
Refill caps can be purchased for both inkjet and laser printers, and can be refilled multiple times yourself.
If the operating rules are followed, the SCP in inkjet color printers can be charged up to 10 times.
To prevent the dye from drying out on the foam sponge and hardening, you must not allow the printer to sit idle without ink in the cartridge. But even with ink inside, the printer cannot be left idle for a long time, otherwise the nozzles and nozzles may dry out.
SPDs for laser HP are practically eternal, but various parts can break. First of all, the photo shaft breaks, then the magnet. shaft, dosing blade (squeegee). To extend the life of the cartridge, you need to clean the waste hopper every time you refill.
Checking the Print
To check the quality of the completed filling, you need to print a test page.
- Go to Start.
- Open "Devices and Printers".
- Select your printer from the list and right-click on it.
- Select "Printer Properties".
- Click "Test Print".
You can also go to “Maintenance” in the printer properties and select “Check Nozzles” to print a sample. This is how the quality of monochrome printing is checked. Valid for Canon models.
To check color images, you additionally need to use a selection of test pages to check brightness and color saturation. Test sheets are downloaded from the Internet.
5 / 5 ( 2 voices)
